
Portal
New in V2.2. Place portals at any location in the scene, configure jump targets (scene + landing point) via the properties panel, and enable same-scene instant teleportation or cross-scene spatial jumps. End users trigger them by clicking after publishing.
Placing a Portal
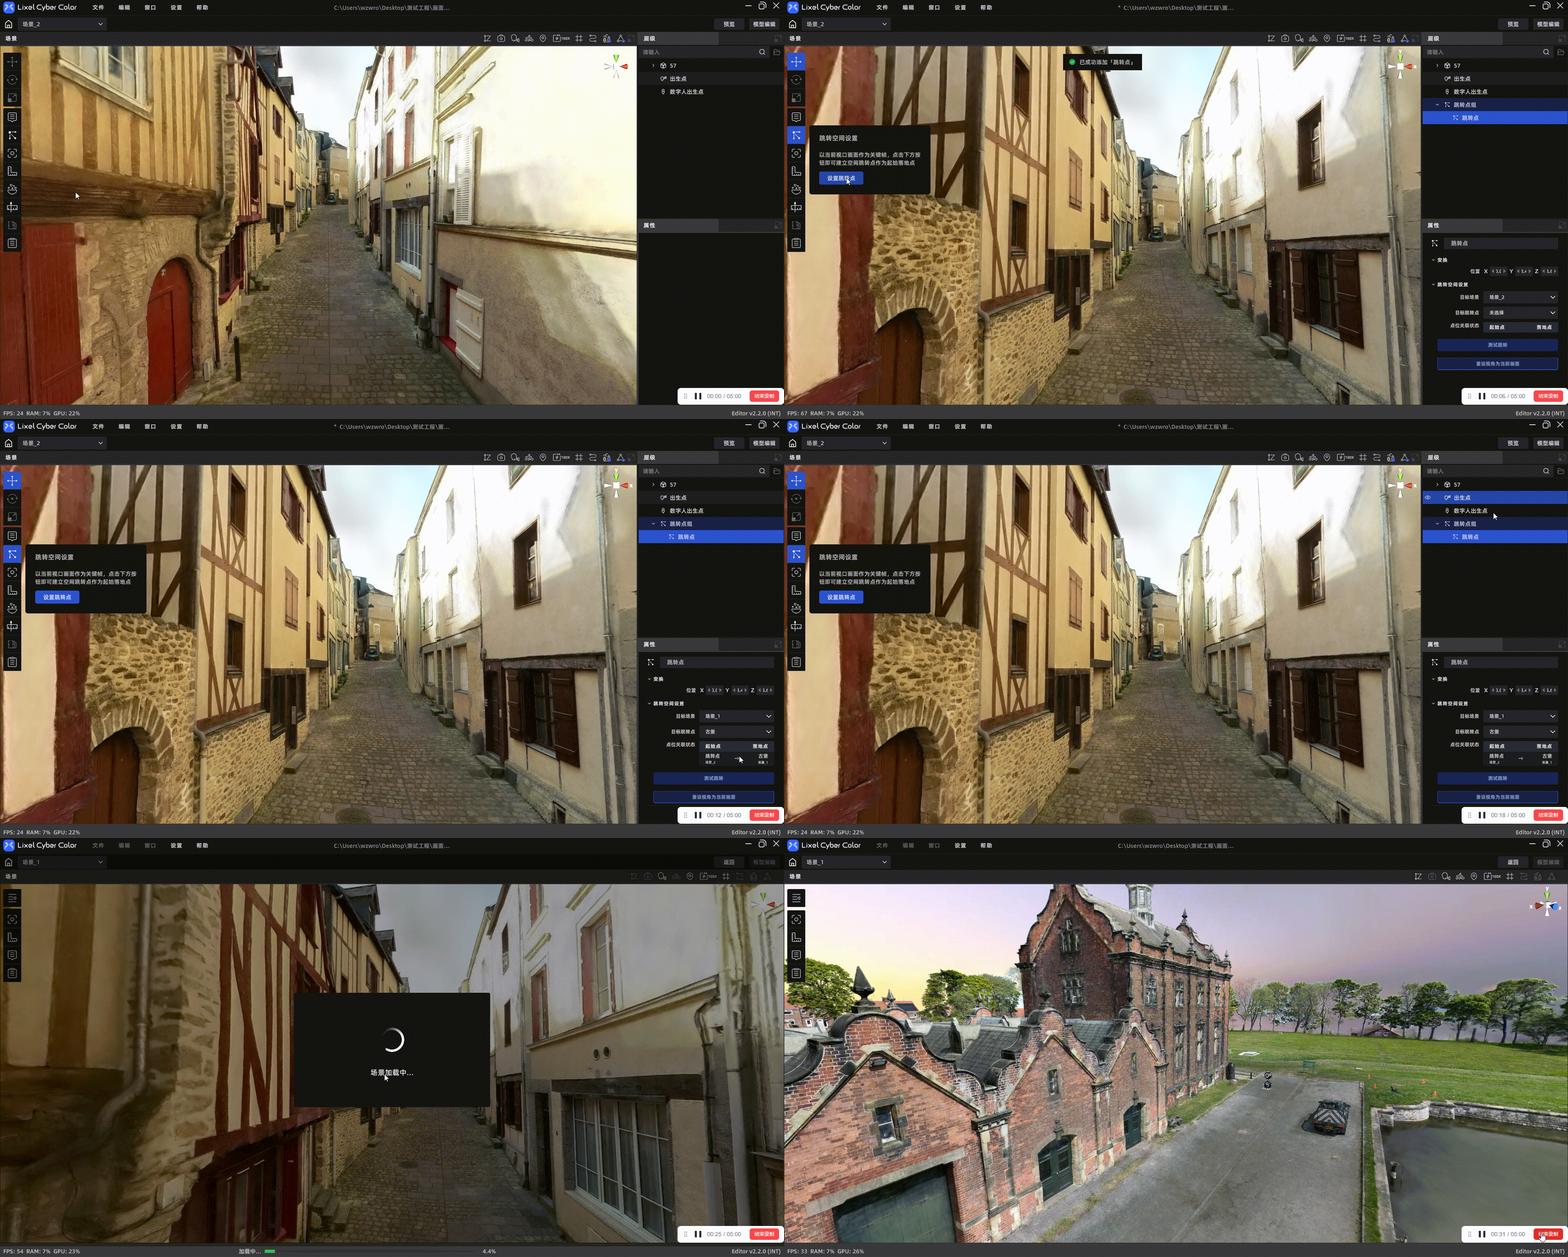
Portal
- Click Portal in the toolbar
- Select the target position and orientation in the scene, then click Set Portal
- After the portal is created, the current camera angle is automatically captured as the orientation preview
- In Preview Mode, you can test the jump effect
Configuring a Portal (Properties Panel)
After selecting a portal, the properties panel shows the following options:
| Setting | Description |
|---|---|
| Target Scene | Select the target scene from the dropdown (includes the current scene and all other scenes) |
| Portal | After selecting a scene, the dropdown refreshes to list that scene's portals; select the landing target |
| Name | Portal name (≤50 characters) |
| Update Preview Image | Update the portal position, orientation, and re-capture a screenshot using the current camera angle |
Note: You must first place a portal in the target scene before you can link to it.
Two-Way Portal
When two portals each designate the other as their target (A→B and B→A), the system automatically detects the bidirectional link and displays a Bidirectional Link badge on both portals.
- Two-way portals must be configured manually on each end; the system does not create reverse links automatically
- When either end is modified or the link is removed, the Bidirectional Link badge is removed from both
Portal Interaction
- Trigger: Mouse click (click-to-trigger only; proximity auto-trigger is not supported)
- Supported mode: Free Mode (SelfMode); portals are hidden in other modes
- Same-scene jump: Instant teleport — camera arrives immediately
- Cross-scene jump: After loading completes, the camera lands at the target position with the orientation set by the landing point