
Viewpoints
The Viewpoints module lets you preset key observation points and automatic roaming paths in the scene. Three types are supported: Tour / Roaming / Zone Viewpoints.
Note: Viewpoint data from previous versions is not compatible with the current version. If a project contains legacy viewpoint data, a warning will appear indicating the data cannot be read and must be recreated.
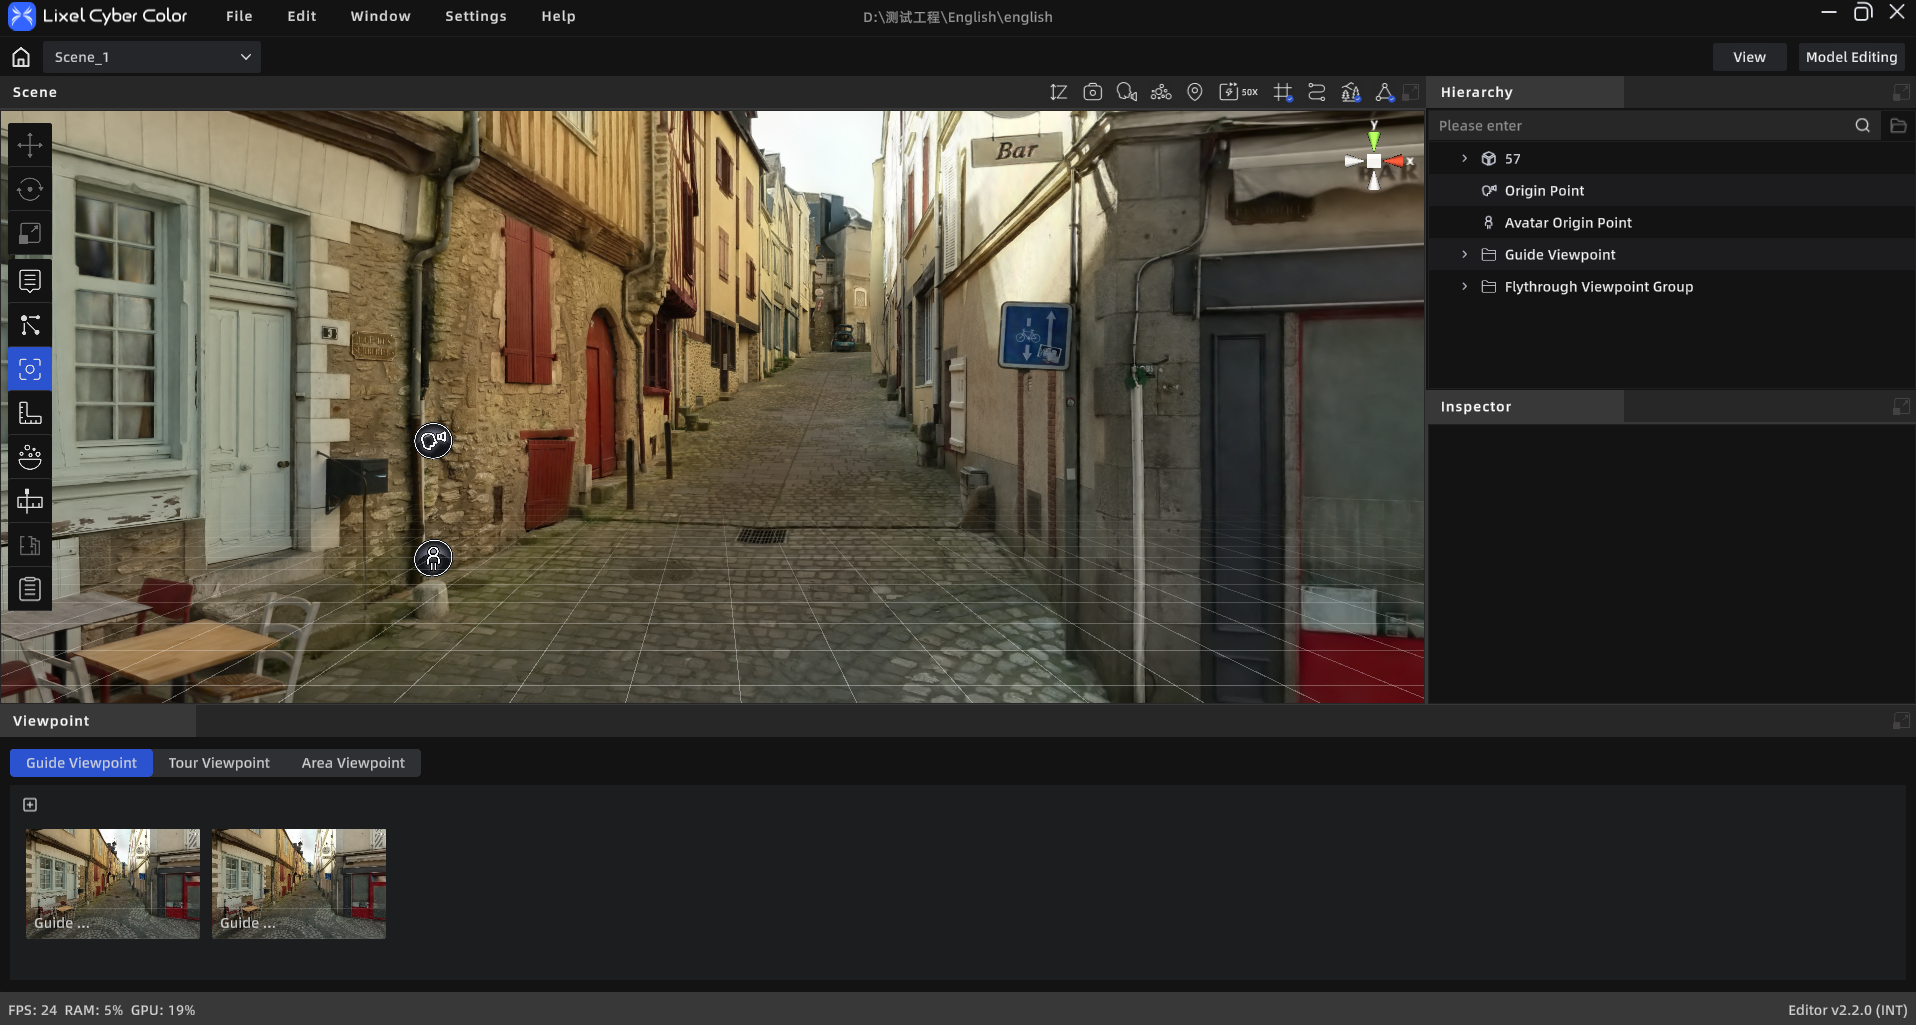
Viewpoints Module
Opening the Viewpoints Editor
Click the "Viewpoints" icon in the left toolbar to open the bottom sidebar. The sidebar has three tabs: Tour, Roaming, and Zone Viewpoints.
Tour
Preset multiple observation points in the scene. In Preview Mode, clicking a point instantly jumps to that preset angle.
Creating a Tour Point
- Switch to the "Tour" tab
- Adjust the camera to the desired position and orientation
- Click "Add Point"
- Set parameters in the properties panel
Tour Point Properties
| Property | Description |
|---|---|
| Point Name | Required, ≤50 characters |
| Intro Title | Optional, ≤50 characters |
| Intro Text | Optional, ≤300 characters |
| Camera Motion | Static (default) / Left to Right / Right to Left |
| Motion Angle | 0°–360° |
| Position | x, y, z |
| Lock Point | When locked, unaffected by "Apply to All Tour Points" |
- Click "Apply this point's settings to all tour points" to batch-apply current settings to other unlocked points.
Tour in Preview Mode
- Markers in the scene represent tour viewpoints
- Hover to show the title
- Click to move the camera to that viewpoint
Roaming
Draw a continuous path and generate an automatic roaming animation.
Automatically Generate Roaming Viewpoints and Routes (New in V2.3.0)
Select POV viewpoints and place markers in LixelGO or LCC Scan. After reconstruction is complete, Scene Editor automatically generates roaming viewpoints and routes from the marker data, reducing the need to create path points manually.
Device Compatibility: K1 and L2 Pro devices do not currently support this feature.
After generation, you can view the viewpoints and route in the roaming route list, then adjust the point order and properties as needed.
Route Management
- All roaming routes are listed vertically
- Click "New Route" at the top to create one; up to 10 routes
- Hover over a route to reveal a delete button (requires confirmation)
Route Properties
| Property | Description |
|---|---|
| Route Name | ≤50 characters |
Drawing a Roaming Path
- Select a route
- Manually move the camera to the desired position and orientation
- Click "Add Point" to save the current angle as a path point (a thumbnail is captured automatically)
- Repeat steps 2–3 to add more points
- New points are appended to the end of the route and smoothly connected to the previous point.
Point List
- A horizontally scrollable thumbnail list appears at the bottom of the sidebar
- Click a thumbnail: camera flies to that viewpoint
- Long-press and drag: reorder points
- Hover to reveal a delete button
Roaming Point Properties
| Category | Property | Description |
|---|---|---|
| Basic | Point Name | ≤50 characters, required |
| Intro | Title | Optional, ≤50 characters |
| Intro | Intro Text | Optional, ≤300 characters |
| Roaming | Dwell Duration | Number input (seconds), min 0.1, default 3 |
| Roaming | Transition Duration | Transition time from this point to the next |
| Roaming | Transition Type | Linear (smooth) / Instant (cut) |
| Camera | Camera Motion | Static / Left to Right / Right to Left |
| Camera | Motion Angle | 0°–360° |
| — | Lock Point | When locked, unaffected by batch apply |
Shortcuts:
| Shortcut | Action |
|---|---|
Space | Play / Pause from the current position |
→ (Right arrow) | Jump to the start of the next shot |
← (Left arrow) | Jump to the start of the previous shot |
Render Video
After selecting a route, export the roaming path as a video file.
| Parameter | Options |
|---|---|
| Resolution | 1080p / 2K / 4K |
| Frame Rate | 30 / 60 FPS |
| Export Format | MP4 |
| Codec | H.264 / H.265 |
| Save Location | Local folder / Media render group |
| Mode | Gaussian / Point cloud |
Note: The Render button is grayed out when no points have been added to the route.
Roaming in Preview Mode
- The roaming path plays automatically when entering Preview Mode (if one exists)
- To pause: click the pause button
- Resume from breakpoint: after pausing, click play to continue from the nearest point
- Loop: automatically restarts from the beginning after the last viewpoint
Note: Roaming playback and annotation features are mutually exclusive; annotation functions are automatically disabled during playback.
Zone Viewpoints
Record positioned views that include a line-of-sight range. Can be used as screenshot sources for scene reports.
Zone Viewpoint Properties
| Property | Description |
|---|---|
| Title | ≤50 characters |
| Position | x, y, z |
| Zone Length / Width | Number stepper |
| Area | Read-only, auto-calculated |