
Assets & Properties
Asset List
The asset list is located on the right side of the interface and centralizes all objects and data in the current scene (models, annotations, viewpoints, measurements, etc.).
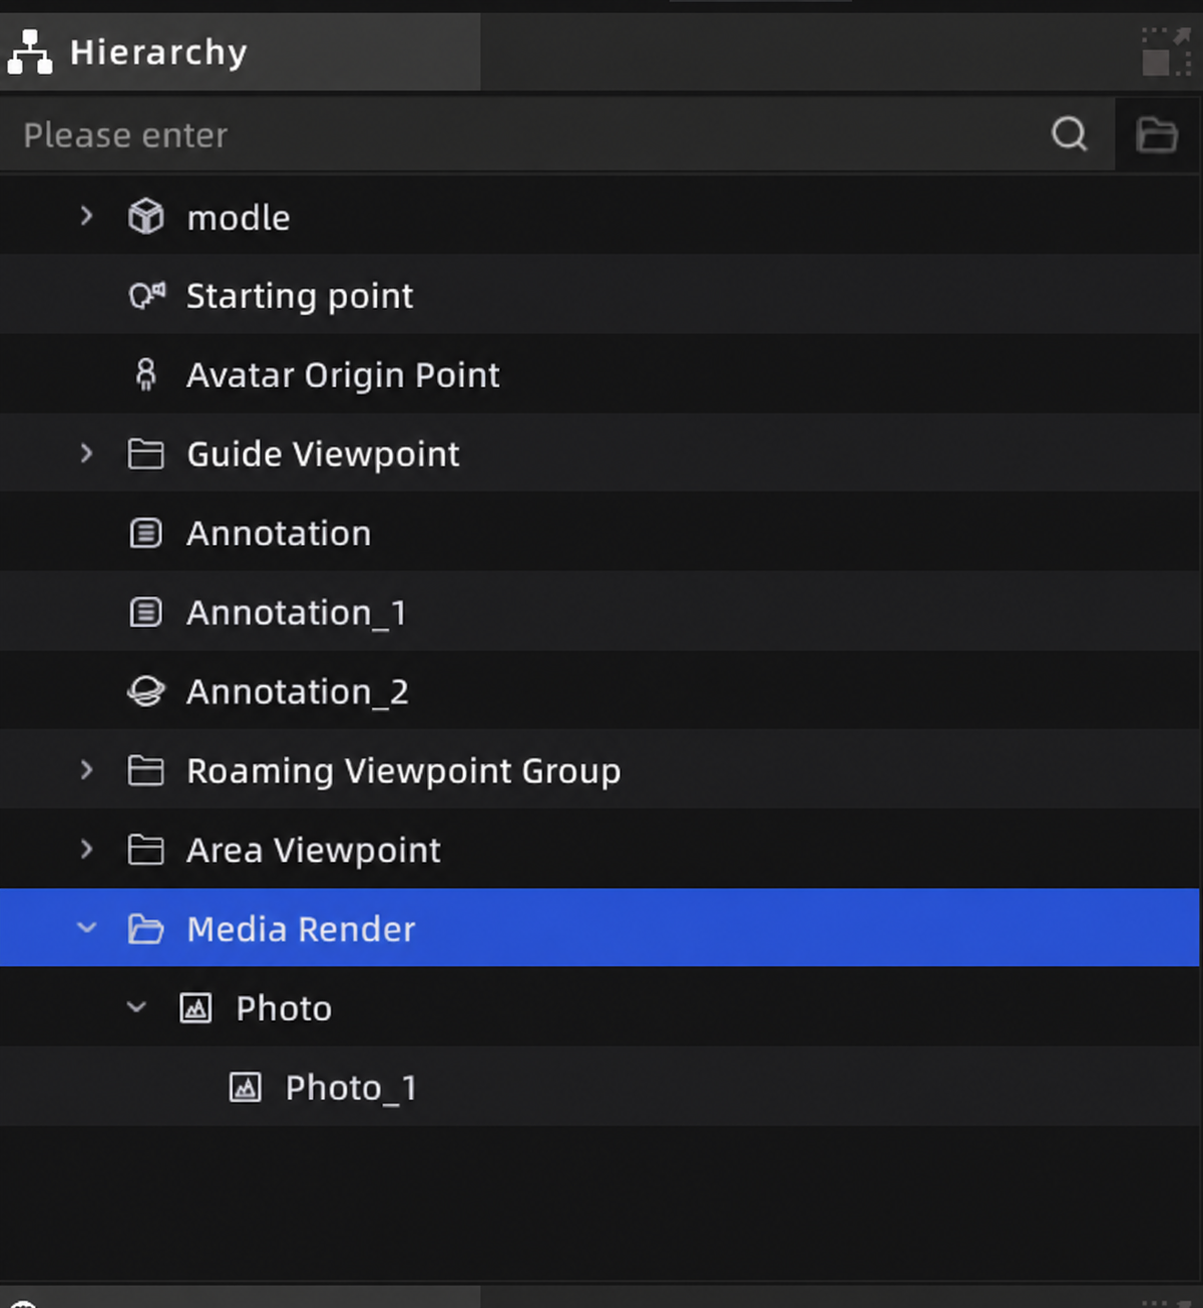
Asset List
Selecting Assets
- Single click: Select an asset; the properties panel switches to that asset's properties
Ctrl+ click: Add to selection one by oneShift+ click: Select a contiguous range- Double-click: Navigate to the asset (3D view jumps to its position)
- Click empty area: Deselect
Note: Selecting an asset in the list highlights it in the 3D view and shows the Gizmo handles.
Adding Assets
Assets are added to the list automatically after a creation operation in the scene.
Deleting Assets
Select an asset and press Delete, or right-click and choose Delete. The asset list and 3D view update simultaneously.
Non-deletable assets:
- Collision meshes (cannot be deleted independently; they follow the model)
- Spawn point, Avatar spawn point
Note: Delete operations support undo (
Ctrl+Z).
Show / Hide
Click the eye icon to the left of an asset entry to toggle visibility:
- Hidden state is saved with the project
Drag to Reorder
Drag asset entries to reorder them or move them into folders:
- Same-level drag: Drag to a sibling position; a guide line indicates the drop location
- Child-level drag: Drag below a parent asset to nest it into that group
Non-draggable assets: Collision meshes, environment data, media files under annotations, 3D Layout components, AI recognition data, mini-map, multi-floor, zone viewpoints, tour viewpoints
Note: Nesting depth cannot exceed 4 levels.
Search
Type keywords in the search box at the top of the asset list to filter by name. Results show matching assets and their parent path. Hidden assets are also searchable.
Right-Click Menu
Right-click an asset to access the following options (available options vary by asset type):
| Action | Description |
|---|---|
| Locate | Jump to the asset's position in the 3D view |
| Frame Selected | Quickly aim the camera at the LCC model's valid data area (LCC assets only; see below) |
| Rename | Change the asset's display name |
| Delete | Delete the asset |
| Hide / Show | Toggle visibility |
| Export | Export the asset as a file |
| Copy / Paste | Duplicate the asset (supported for models and 3D Layout components) |
| Create Folder | Create a new group folder |
| Ungroup | Move folder contents back to the parent level |
| Relink | Re-specify the file path when an asset file is missing |
| Set Spawn Point | Set the current camera position as the spawn point (available on the spawn point asset) |
Frame Selected
Some LCC data has a large original bounding box, but the actual valid point cloud or mesh data only occupies a small area within it. After import, the camera may be far from the model. Use Frame Selected to quickly position the camera at the center of the valid data.
How to use:
- Right-click the target LCC asset in the asset list
- Select "Frame Selected"
- The camera automatically focuses on the LCC's valid data area
Note: If the LCC contains no valid data, the camera will position at the original bounding box center.
Missing Assets & Relinking
When an asset's corresponding file has been moved or deleted, the asset name turns red.
To fix:
- Right-click the missing asset → select "Relink"
- Select the correct file in the file browser
- Confirm to restore the link
Properties Panel
The properties panel is located at the lower-right of the interface. After selecting any asset, it automatically shows that asset's editable parameters.
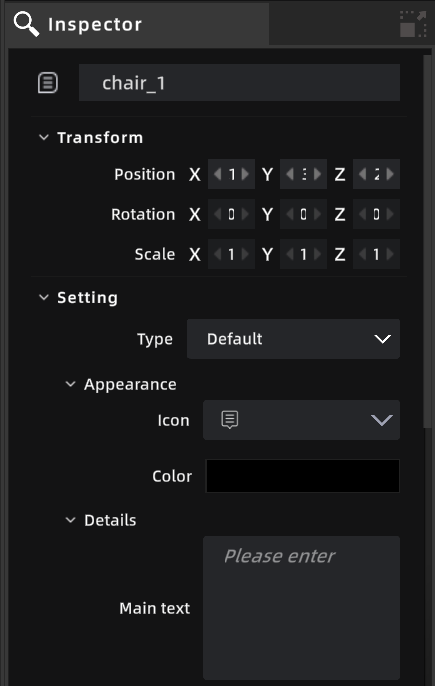
Properties Panel