
3D Layout
The 3D Layout tool supports viewing and re-editing indoor scenes that had Smart Space Recognition enabled during model reconstruction.
Note:
- 3D Layout is only available for indoor scenes that had Smart Space Recognition enabled during reconstruction
- A 3D Layout license is required to use this feature
Opening & Activating
V2.2 Upgrade: Auto-Import — When importing LCC, the system automatically detects and associates the corresponding floor plan data. A floor plan child node appears automatically under the LCC node in the asset panel and activates on selection. No manual import needed.
- If no floor plan data exists, LCC loads normally without error
- If auto-association fails, a toast message appears: "Floor plan auto-association failed. You can bind it manually."
Manual Import (entry retained):
- File → Import → Floor plan file directory → Select the
semantic-resultfolder in the project directory - Click Confirm
- In Scene Mode, click 3D Layout in the toolbar to enter the interface
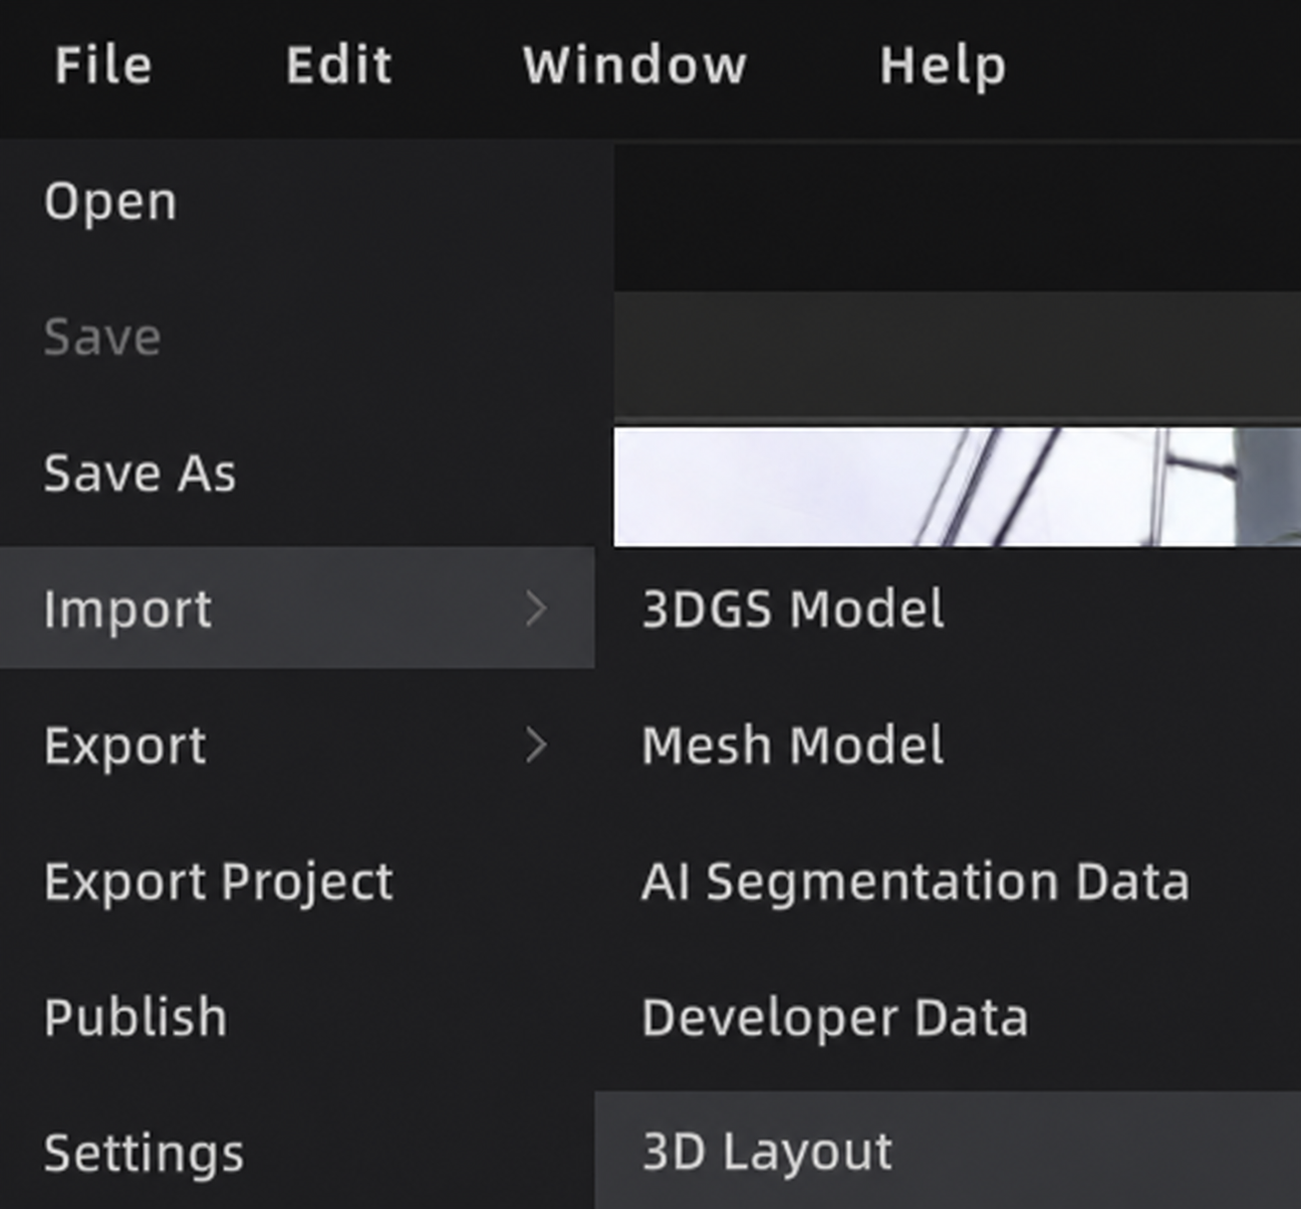
Import Floor Plan File
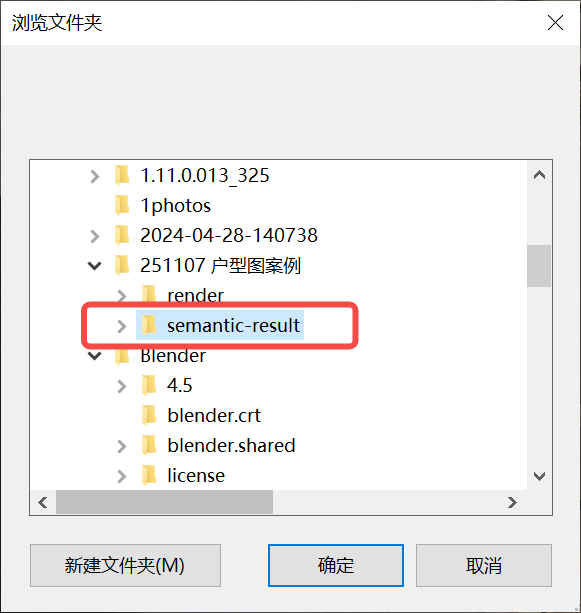
Select Floor Plan Directory
Interface & Tools
- The right side shows the floor plan canvas, which supports zoom, pan, and drag navigation
- Supports 2D/3D view switching and 2D overlay view
Drawing Tools
Wall
Click Wall → place start point → adjust position → place end point → right-click to finish
Door
Click Door → place pivot point → adjust width → confirm end point → adjust orientation
Window
Click Window → place start point → adjust width → confirm end point
Text Annotation
Click T → place text box → double-click to activate → type text → click empty area to finish
Polygon Drawing
Click Polygon → single-click to add control points → double-click to finish
Rectangle Drawing
Click Rectangle → drag to draw → release to finish
Quick View Adjustment
Provides quick-align and 90° rotation shortcuts for fast canvas orientation adjustments in 2D view.
Export 3D Layout
Right-click the 3D Layout in the asset list → Export. Exports as an OBJ 3D model file or JPEG image.
- Supported formats: JPEG / OBJ
- Hidden assets are not exported
Asset Management
After importing floor plan data, recognized components (walls, doors, windows, etc.) are automatically grouped by type.
Asset group operations (right-click):
- Delete
- Export OBJ
- Export JPEG
Single asset operations (right-click):
- Clone
- Delete
- Rename
Shortcuts:
Shift+ click: Add to selectionCtrl+ click: Remove from selection- Select and press
Delete: Delete selected assets