
Appendix
This chapter provides the specifications, storage instructions, and accessory usage instructions for the Lixel L2 Pro.
Specifications
| Category | Item | L2 Pro | Remarks |
|---|---|---|---|
| System parameters | Handheld unit weight | 1.7 kg | Without battery |
| Handheld unit dimensions | 180 mm × 130 mm × 400 mm | Includes battery and base, but not the RTK or phone mount components. | |
| Outer casing | Aluminum alloy | ||
| Power consumption | <30W | ||
| Data interface | USB 3.1 Gen2 | ||
| Storage | 1T SSD | ||
| Operating time | 1.5h | ||
| Wireless module | Supports Wi-Fi, Bluetooth: 802.11a/b/g/n/ac, 2.4G Wi-Fi 2412-2472 MHz, 5G2 Wi-Fi 5180-5240 MHz, 5G8 Wi-Fi 5745-5825 MHz | ||
| Working environment | Operating temperature | -20℃~50℃ | |
| IP rating | IP54 | ||
| Functions | Visual SLAM positioning | Supported | |
| Real-time colored point cloud | Supported | ||
| Real-time RTK fusion | Supported | ||
| Output | Point cloud format | .las | |
| Image format | .jpg | ||
| Real-time accuracy | Absolute accuracy - elevation (RMSE) | 3 cm | RTK disconnection <100 m |
| Absolute accuracy - horizontal (RMSE) | 3 cm | RTK disconnection <100 m | |
| Relative accuracy (RMSE) | 2 cm | Distance between two points less than 100 m | |
| Post-processed accuracy | Absolute accuracy - elevation (RMSE) | 3 cm | Control point / RTK disconnection <100 m |
| Absolute accuracy - horizontal (RMSE) | 3 cm | Control point / RTK disconnection <100 m | |
| Relative accuracy (RMSE) | 1 cm | Distance between two points less than 100 m | |
| Repeatability (RMSE) | 2 cm | Two scans with RTK, no disconnection | |
| Point cloud thickness | 0.5 cm | Point cloud plane thickness within 10 m of the walking path | |
| Horizontal accuracy (RTK / control point fusion) | 0.015° | RTK: no disconnection over 100 m; control points: control point spacing <100 m | |
| Point cloud enhancement | Supported | ||
| LiDAR | Scanning range | 0.5m~120m, 0.5m~300m | |
| Laser class | Class 1 / 905nm | ||
| Field of view (FOV) | 360°×270° | ||
| Scan rate | 320,000 points/s, 640,000 points/s | ||
| Panoramic camera | Resolution | 2×48MP | |
| Panoramic image resolution | Up to 56MP | ||
| Focal length | 2mm | ||
| Aperture | F/2.0 | ||
| CMOS size | 1/2” | ||
| Shutter type | Rolling shutter | ||
| FOV | 190°×190° | ||
| Visual positioning camera | Resolution | 1×1MP | |
| Shutter type | Global shutter | ||
| FOV | 190°×119° | ||
| Battery | Rated voltage | 14.4V | |
| Capacity | 46.8Wh | ||
| Charger | Input | 100V~240V, 50~60Hz, 1.5A 80VA | |
| Output | 16.8V 2.0A | ||
| Rated power | 34W | ||
| Accessories | Backpack scanning system | Size: 60cm×60cm×15cm; weight: 2.5 kg | |
| Backpack + insert | Size: 55cm×35cm×25cm; weight: 2.7 kg | ||
| Standard RTK + bracket | Supported bands: GPS L1/L2/L5, GLONASS L1/L2, BDS B1/B2/B3, Galileo E1/E5a/E5b/E6b. Accuracy: horizontal 0.8 cm+1 ppm, elevation 1.5 cm+1 ppm. Antenna: impedance 50 ohms, right-hand circular polarization, horizontal coverage 360°, output VSWR ≤2.0, max gain 2.8 dBi | Test results are affected by atmospheric conditions, baseline length, GNSS antenna type, multipath, the number of visible satellites, and the satellite geometry, and may deviate. Without accounting for possible antenna phase-center offset errors, measurement with a 1 km baseline and a receiver with good antenna performance is recommended. | |
| Survey RTK + bracket | Supported bands: GPS L1/L2/L5, GLONASS L1/L2, BDS B1/B2/B3, Galileo E1/E5a/E5b/E6b. Accuracy: horizontal 0.8 cm+1 ppm, elevation 1.5 cm+1 ppm. Antenna: impedance 50 ohms, right-hand circular polarization, antenna axial ratio ≤3 dB, horizontal coverage 360°, output VSWR ≤2.0, max gain 5.5 dBi | ||
| 2m extension pole | Supported | ||
| Phone mount | Supported | ||
| GCP Collection Base | Supported | ||
| Shipping case | Size: 42cm×34cm×18cm; weight: 6.6 kg |
Storage
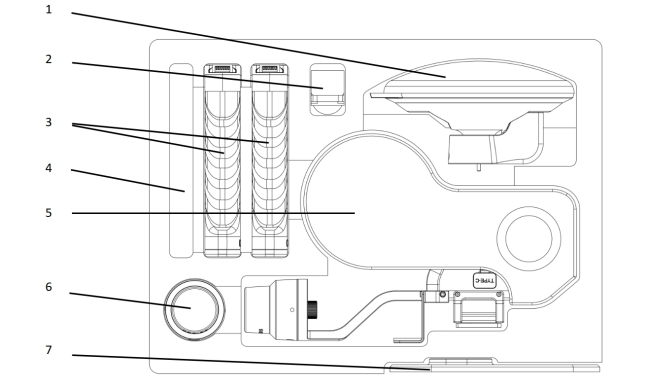
Note
1 - Survey RTK module; 2 - Phone mount; 3 - Battery; 4 - Manual and USB cable; 5 - Device body; 6 - Standard RTK module; 7 - GCP Collection Base.
Accessories
L2 Pro Drone Mounting Bracket Accessory Instructions
Accessories included in the L2 Pro drone mounting bracket package:
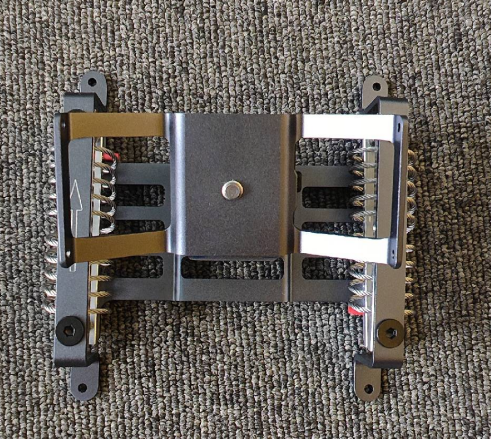
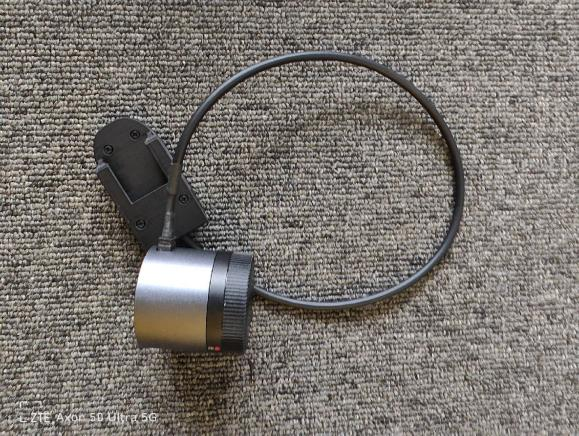
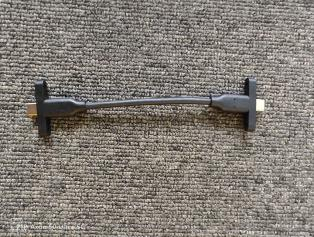
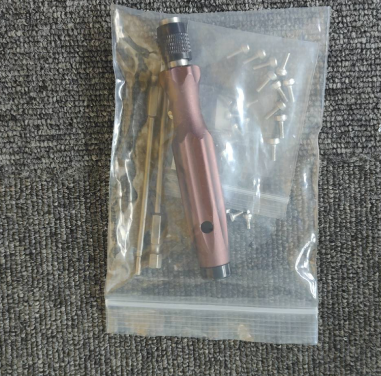
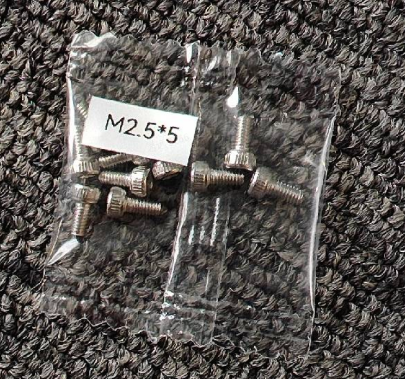
Installation Toolkit: the installation toolkit contains several M2.5*5 screws, several M2.5*10 screws, and several M3*8 screws (Mx*y, where x is the diameter and y is the length).
Necessary Preparations
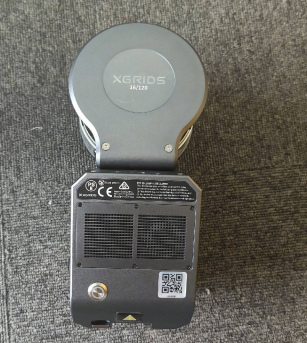
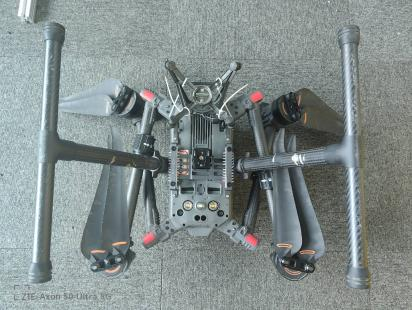
Operation Guide
Installation
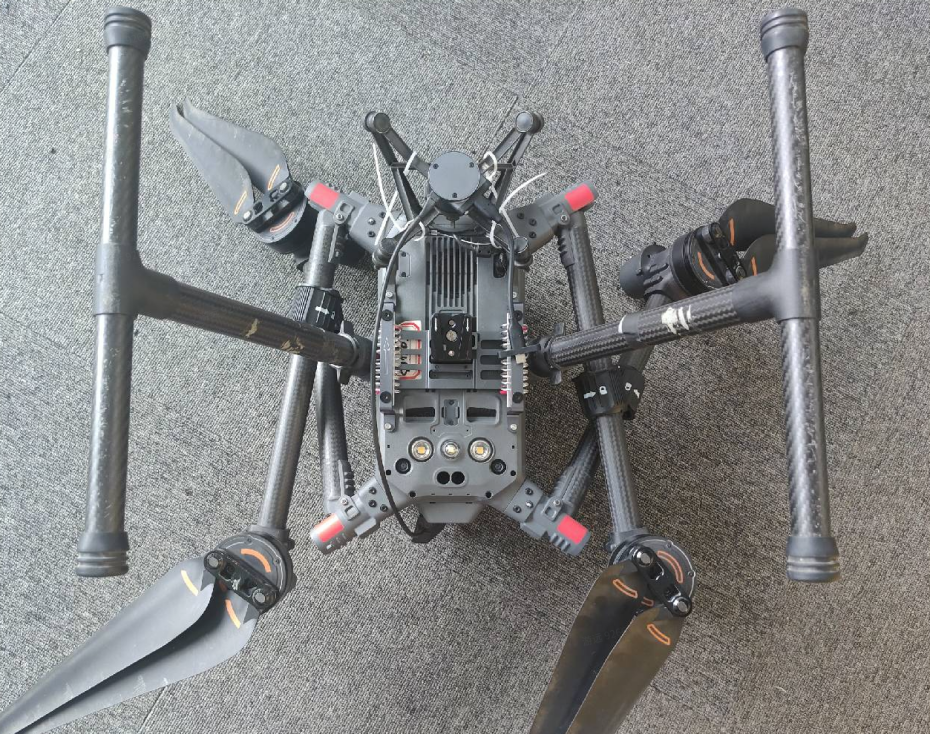
- Remove the back plate of the bracket and use M2.5*5 screws to attach the back plate to the L2 Pro.
- Connect the custom Type-C cable to the gimbal adapter ring and secure it with M2.5*8 screws.
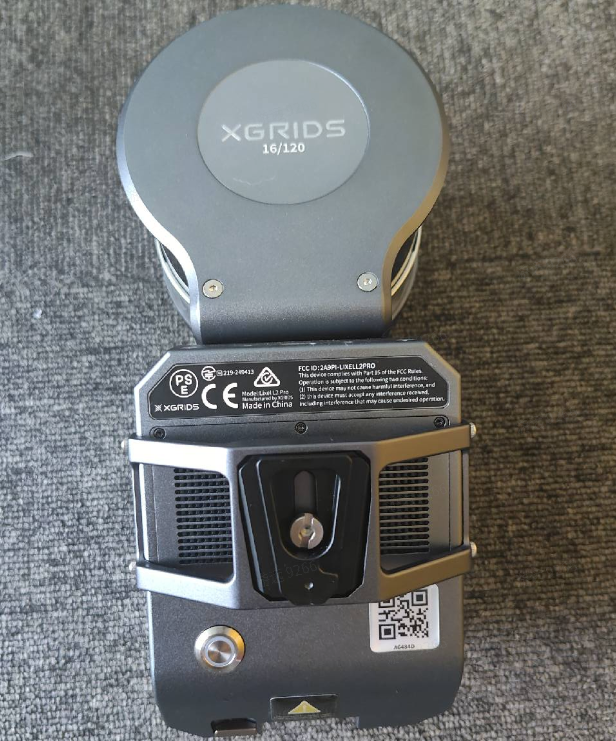
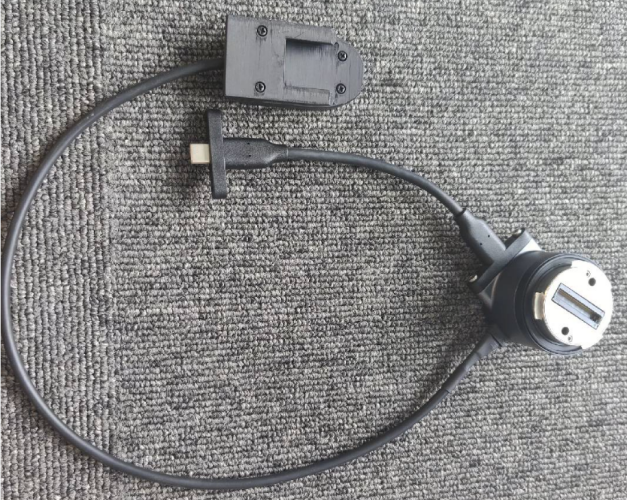
- Bracket installation: reuse the gimbal screw holes of the M300/M350 and use M3*8 screws to install the bracket on the belly of the aircraft.
Note
Make sure the arrow direction marked by the red box points toward the gimbal adapter ring.
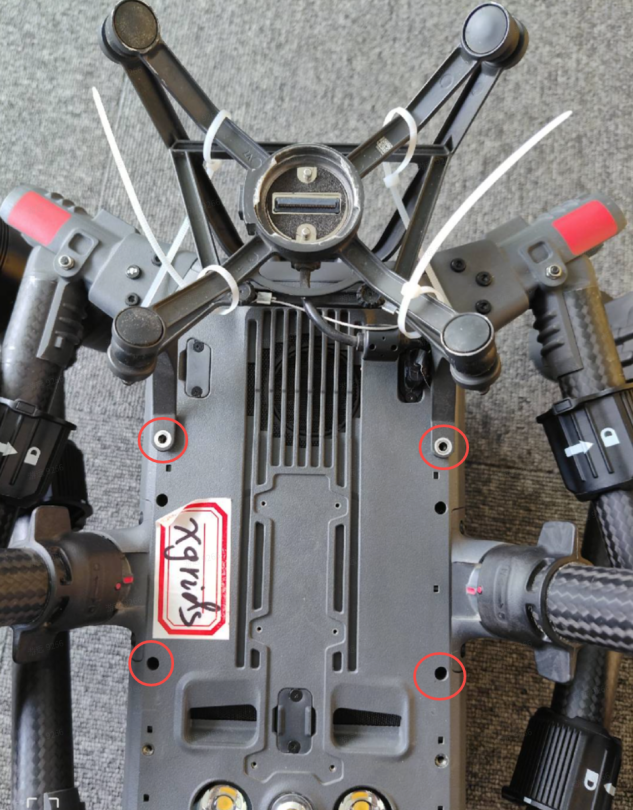
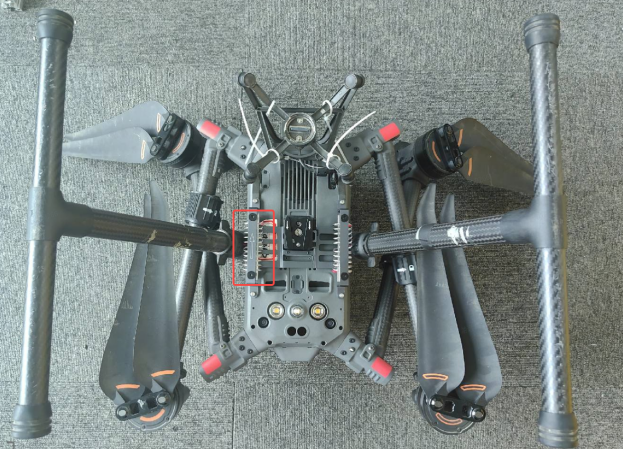
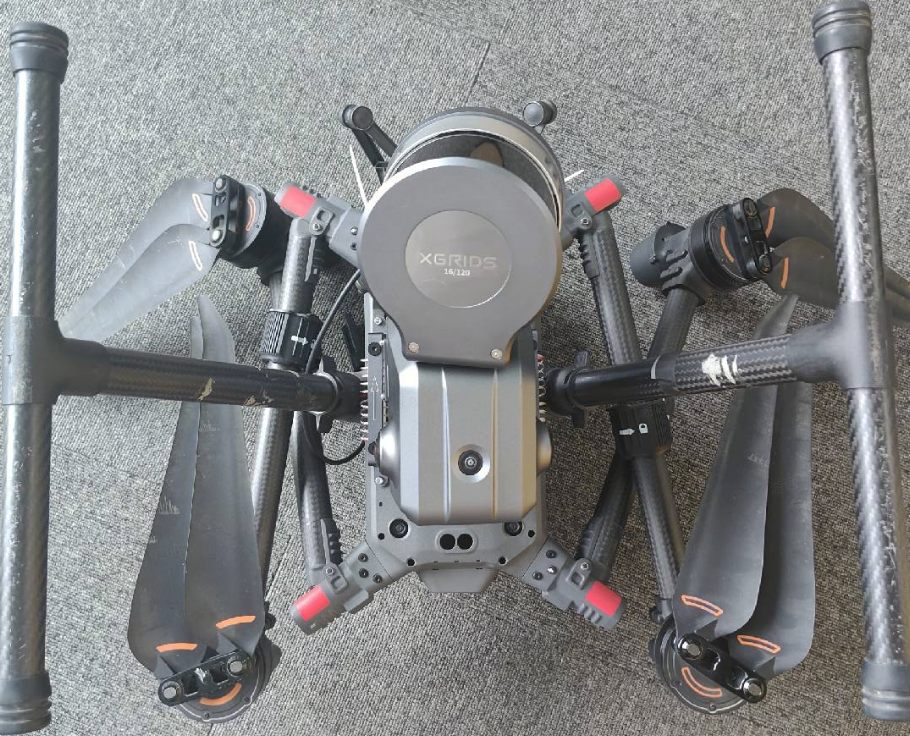
- Install the XGRIDS gimbal adapter ring onto the M300/M350.
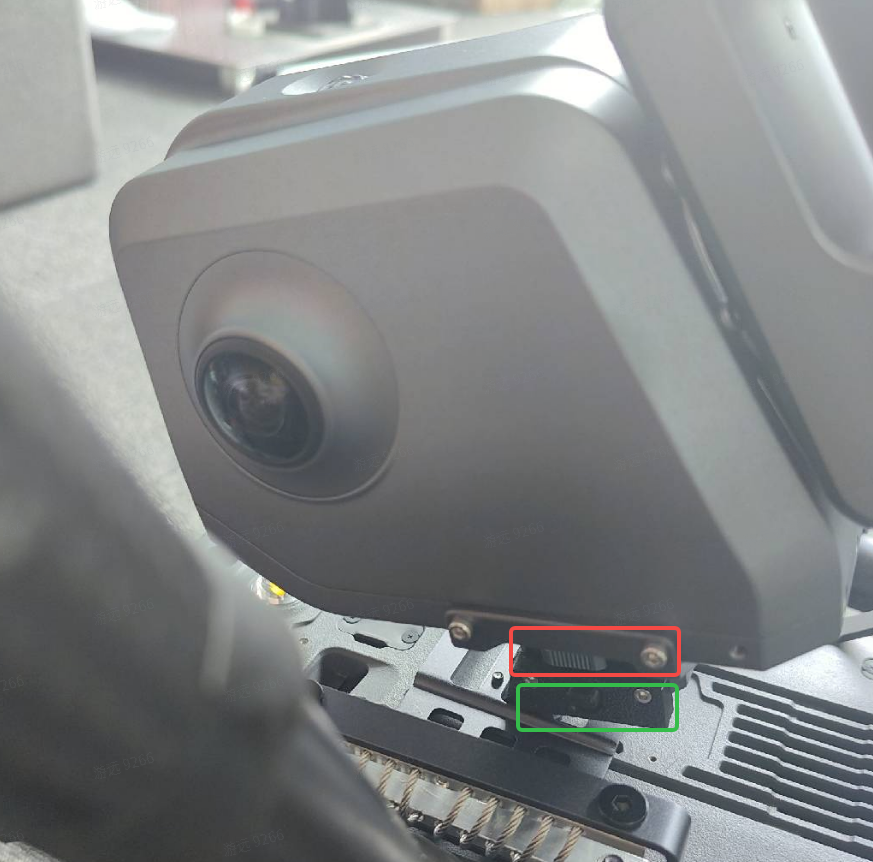
- Mount the L2 Pro onto the bracket and toggle the button in the green box as shown; the tightening button in the red box will then be locked, ensuring the device does not come loose during flight.
Note
The button in the green box is actually a safety button. If it is not toggled, there is a risk of the L2 Pro falling from the air, so pay special attention.
- Connect the power cable and the Type-C cable to the L2 Pro, and secure the Type-C cable with M2.5*8 screws.
Note
If it is not secured, the Type-C cable connection may be unstable during flight, causing the RTK to disconnect.
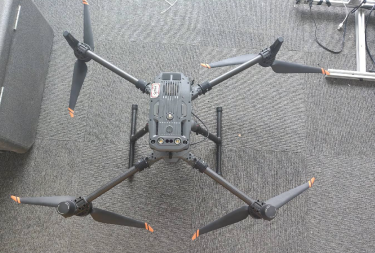
- Illustration after installation is complete.
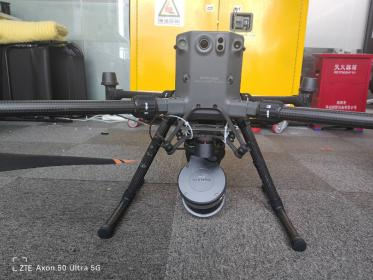
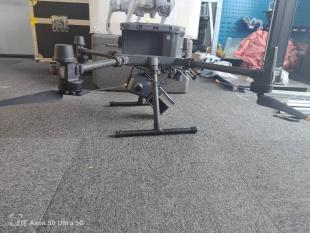
Capture
- Update LixelGO to version 1.2.0 or above.
- Power on the aircraft and press and hold the button to turn on the L2 Pro; the L2 Pro reuses the aircraft's power.
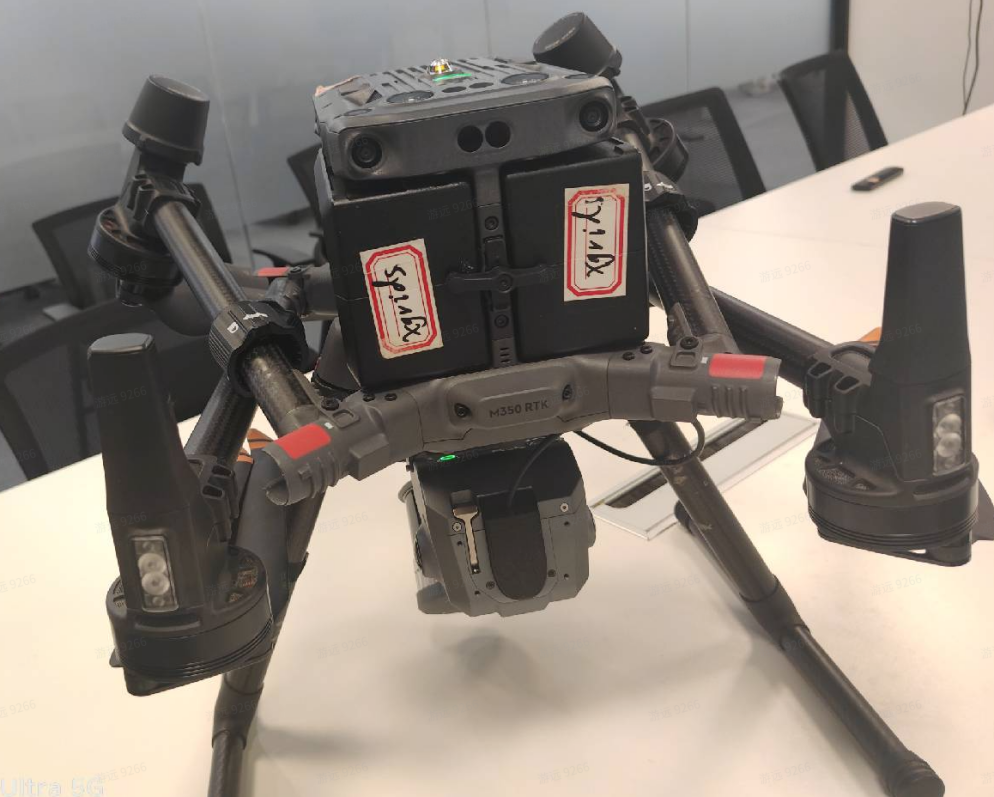
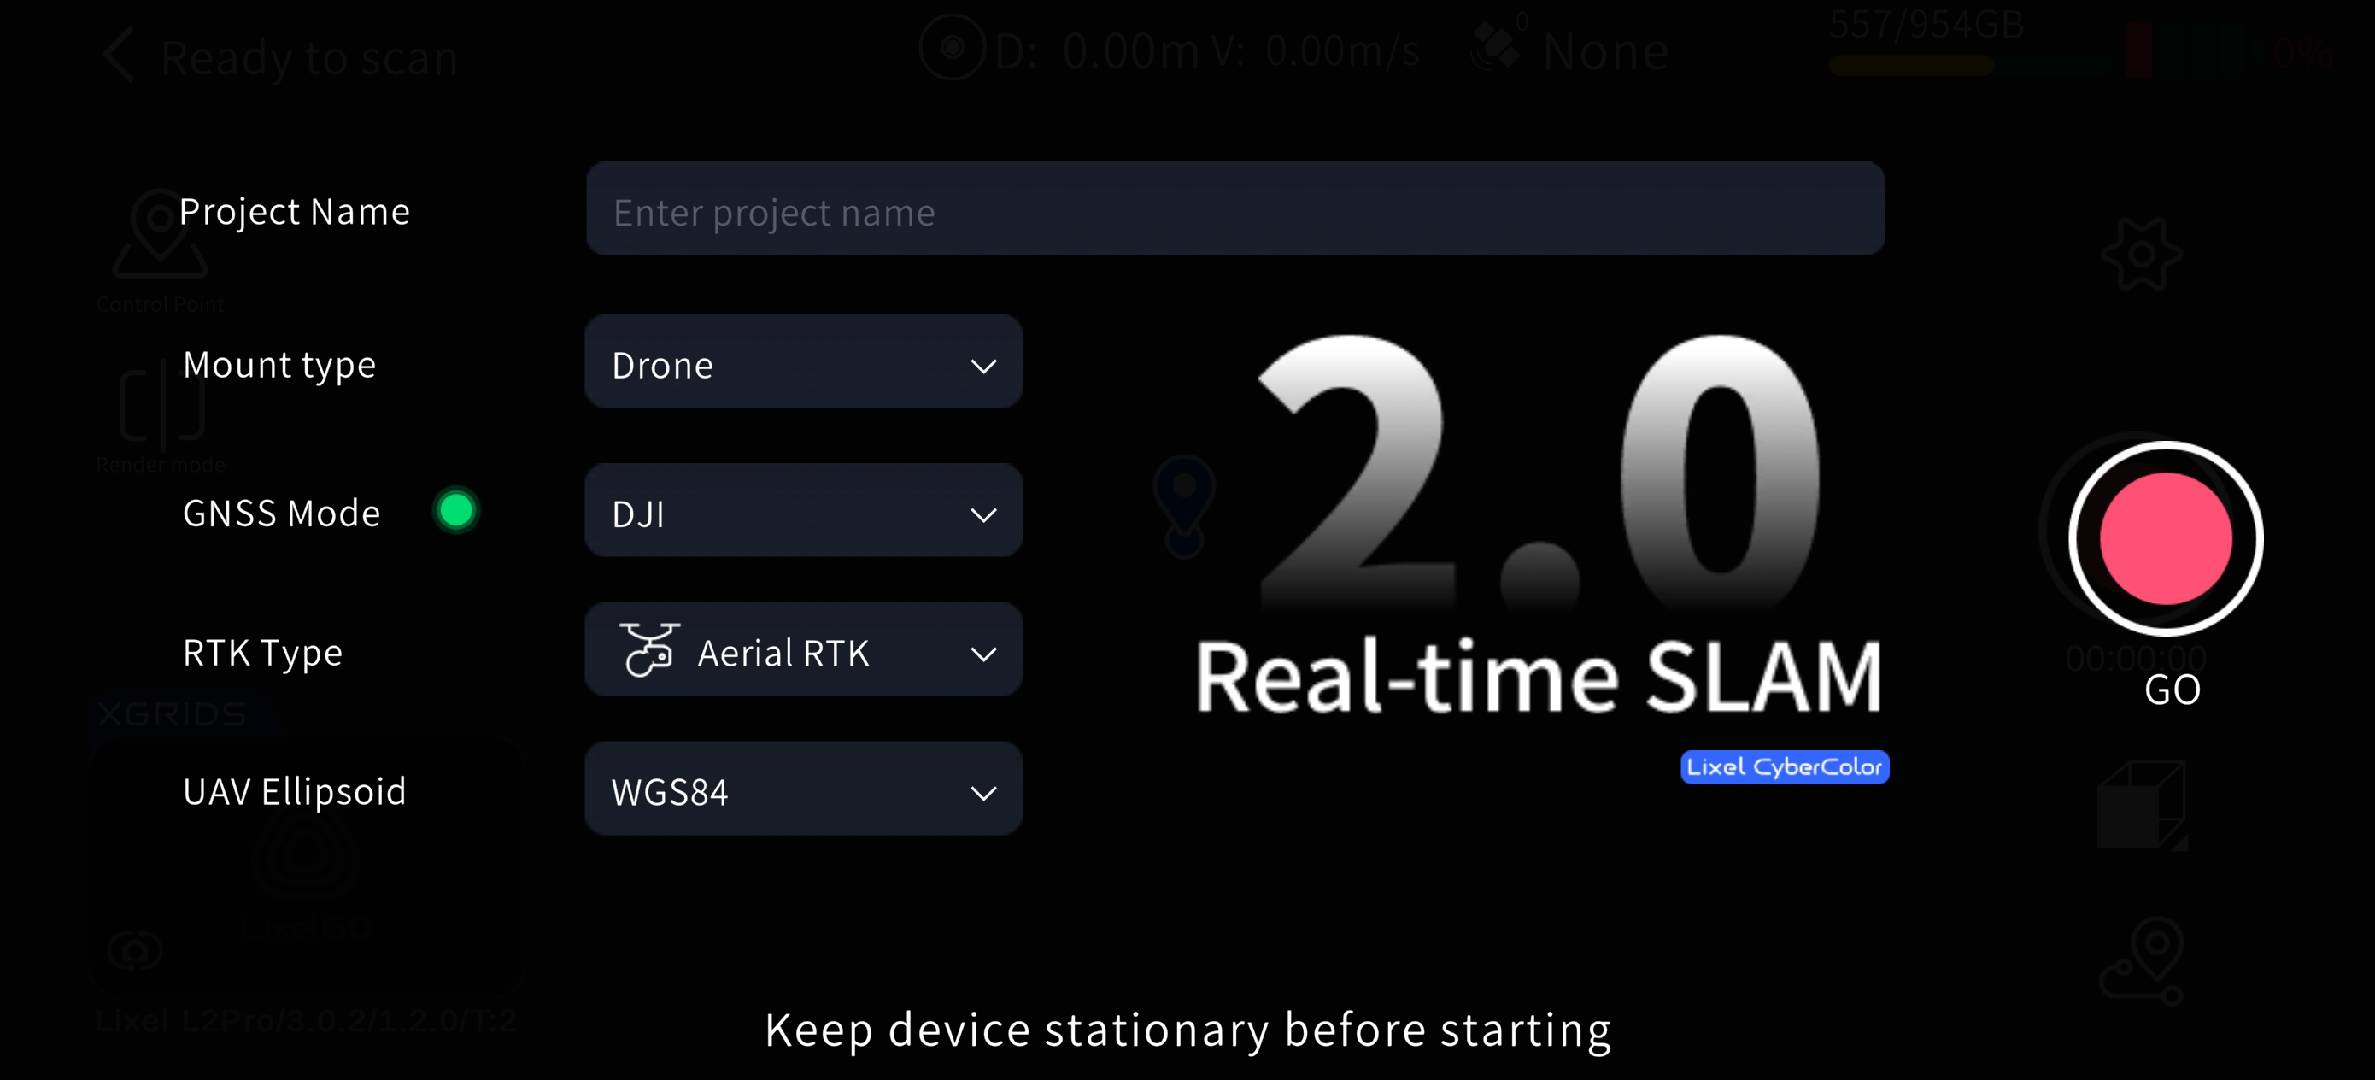
- Start scanning with LixelGO.
(1) Mount type: Drone
(2) RTK type: Aerial
(3) UAV source ellipsoid: set the coordinate system to match the one on the DJI controller (WGS84/CGCS2000).
Note
If you do not start with LixelGO, the mount type, RTK type, and coordinate system information will not be correctly recorded in the project file.
Set the route on the DJI controller, start normal fixed-speed flight along the route, and stop scanning after returning; then power off normally.
Route information
(1) Recommended flight speed: 3 m/s.
(2) Flight altitude 30 m; maximum flight speed 5 m/s.
(3) Flight altitude 50 m; no limit on flight distance.
Project Processing
- Update LixelStudio to version 3.3 or above.
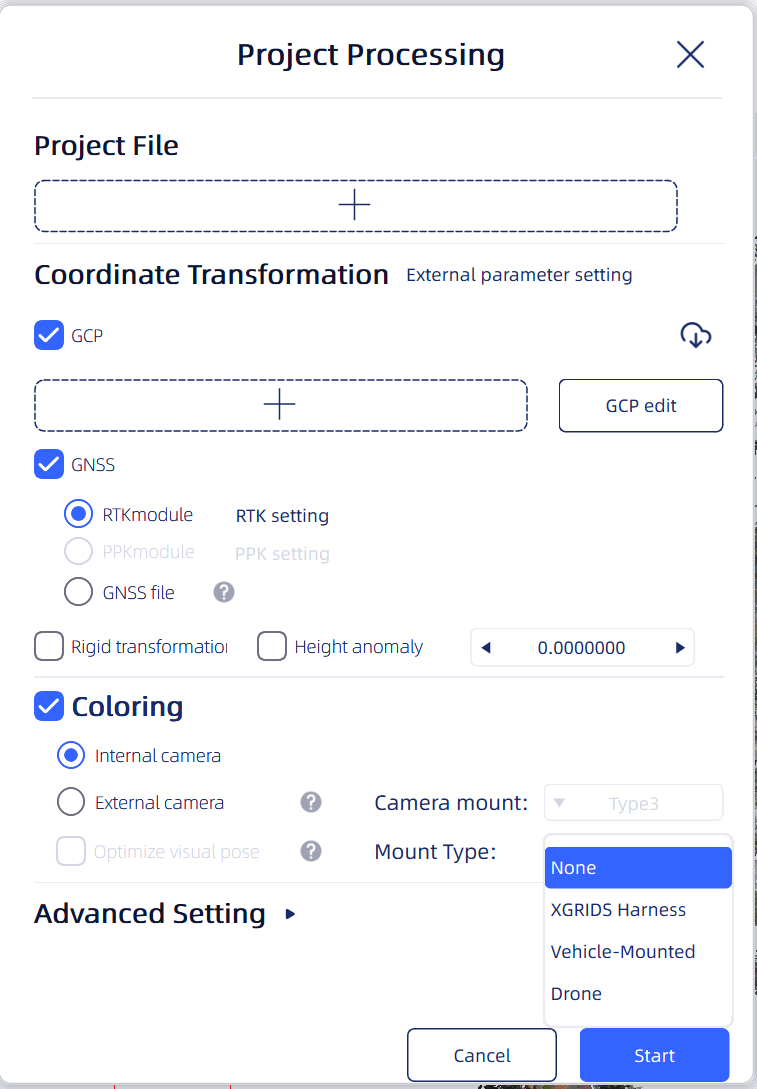
- Click Project Processing -> select the project file; the software automatically recognizes the mount type and ellipsoid information recorded in the project file.
Note
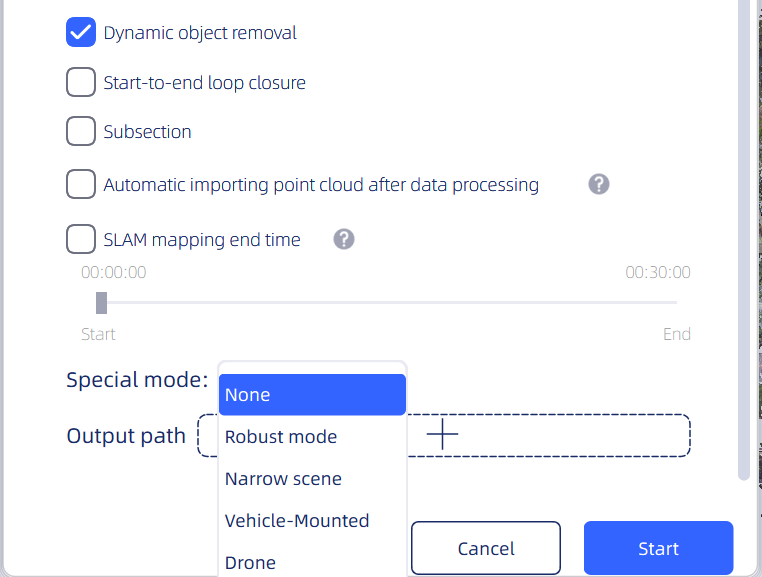
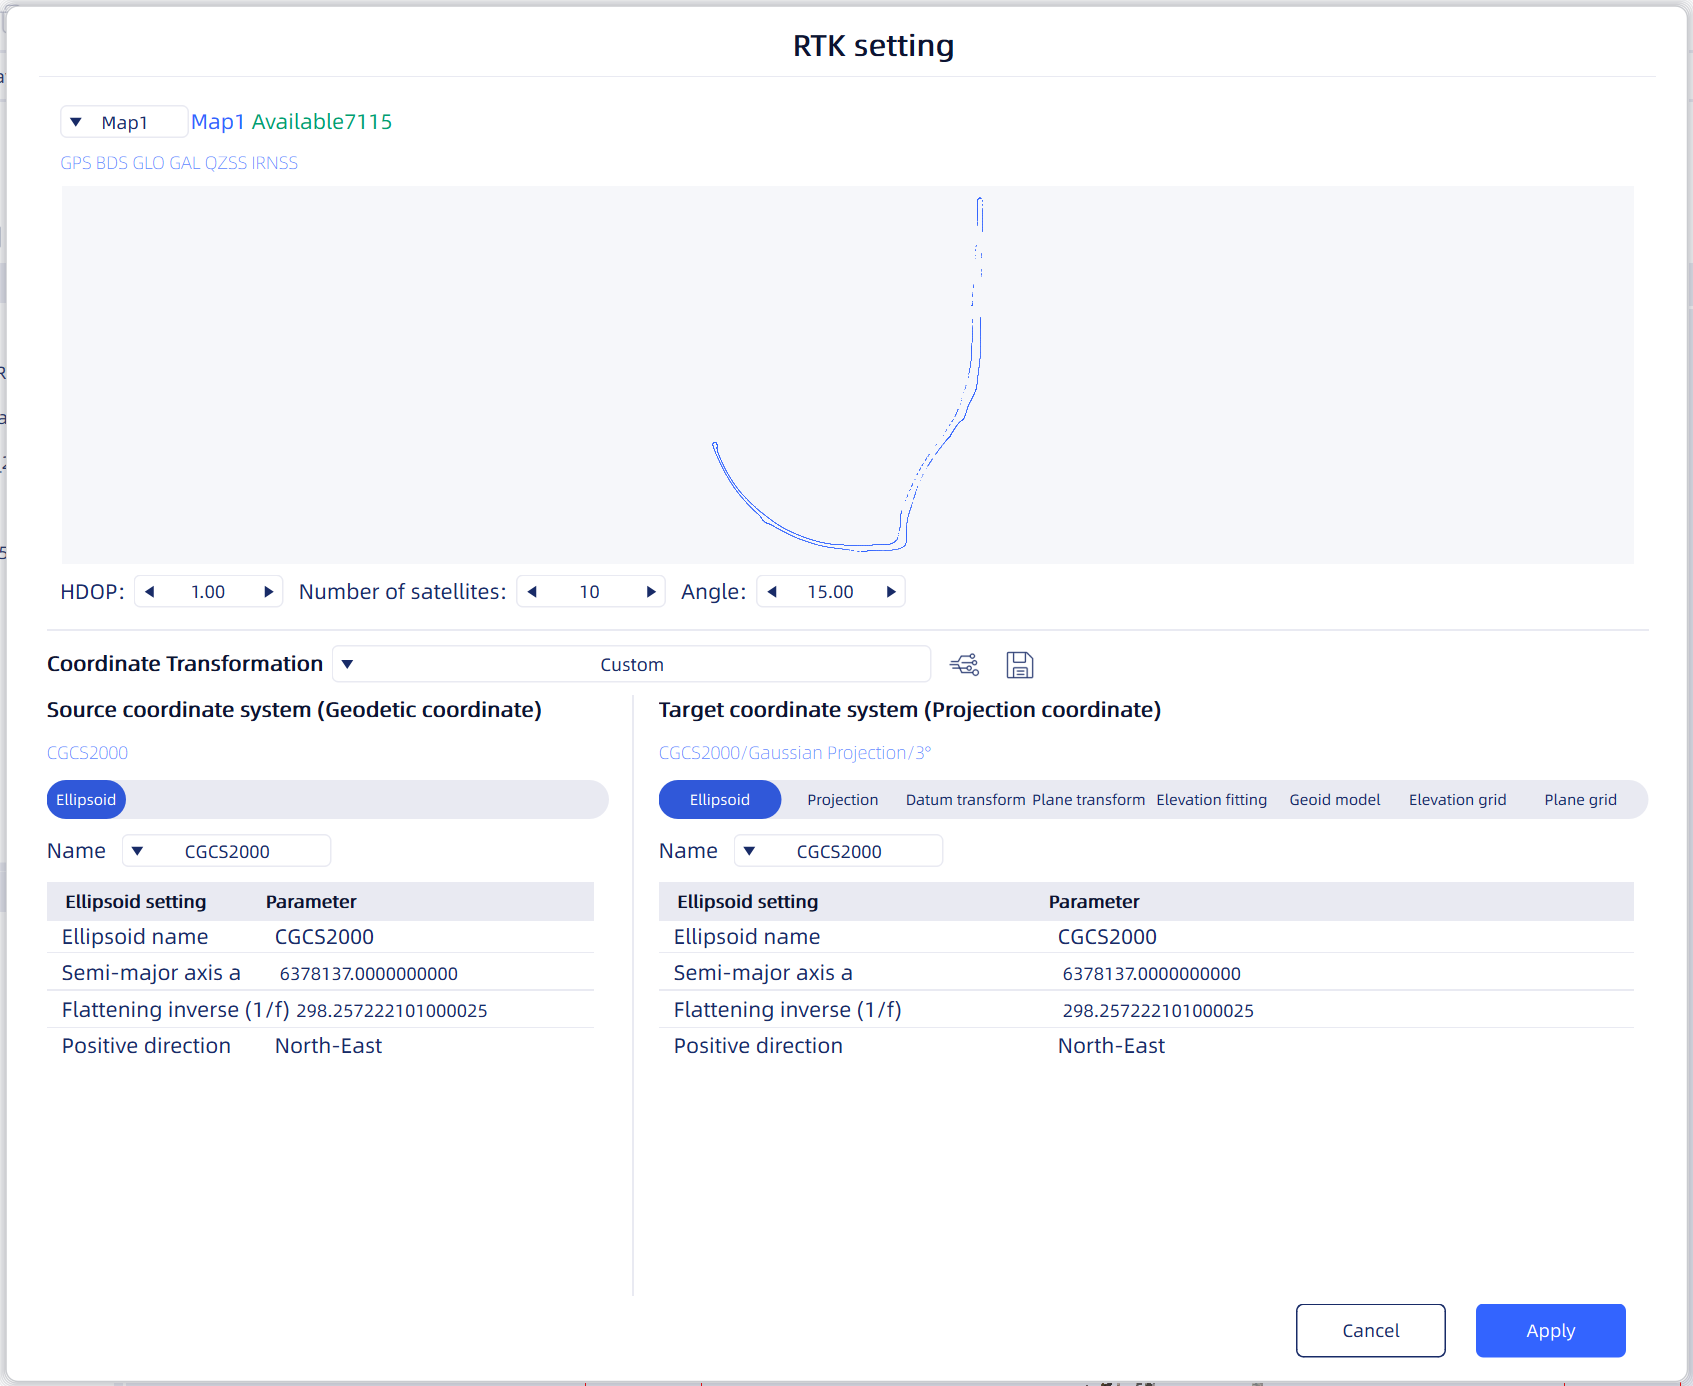
- If the parameters were set incorrectly during capture, you can change the option settings to those shown in the figure above during LixelStudio project processing, and change the tilt angle to 180°.
- Coordinate system setting: the coordinate system defaults to CGCS2000. Before project processing, confirm the coordinate system setting, otherwise the output absolute accuracy will be reduced.
- Once set, click Start and project processing begins automatically.