
Getting Started
Product Overview
LCC—Lixel CyberColor—is a real-world model rendering approach based on 3DGS technology. It combines LiDAR and visual data captured with XGRIDS devices for model reconstruction and rendering, producing highly detailed 3D models of real-world environments. Compared with mesh modeling and image-based modeling, 3DGS-like technologies provide better generation efficiency and results, and are currently popular across the global 3D industry and related sectors.
LCC has the following advantages over similar technologies on the market:
- SLAM-based 3DGS supports mobile capture of larger real-world spaces with greater capture efficiency.
- LiDAR data is captured and used in processing, resulting in more structurally accurate models and better visual results. This data can be used for measurement and other spatial-computing overlay applications.
- Fast generation speed (5 minutes of data currently takes 100–150 minutes to generate, a 1:20–1:30 ratio).
- Small data size (one-fifth the size of comparable data).
- Strong extensibility (measurement, annotation, editing, and further development are supported).
Lixel CyberColor Studio (hereinafter referred to as LCC Studio) is a local-PC 3D real-world modeling and rendering tool. It can import LiDAR and visual data captured with XGRIDS devices, automatically process it to generate high-quality 3DGS model outputs, and support management, editing, and publishing in the universal .ply format or the proprietary .lcc format. LCC Studio also provides extensive visualization and analysis tools, allowing outputs to be viewed locally or published as online links for sharing.
Core Feature Overview
- One-Click Generation: Import raw data captured with XGRIDS devices to automatically generate 3D model outputs in .lcc, .lcc2, .ply, .usd, or 3D Tiles format.
- Local Viewing and Navigation: Supports local viewing and first-person navigation of LCC, LCC2, PLY, and USD models.
- Online Publishing: Publish model outputs as web-viewing links with one click for convenient remote sharing and presentation.
- Format Export: Supports export in .lcc, .ply, .lcc2, .usd, and 3D Tiles formats, compatible with a variety of downstream workflows.
Practical Tools
- Measurement and Annotation: Supports model measurement and adding annotations. Annotations can include multimedia assets inside or outside the scene.
- Model Post-Processing: Supports post-processing tools such as model cropping and color adjustment.
- Asset Overlay: Supports importing external 3D assets in .fbx, .glb, .obj, and other formats to enhance models.
- Collision Experience: Supports generating models with physical collisions for immersive navigation and interaction.
- Snapshots and Recording: Supports snapshots and rendering navigation videos to assist presentations and reports.
- Viewpoints and Reports: Supports adding viewpoints to guide users through specified areas, and generating scene reports to present and summarize related content.
Featured Capabilities
- Map Fusion: Supports stitching multiple segments of ground data. Overlapping areas are automatically recognized to enable unified reconstruction of large-scale models.
- Aerial-Ground Fusion: Combines drone imagery with ground scan data to seamlessly connect aerial and ground perspectives. Suitable for large, complex model reconstruction of building clusters, campuses, scenic areas, and more.
- HD Enhancement: Supports importing high-definition images taken with DSLR cameras or smartphones to improve detail restoration and texture quality in key areas. Suitable for detailed reconstruction of priority areas.
- Intelligent Spatial Recognition: For indoor scan data, automatically extracts spatial structures and building components to quickly generate structured, intelligent floor plan outputs. Suitable for spatial analysis, BIM modeling, and more.
- Aerial Reconstruction: Supports 3DGS reconstruction of ultra-large models from drone aerial photographs alone, without capture data from ground devices.
Core Workflow Overview
Download and Installation
Obtain the software installation package through the official download link: https://xgrids.com/intl/support/download
LCC Studio uses a full .iso installation package, which supports offline installation of all LCC functional modules.
Recommended Configuration
- CPU: 12th Gen Intel i9
- GPU: RTX 3070 or higher
- RAM: 64 GB or more
- For details about other configurations, see Download and Installation—System Requirements—Reconstruction Configuration Reference.
Registration and Authorization
- Free Edition: Register and sign in to use the free edition features.
- Premium Edition: After registering and signing in, contact Sales to obtain an account authorization code. Once the code takes effect, Premium Edition features are enabled for the account.
- Premium Edition features include: all Free Edition features, Map Fusion, Aerial Reconstruction, Aerial-Ground Fusion, HD Enhancement, Intelligent Spatial Recognition, and export to .lcc, .lcc2, .ply, .usd, and 3D Tiles formats.
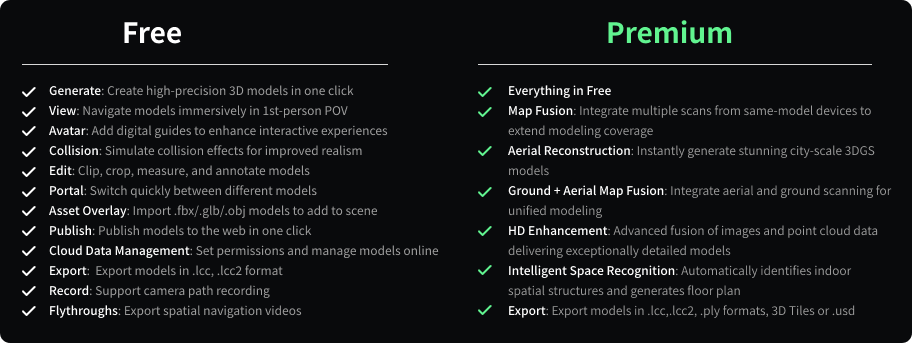
LCC Free and Premium Edition comparison
Data Capture
Before using LCC Studio for 3D spatial reconstruction, you must first use an XGRIDS scanner to comprehensively scan the space.
Note: Because LCC Studio includes Map Fusion and Aerial-Ground Fusion, data capture is subject to specific requirements. When scanning, strictly follow the capture guide to ensure that your data meets the requirements. RTK data capture also has additional considerations to ensure scan-data quality and suitability. Refer to the relevant capture guide and quick start guide for detailed instructions.
- Capture Guide: LCC Capture Guide (PDF)
- LCC Quick Start Guide video: https://xgrids.com/intl/support/tutorials?page=LCCStudio
Reconstruction (Local/Cloud)
On the My Models page, click Create, select the target reconstruction type, upload the capture data according to the page requirements and parameters, and click Start to begin model reconstruction.
Note: Before using LCC Studio for data reconstruction, we strongly recommend that you first set the project storage path and capture data backup path. Keep the LCC data storage location separate from the software installation directory. We recommend setting the storage path to a solid-state drive (SSD), which can significantly improve data generation and processing efficiency.
- Set the LCC project path: Settings - General - Project Path - Select Directory
- Set the LCC capture data backup path: Settings - General - Capture Data Backup Path - Select Directory
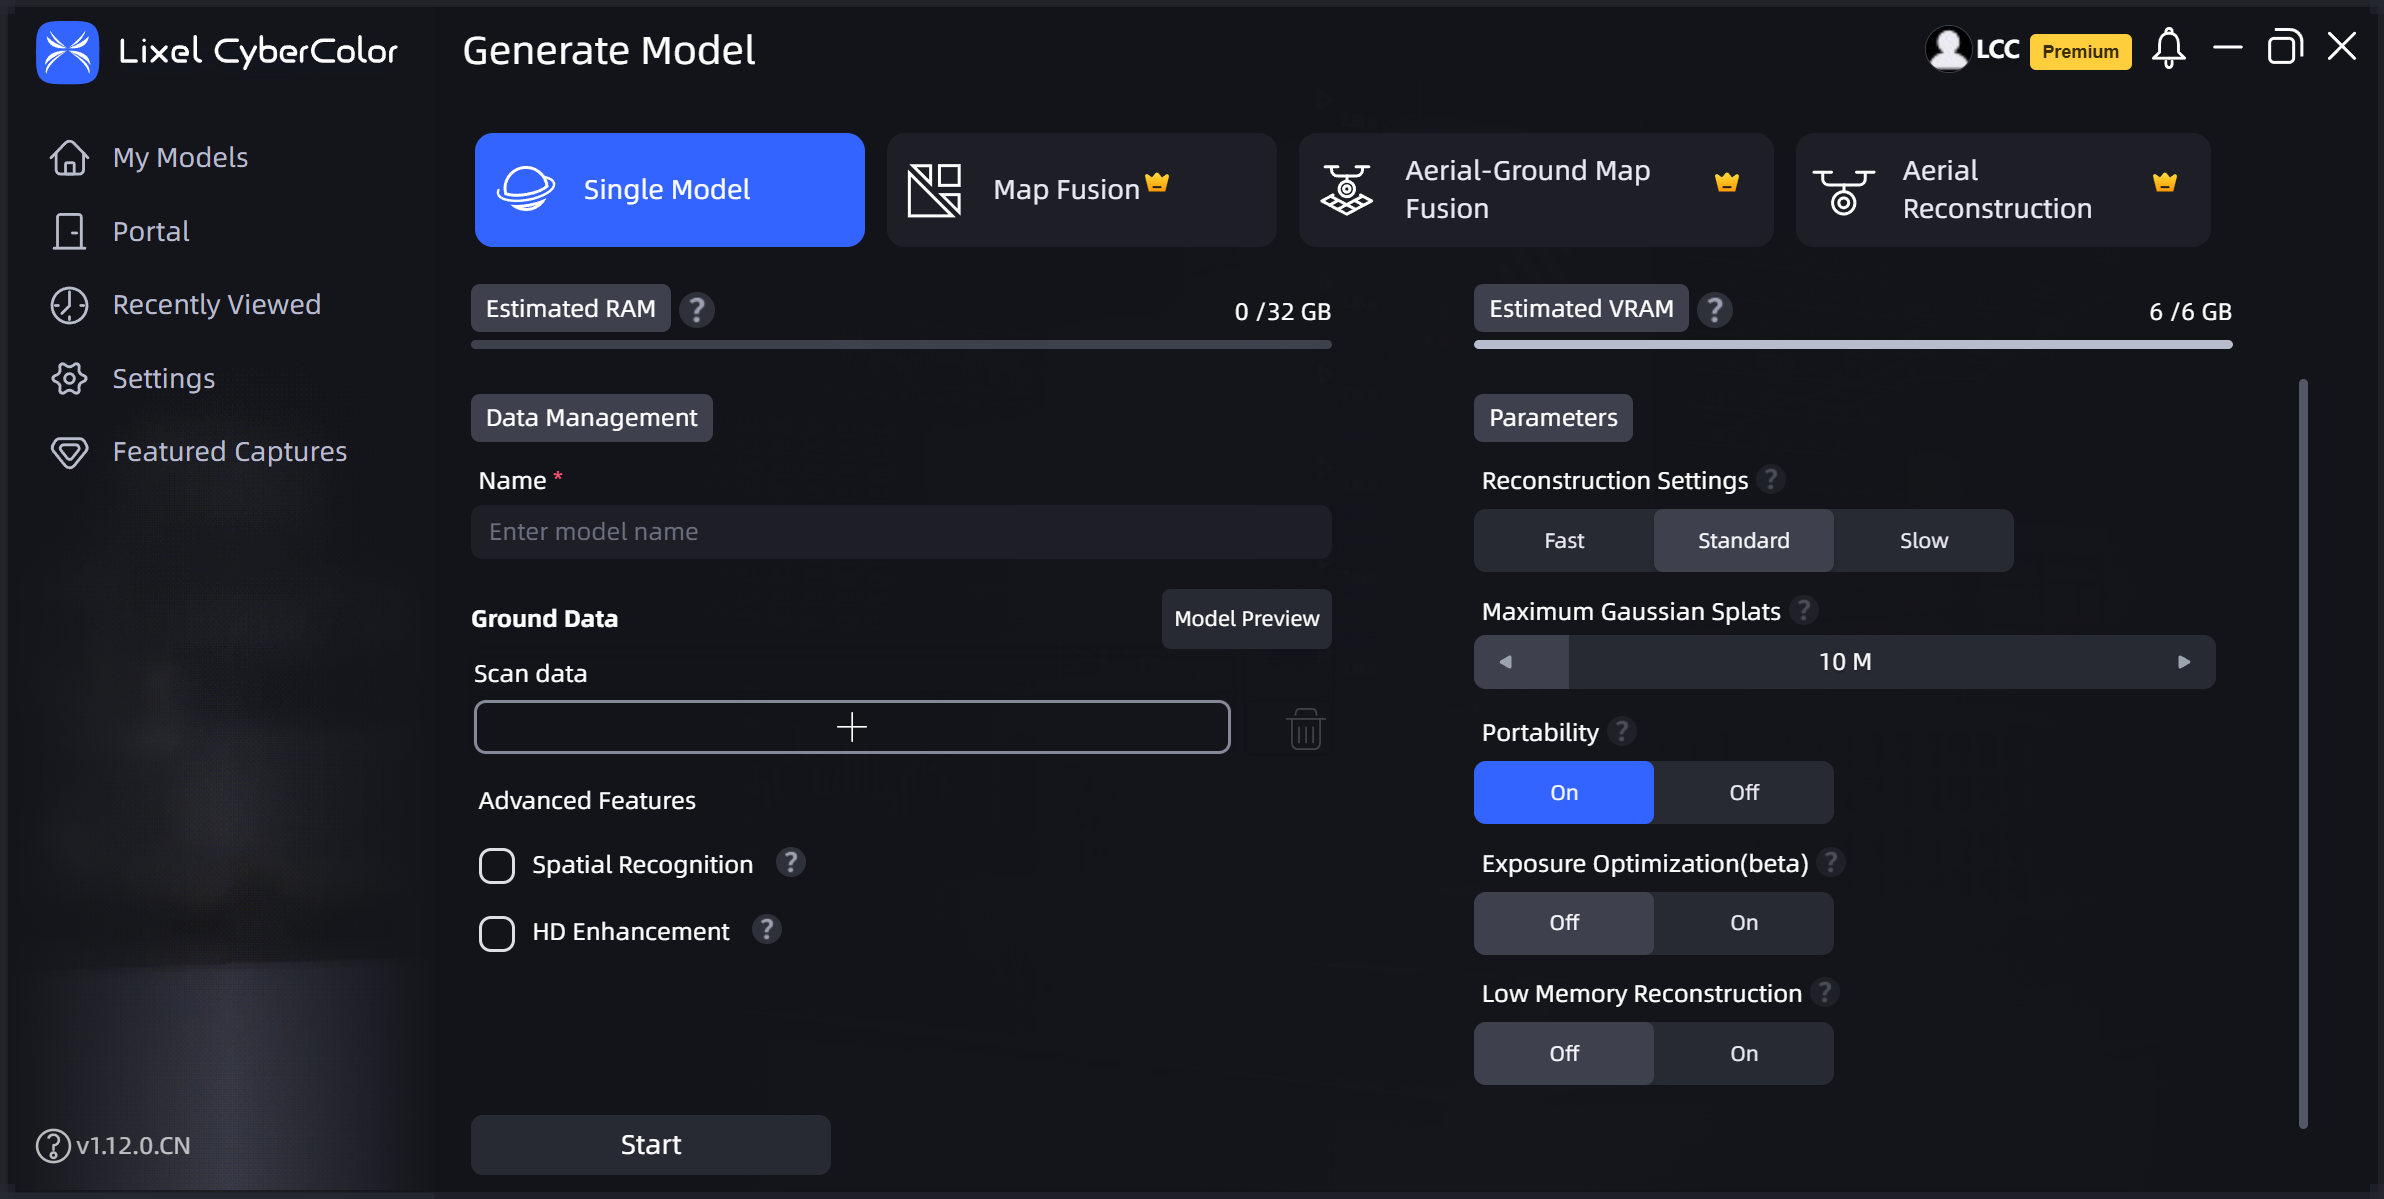
Create
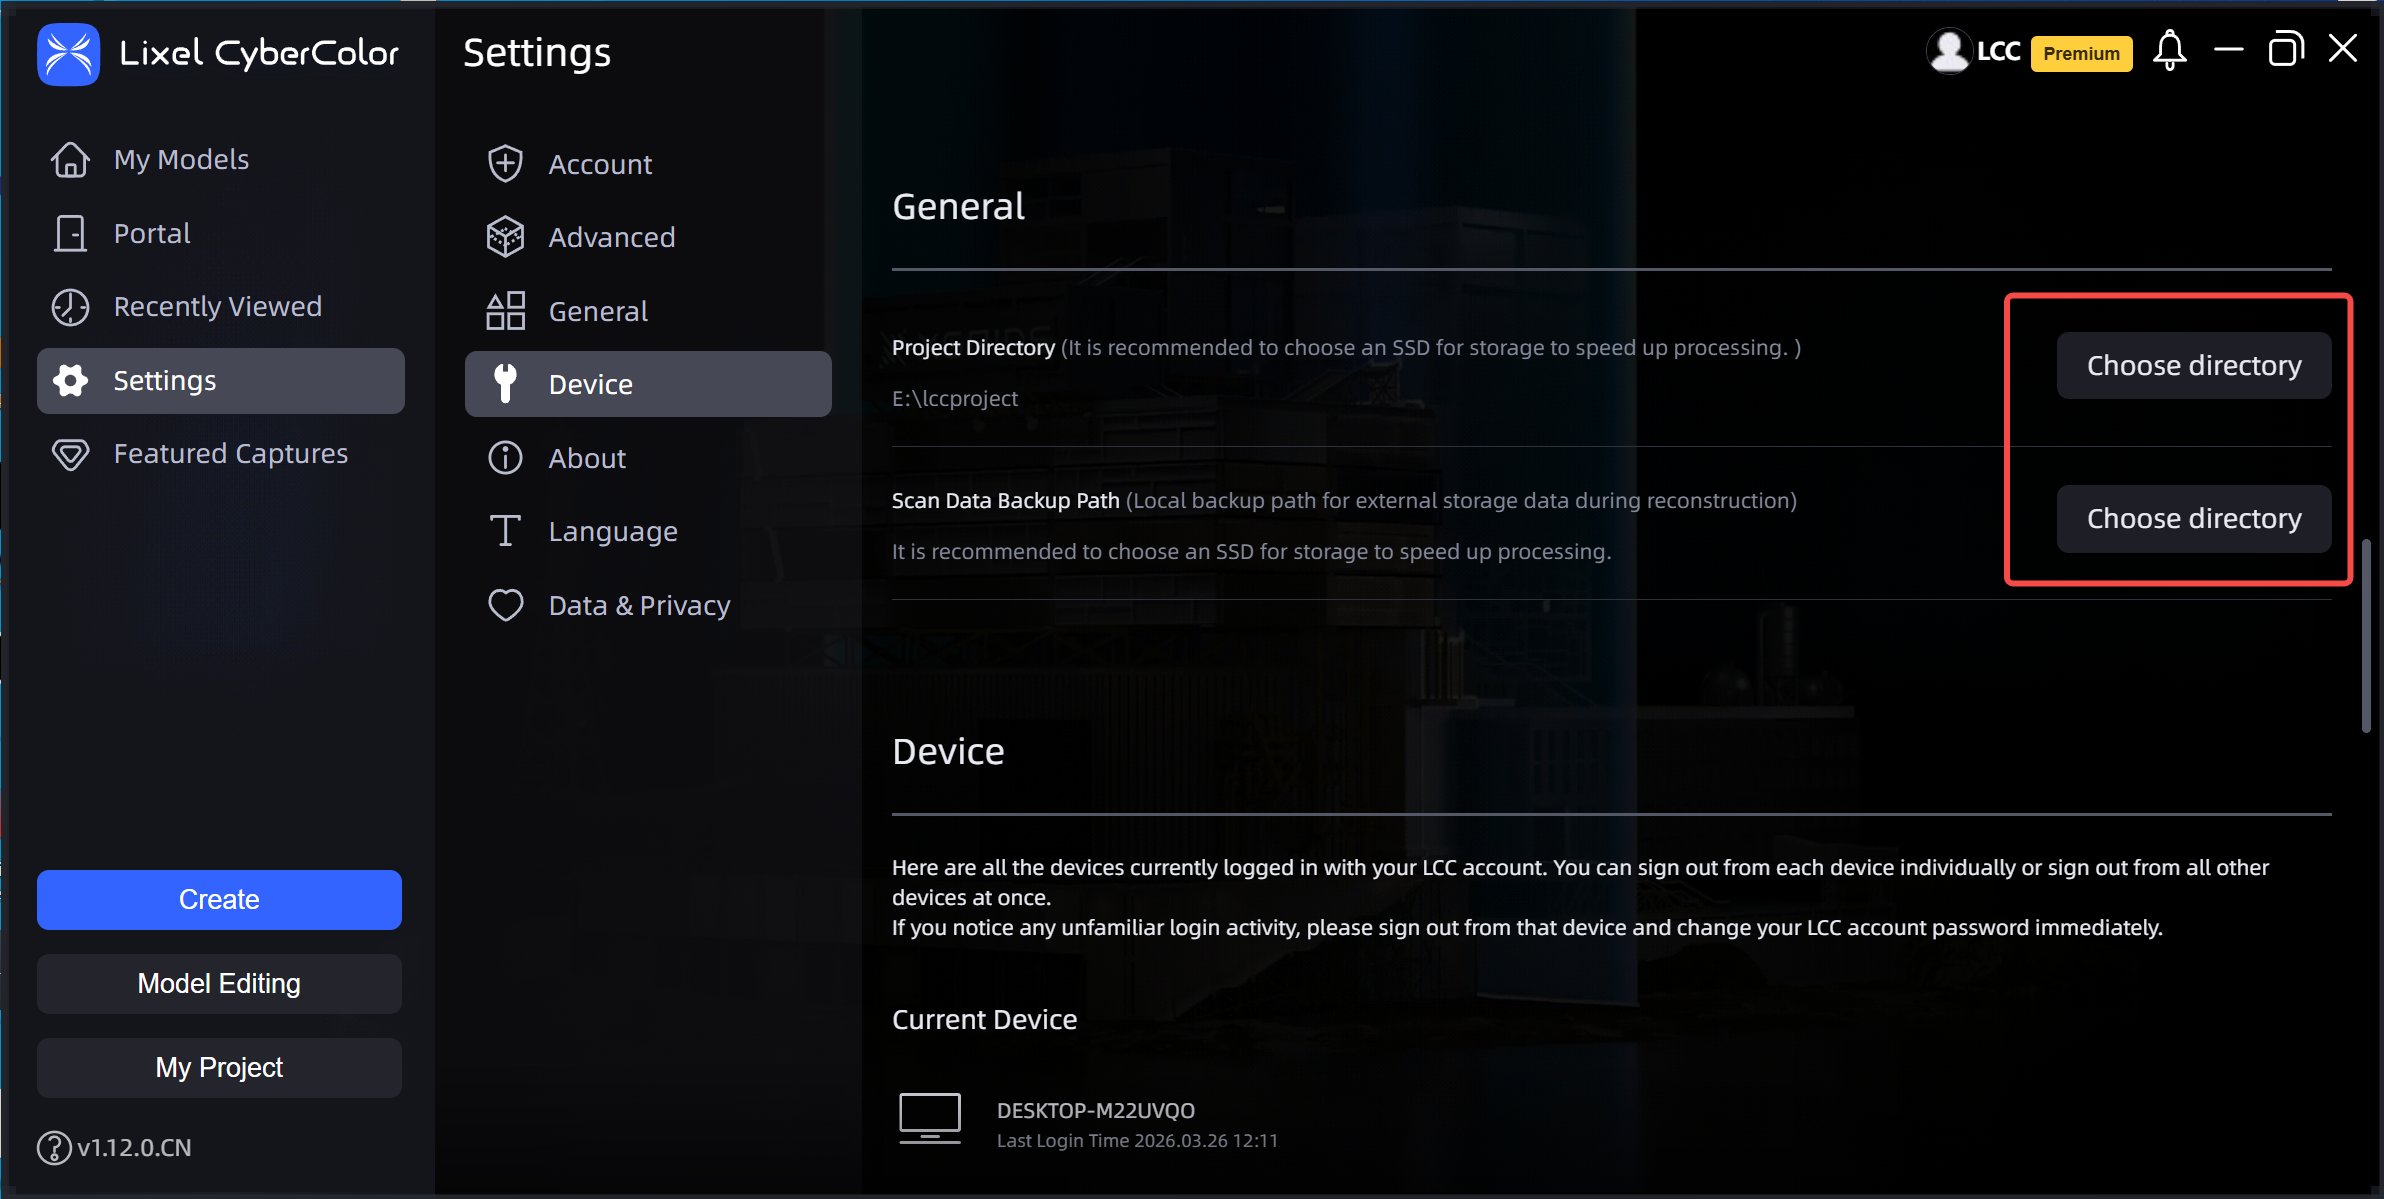
Set the LCC project path
Export
Select a completed model card, click ... in the upper-right corner of the card, select Export, follow the dialog instructions, select the model format to export, and click Confirm to export the model.
The following formats are currently supported: .lcc and .lcc2 result files, .ply data files, .usd, and 3D Tiles.
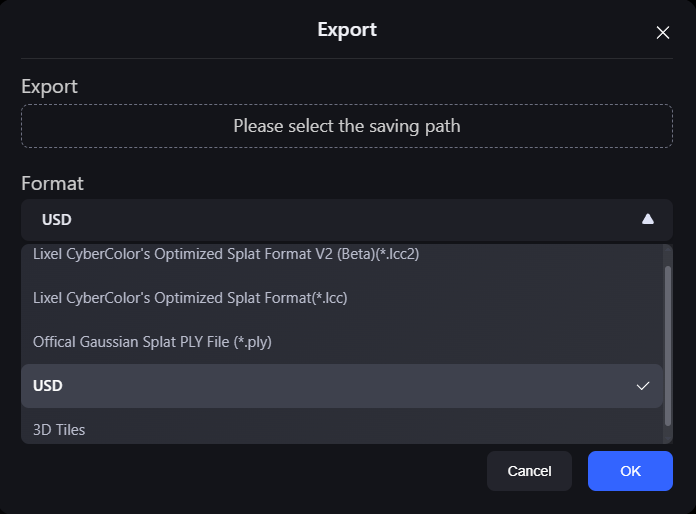
Export
Editing
After model reconstruction is complete, double-click the model card to enter LCC Scene Editor and begin editing tasks or view the model.
Shortcut Keys for Three Navigation Modes
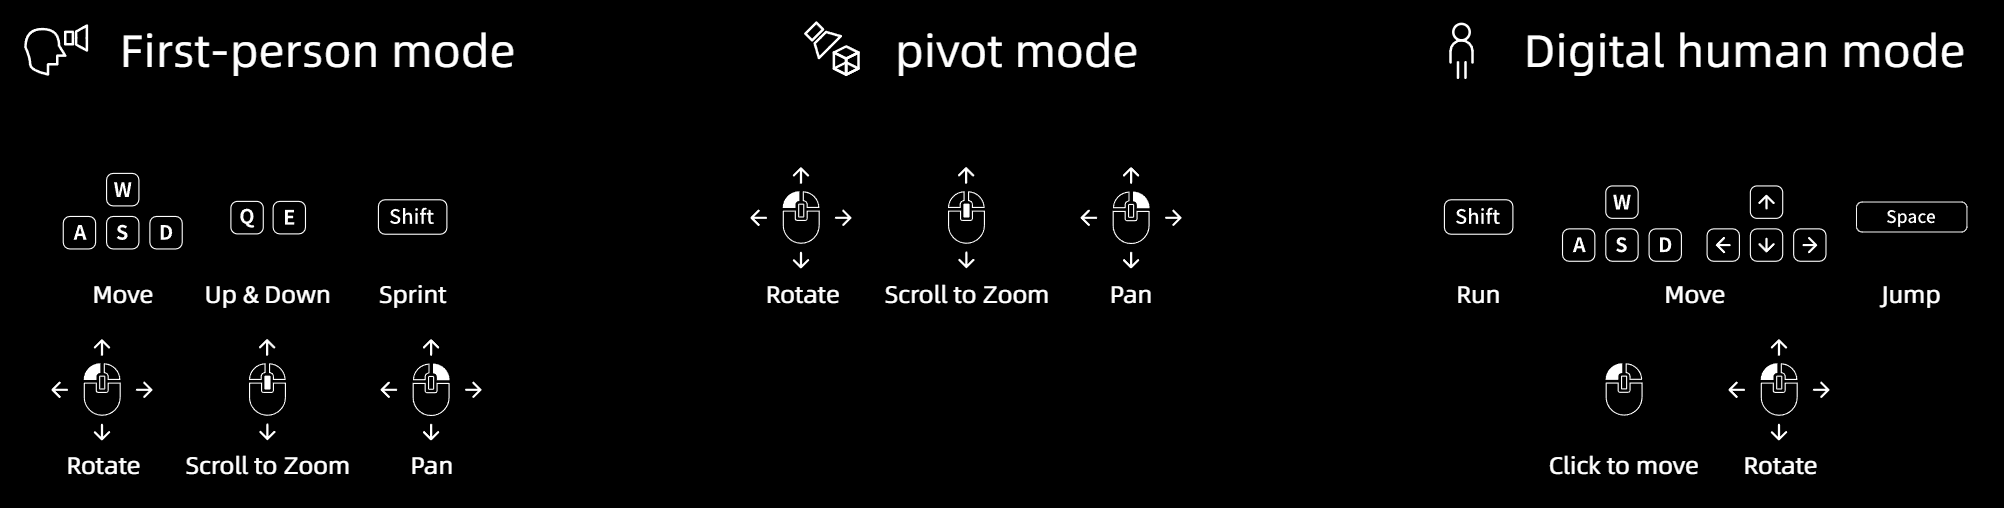
Shortcut keys
| Command | Description |
|---|---|
| First-Person Mode | |
| W / A / S / D / Q / E | Move forward / left / backward / right / down / up |
| Shift | Move faster |
| Mouse scroll wheel | Adjust movement speed |
| Drag with the left mouse button | Rotate the view |
| Drag with the right mouse button | Pan the view |
| Avatar Mode | |
| Space | Jump |
| Left-click | Move to the selected location |
Click a tool in the left toolbar to edit the model.
After editing, switch to View mode in the upper-right corner of the menu bar to review the edited content.
Publish (Share)
Click Menu Bar - File - Publish, configure the publishing options, and click Share to publish the edited project to the cloud.
Share a published model:
On the Editor home page, find the published project, click the link icon at the lower right of its card, and copy the project link to share it with other users.
View a published model online:
Click the hidden menu in the upper-right corner of the project card, then click View Online to open the link in a browser.
Manage published models:
Click the hidden menu in the upper-right corner of the project card, then click Publish Management to go to the cloud publishing data-management page, where you can manage all links published under the account.