
FAQ
This chapter applies only to the latest PortalCam adapter bracket and the K2 / L2 Pro folding U-shaped bracket. The sliding-thread, ball-head interference, and L2 Pro old-bracket interference issues have been removed from the current version.
Usage principle
If you find the bracket loose, the slot damaged, the hinge unable to lock, or the light body visibly wobbling, stop using it immediately. Do not try to fix problems by adding glue, reaming holes, prying the slot, or removing the body screws.
Bracket is not secure; the Stick Light tilts or rotates
High-risk issue
The K2 / L2 Pro body has only one 1/4-inch threaded hole in the middle, and single-point fixing is not enough to stabilize the whole lighting bracket assembly. If the light clearly tilts or can rotate, stop capturing immediately and re-secure it.
Applies to: All supported devices (especially K2 / L2 Pro)
Possible causes:
- The 1/4-inch thread on the bottom of the light body or on the bracket is not fully tightened.
- The body has only one threaded hole in the middle, and single-point fixing cannot restrain the rotation of the whole assembly.
- The friction on the mating surface is insufficient, so it shifts under load.
Solution:
- Hold the light body, then realign and retighten the 1/4-inch thread.
- Add the supplied base screw rubber pads to the mating surface to increase friction.
- If it can still rotate, insert a tool into the bracket screw and turn it to reinforce.
- After reinforcing, push the light body gently to recheck, and start capturing only after confirming there is no relative movement.
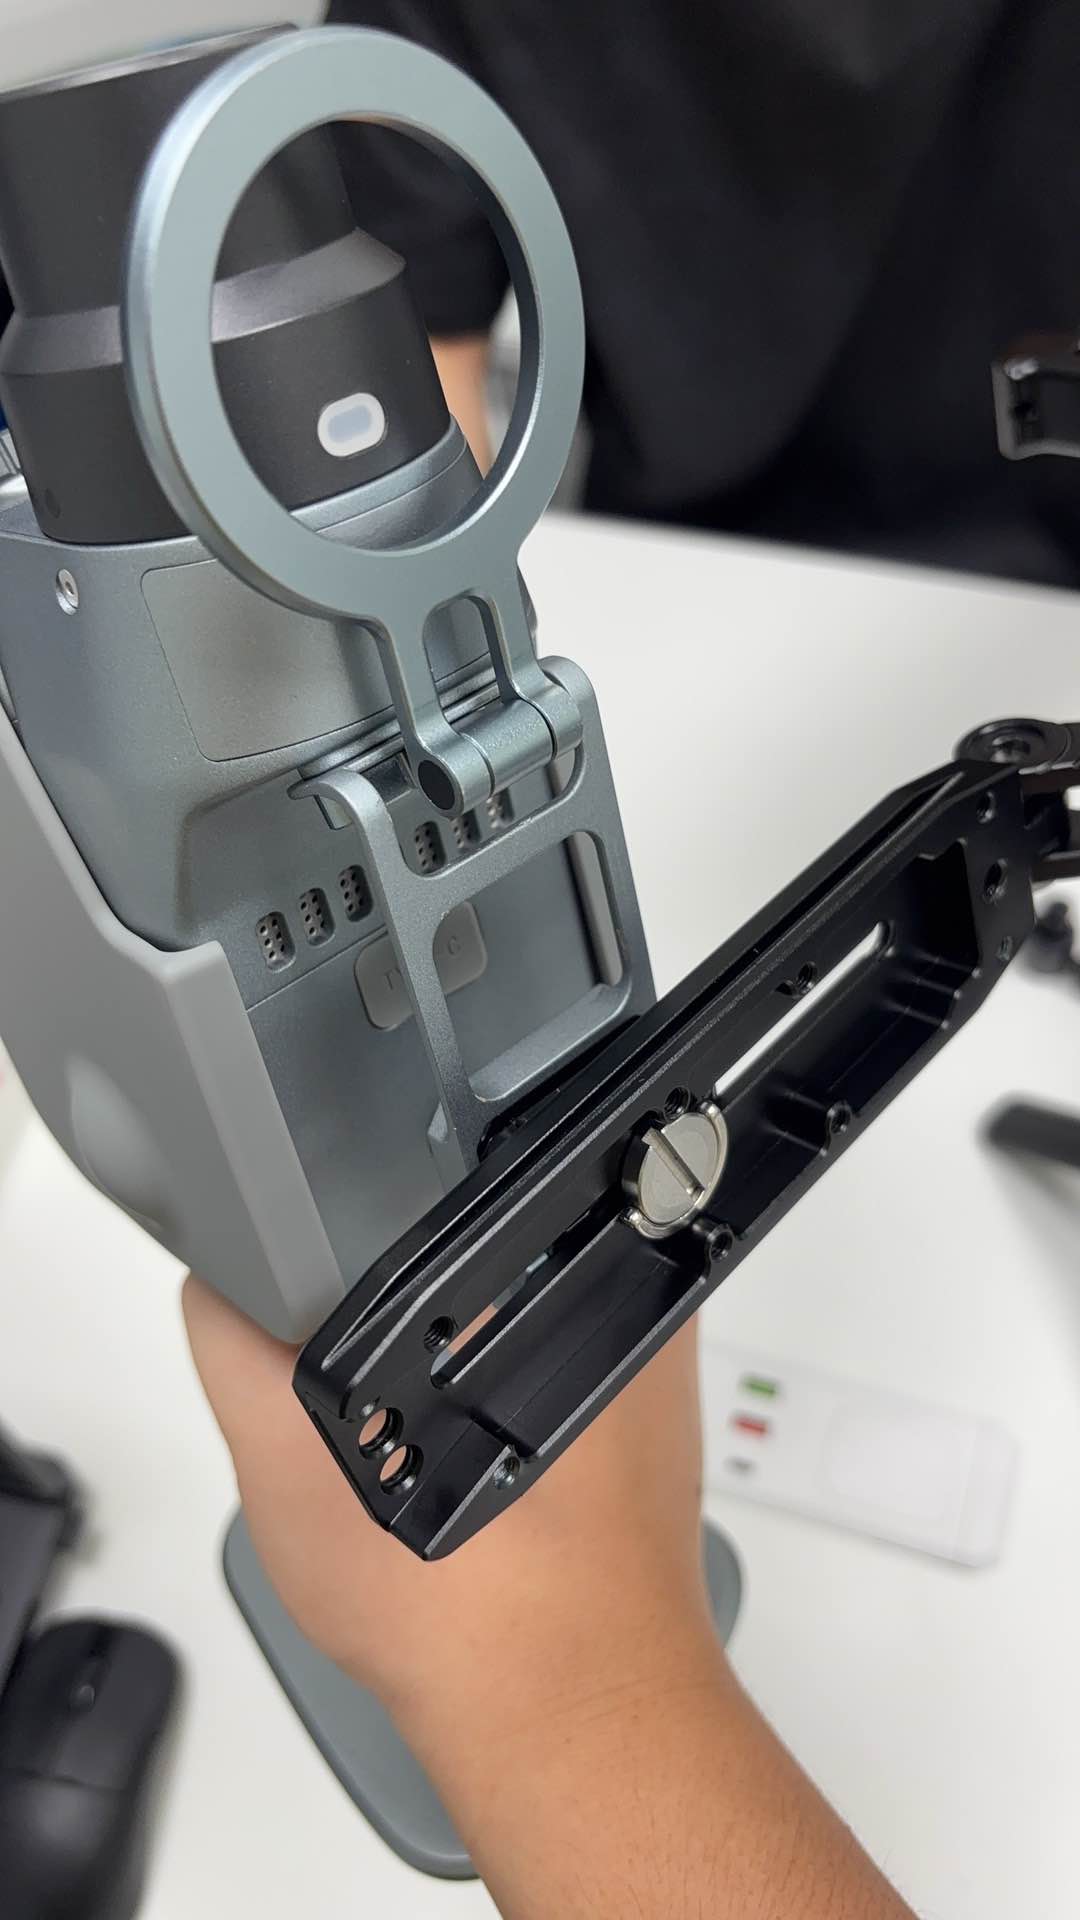
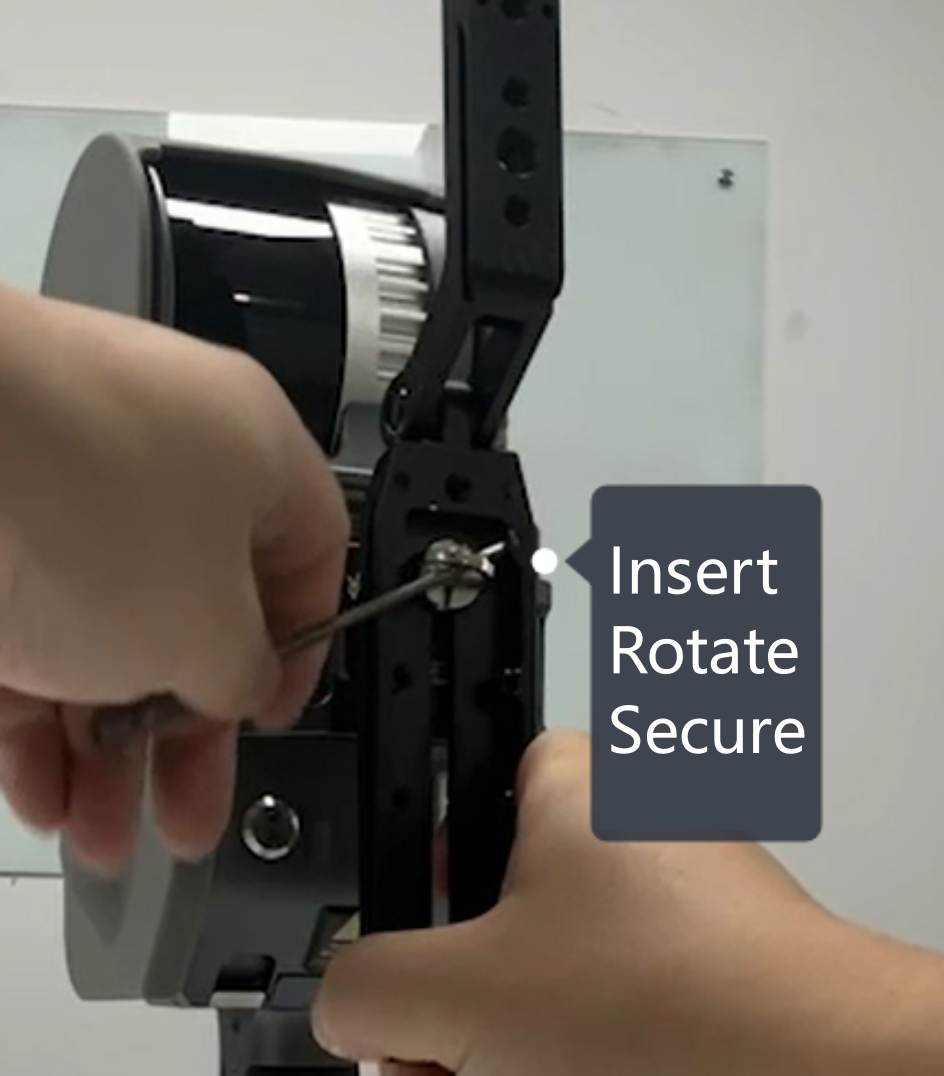
Temporary measure
Reinforcing with a tool is a temporary measure. If looseness or tilting still occurs after reinforcing, stop using it and contact the product owner. Do not fix it by adding glue or reaming holes.
The U-shaped bracket will not slide into the body slot
Applies to: Lixel K2, Lixel L2 Pro
Possible causes: The bracket orientation is wrong, the rail is not parallel with the slot, there are foreign objects in the slot, or a mismatched bracket is used.
Solution:
- Confirm the bracket matches the device model.
- Clean the rail and body slot.
- Keep the rail parallel with the slot and push straight up in the direction of the arrow in the installation image.
- If it still will not slot in, stop installing and contact the product owner; do not insert at an angle or pry.
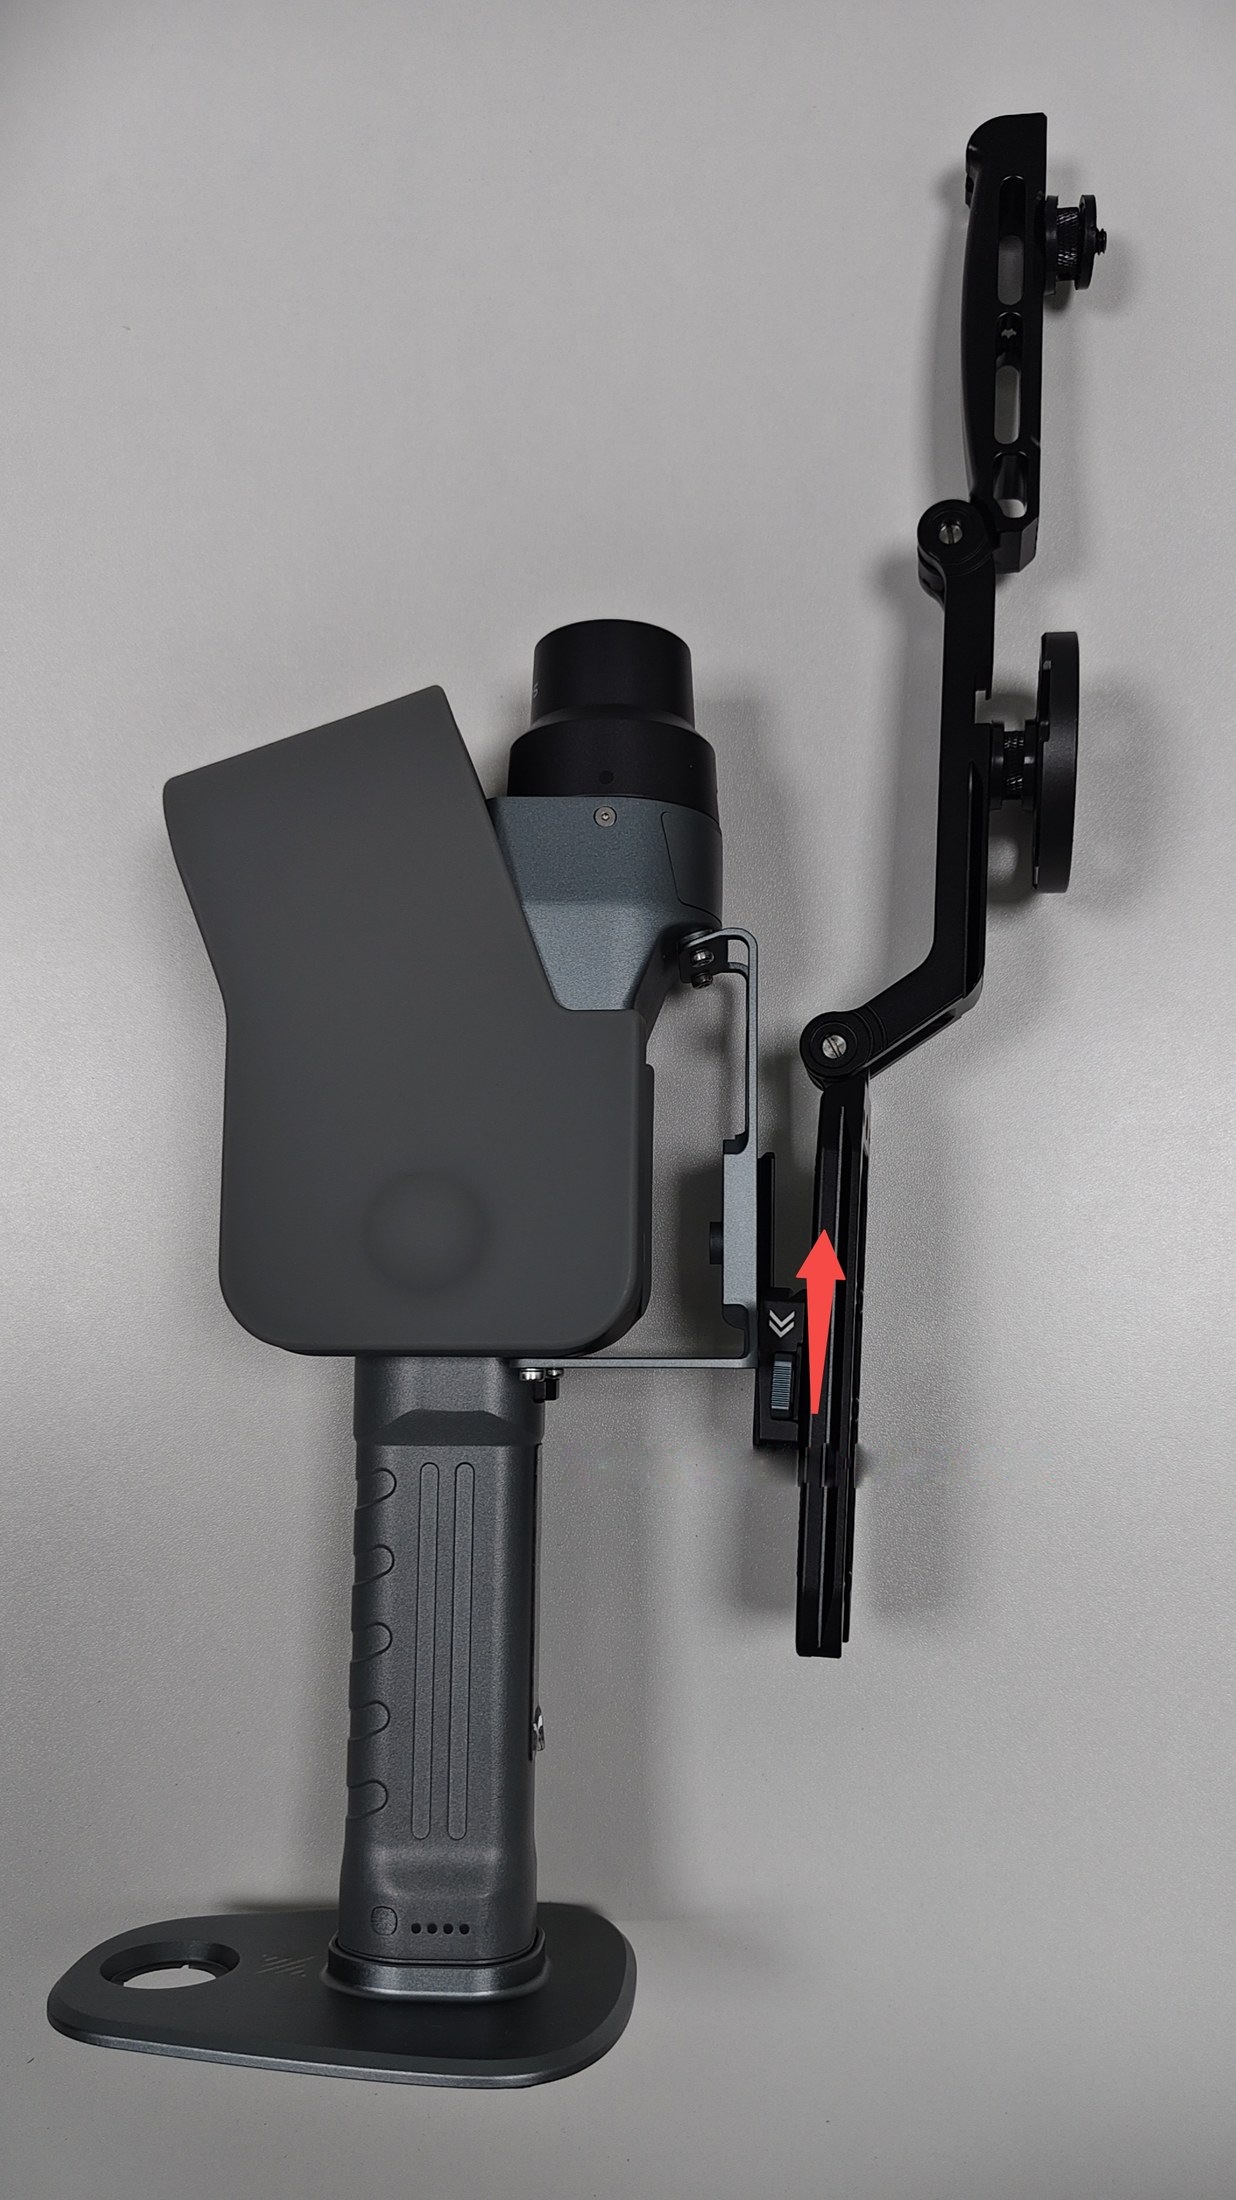
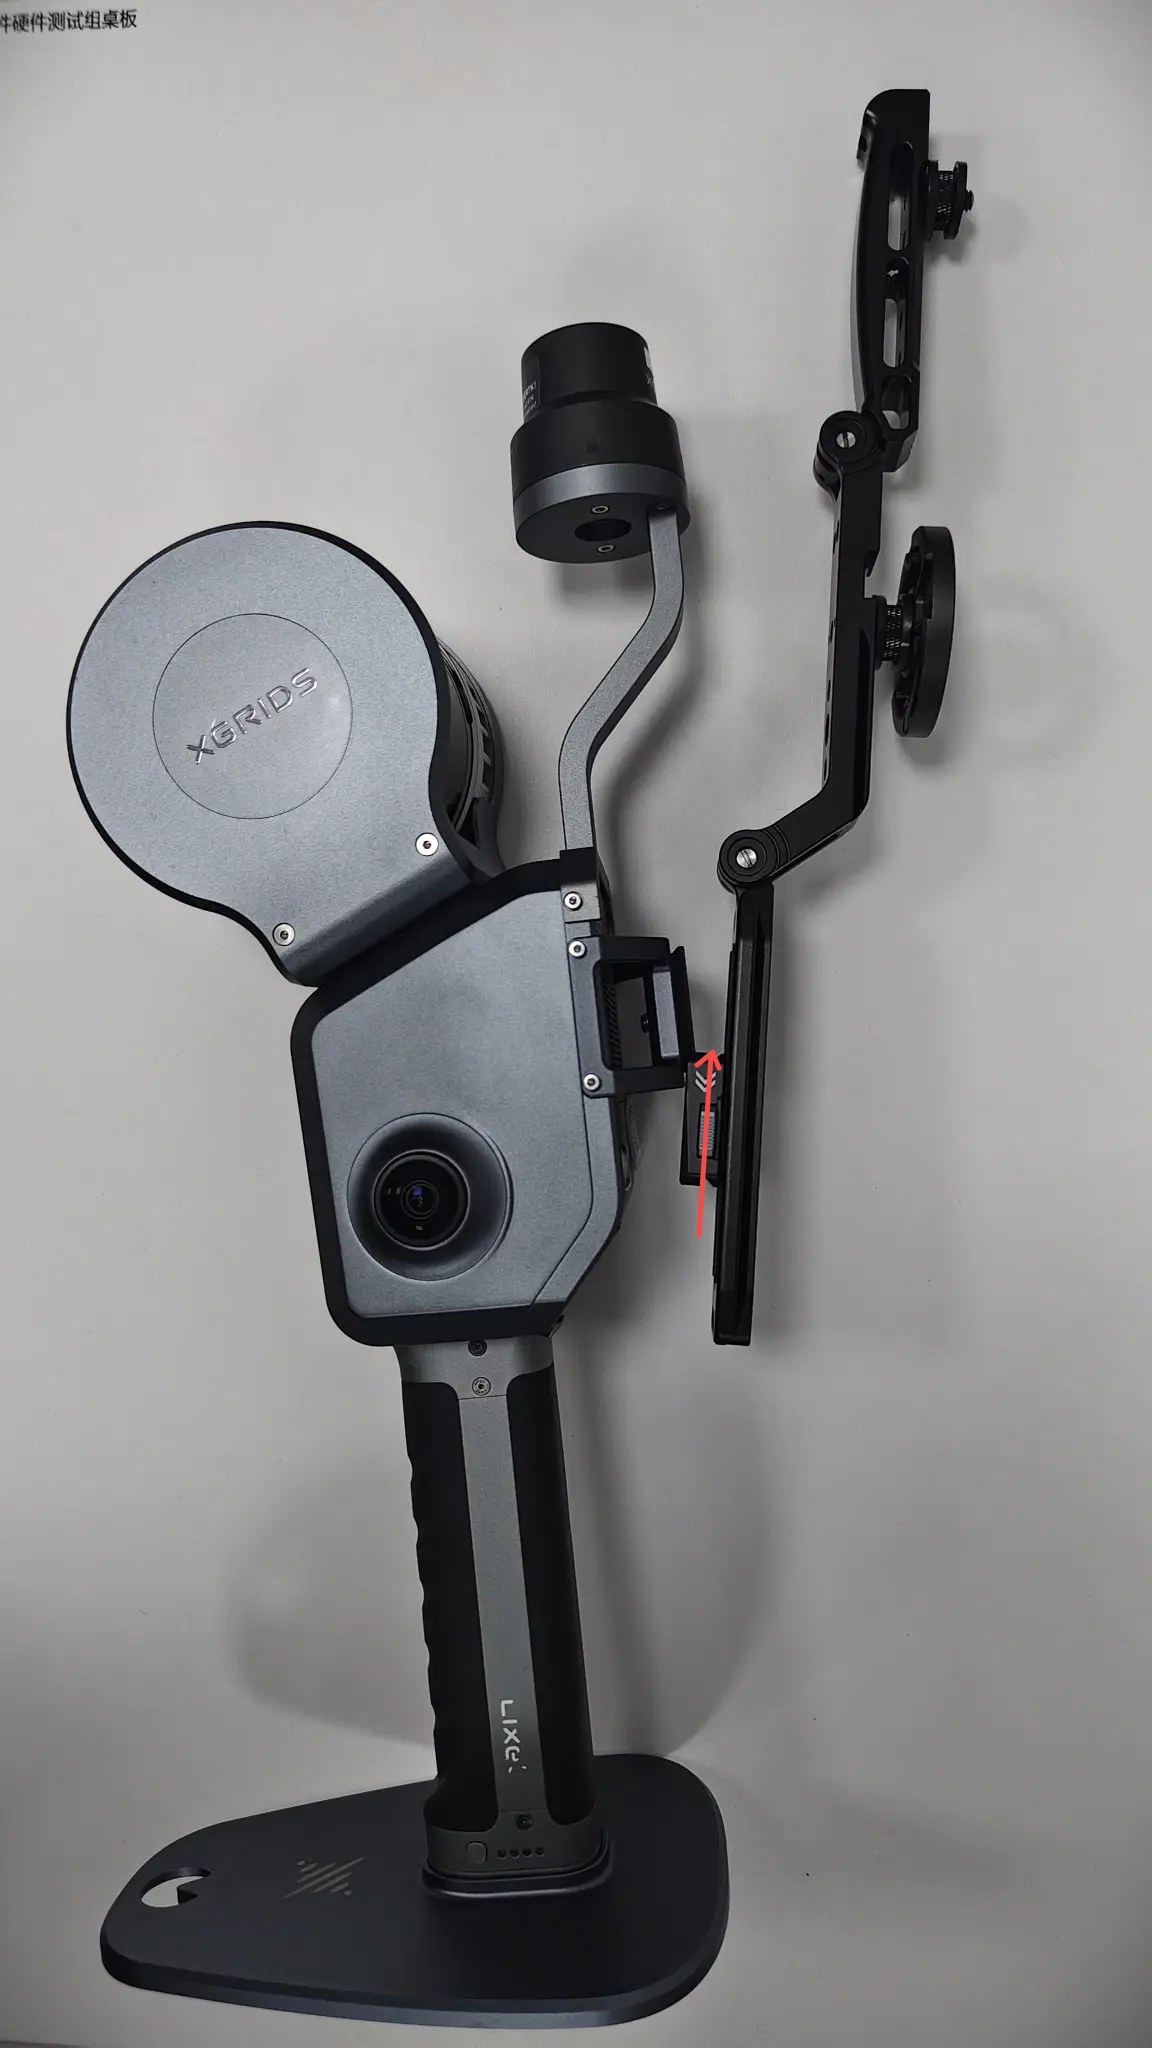
Lixel L2 Pro bracket interferes with the U-shaped metal part on the body
Applies to: Lixel L2 Pro
Possible cause: The U-shaped metal part on the body occupies the space needed by the folding U-shaped bracket. If it is not removed, the bracket cannot slide into the slot or seat properly.
Solution:
- Turn off the device and the Stick Light, and place the device on a stable surface.
- Use the supplied hex tool to remove the two screws of the U-shaped metal part and take the part off.
- Slide the folding U-shaped bracket back into the body slot as described in the Installation Guide.
- After removing the Stick Light, reinstall the U-shaped metal part and the two screws as they were.
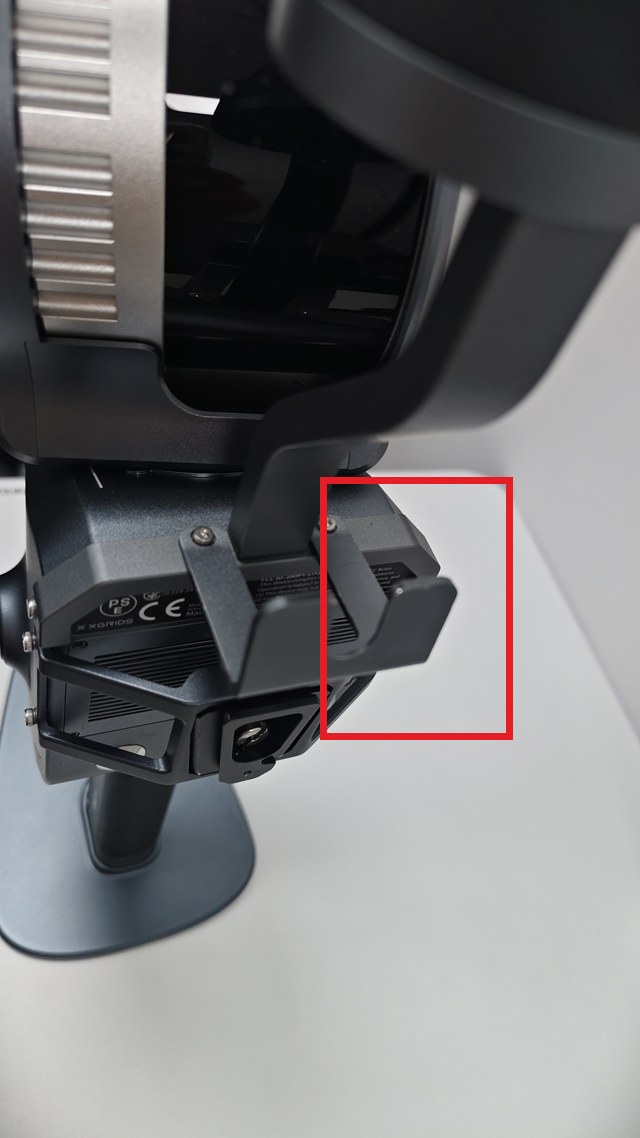
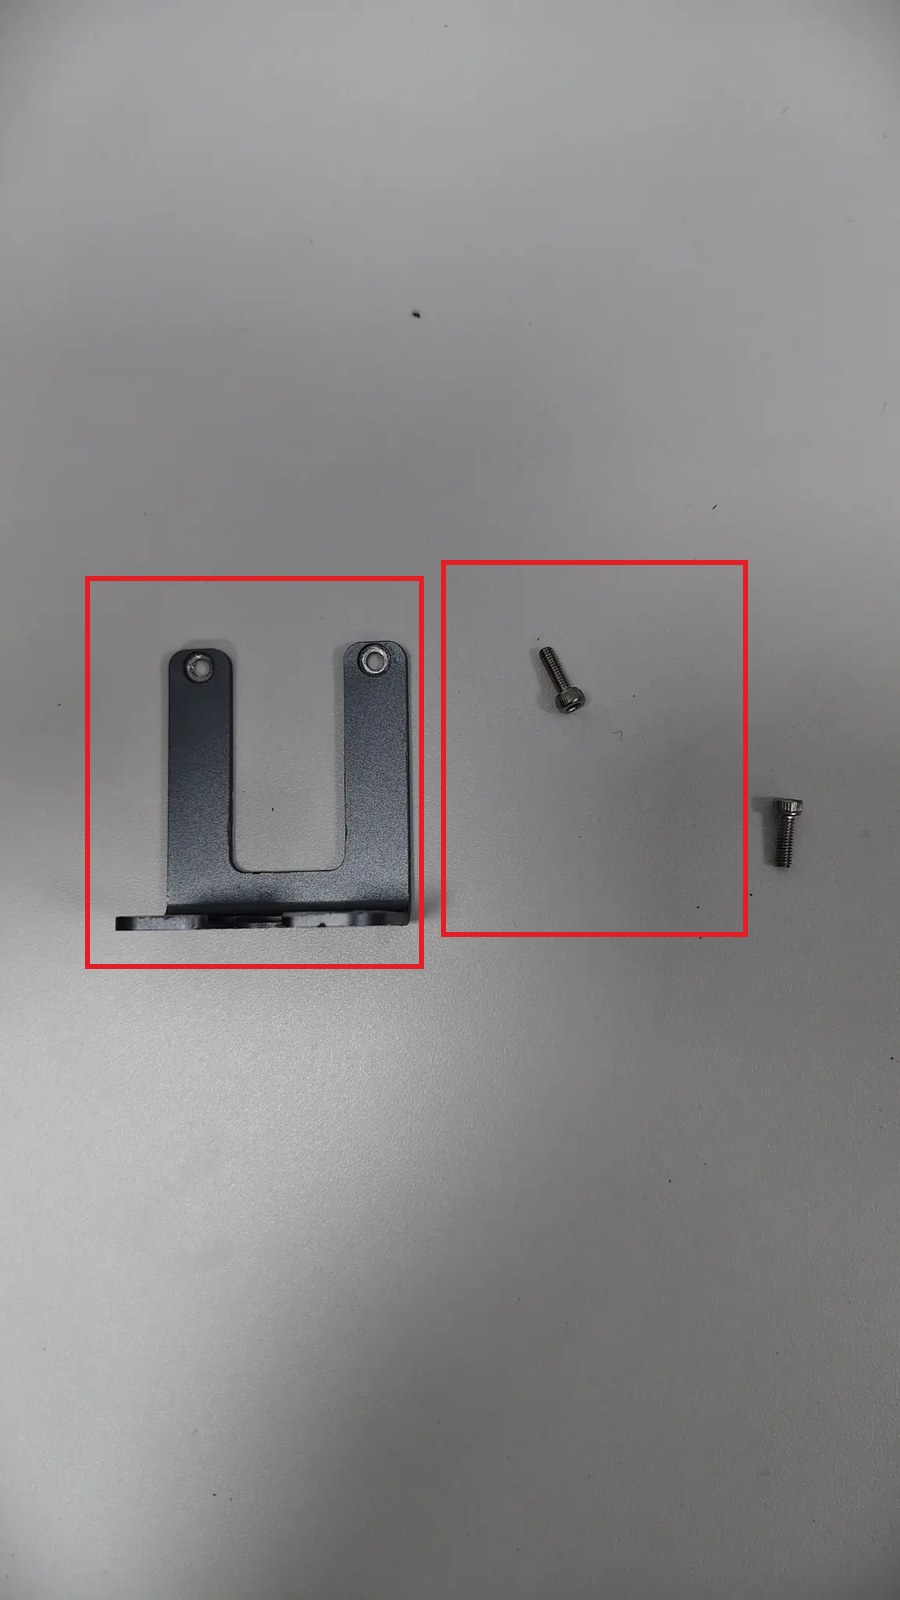
Store separately
Store the screws and the metal part separately. Hold the device steady when removing the screws to avoid dropping them into the gaps of the body.
The bracket hinge is very tight or cannot be adjusted
Applies to: Lixel K2, Lixel L2 Pro
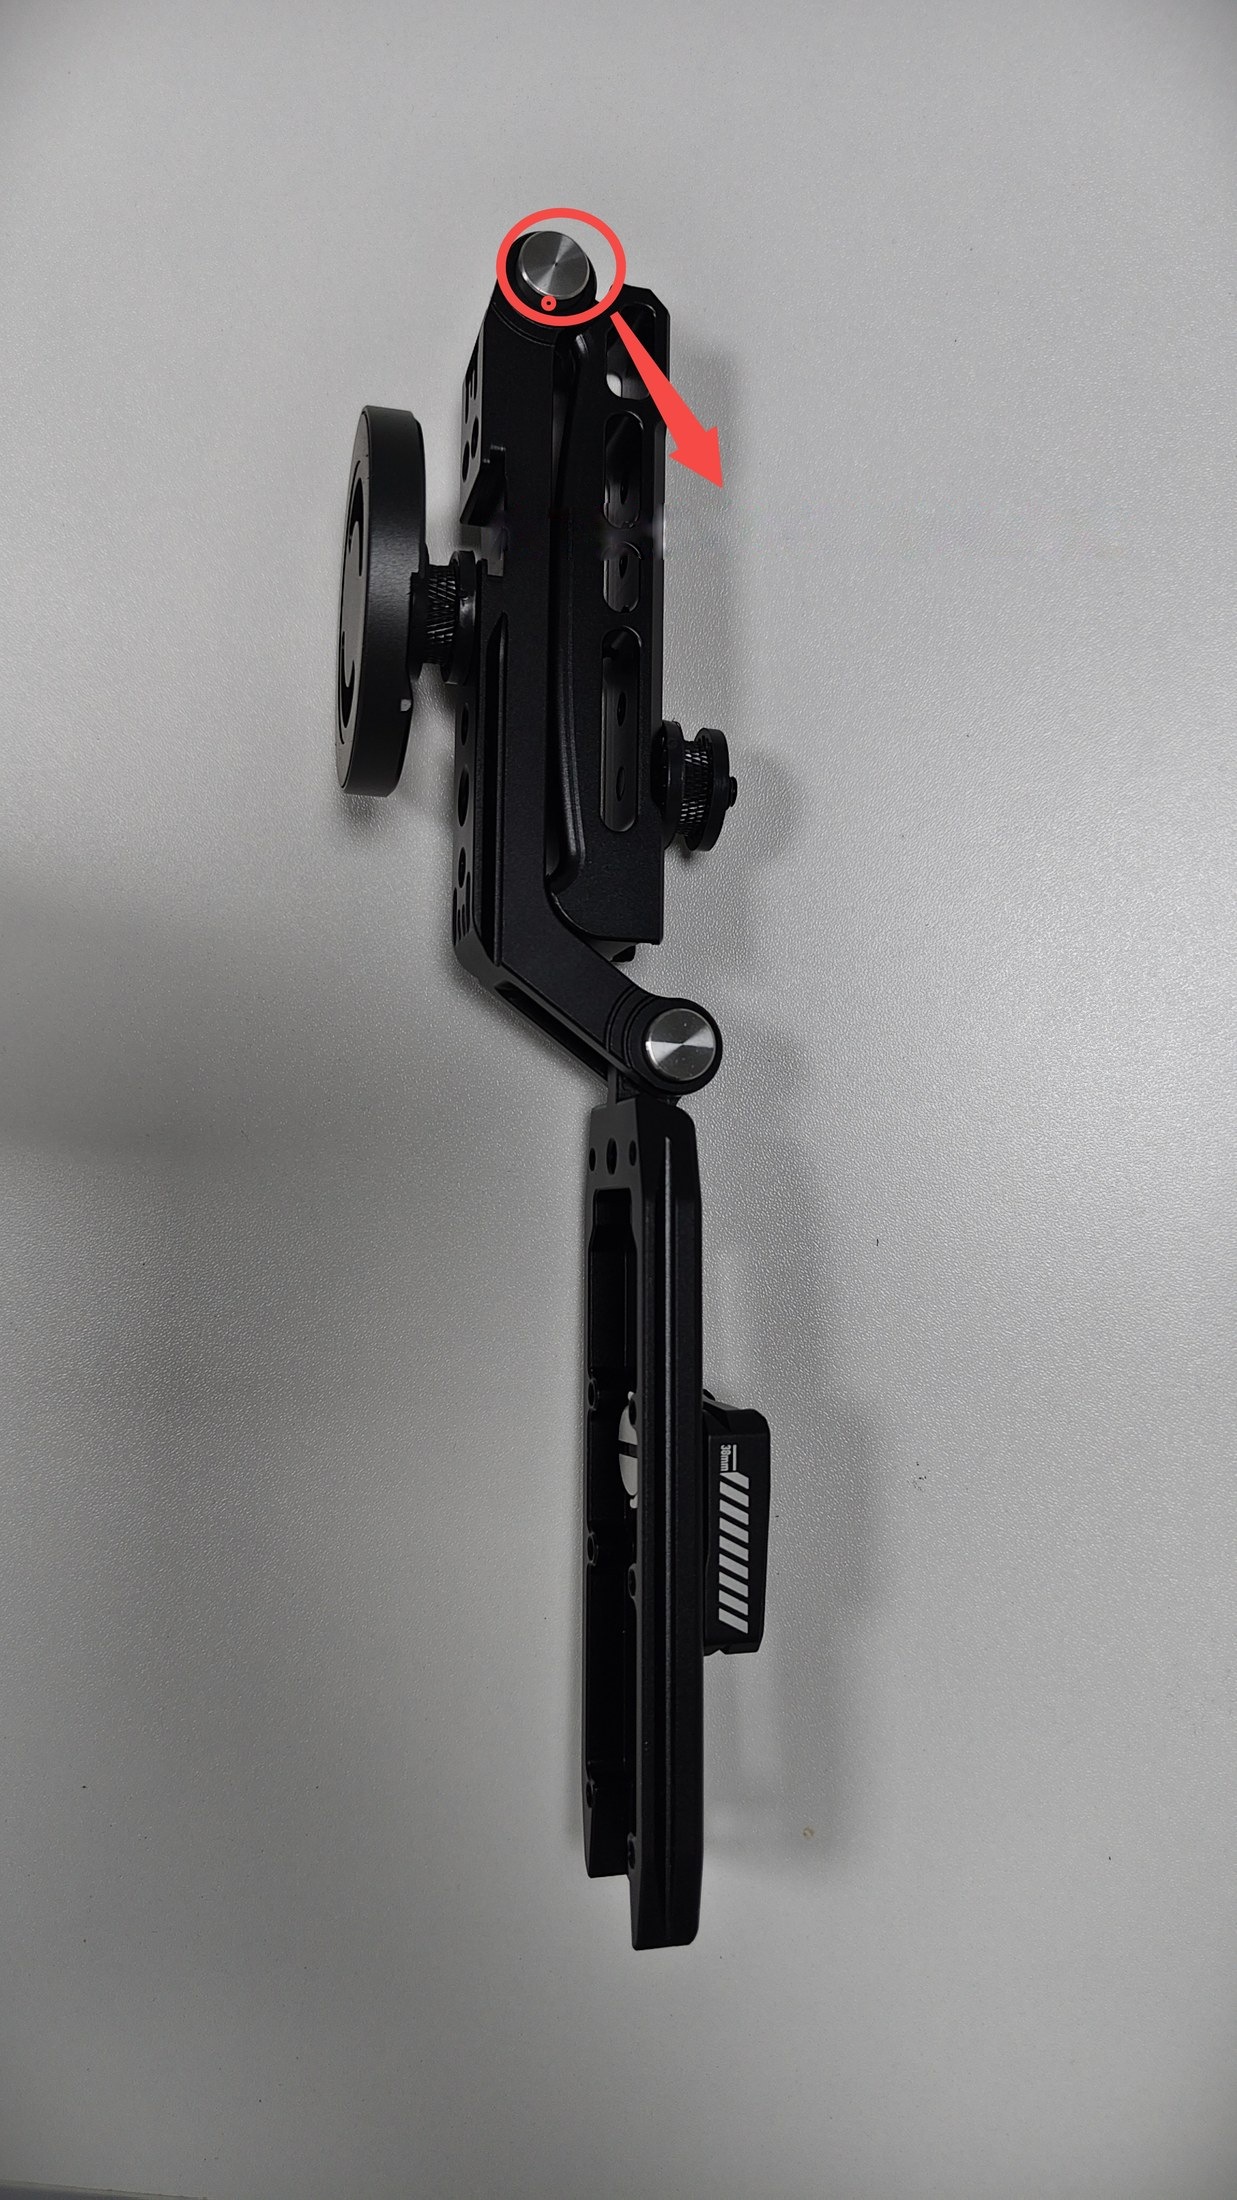
Possible cause: The arm was moved directly without pressing the silver hinge button.
Solution: Press and hold the silver hinge button, then turn the corresponding arm; after adjusting to the target angle, release the button and confirm the button springs back and the hinge locks.
Do not force it
If the hinge button is not pressed, or it still cannot turn after pressing, do not keep applying force, to avoid damaging the locking structure.
The bracket is still loose after installation
Applies to: Lixel K2, Lixel L2 Pro
Possible causes: The bracket is not pushed to the slot limit, there are foreign objects in the slot, or the bracket model does not match.
Solution:
- Turn off the device and the Stick Light and hold the bracket steady.
- Remove the bracket in the direction opposite to the installation arrow.
- Check the rail and slot, clear any foreign objects, and push it back in to the limit.
- Gently pull the bracket to recheck; if it is still loose, stop using it and contact the product owner.
The pad on the bottom comes off easily
Applies to: PortalCam (adapter bracket mating surface); also applies to K2 / L2 Pro when pads are added
Possible causes: The pad is a friction-increasing consumable and shifts under long-term pressure and screwing. If the mating surface has dust, grease, or adhesive residue, adhesion drops noticeably. Repeated installation and removal accelerate the wear.
Solution:
- Remove the device and the adapter bracket, and take off any remaining pad.
- Use a clean soft cloth to clean off dust, grease, and adhesive residue from the mating surface, and wait until it is completely dry.
- Align the pad with the area around the 1/4-inch threaded hole and stick it on flat, avoiding wrinkles or covering the threaded hole.
- Retighten the connection; after locking, push the device gently to confirm there is no relative movement.
- When the pad is deformed, has lost its elasticity, or is no longer sticky, replace it with a supplied spare; do not keep using it.
Do not add glue yourself
Do not use glue, double-sided tape, or other adhesives to fix the pad, and do not force extra friction with a thicker spacer. This will contaminate the mating surface, affect installation precision, and may make removal difficult. If a pad is missing, contact the product owner for a replacement.
Ways to reduce shedding
- Check before each capture that the pad is in place and flat.
- When removing, loosen the thread first before taking off the device, and avoid twisting it sideways under pressure.
- When storing, do not let the pad be pressed by hard objects for a long time.
The light body or magnetic phone holder blocks the device
Applies to: All supported devices
Solution:
- PortalCam: keep the light buttons facing up and the diffuser facing straight ahead, and check the adapter bracket orientation.
- K2 / L2 Pro: press the hinge button to adjust the arm and the magnetic phone holder so they avoid the lens, the LiDAR rotation range, ports, and buttons.
- After adjusting, recheck that all threads, slots, and hinges are secure.
How to remove the U-shaped bracket
Applies to: Lixel K2, Lixel L2 Pro
Solution: Turn off the device and the Stick Light, remove the light body first and hold the U-shaped bracket, then slide it out smoothly in the direction opposite to the installation arrow. Do not twist the bracket or use a tool to pry the body slot.