
CodeMeter Offline Licensing Deployment Guide
Background
If the server running LCC reconstruction cannot connect to the external network and cannot obtain authorization control information from the XGRIDS licensing server in real time, intranet licensing via CodeMeter is supported.
Solution Overview
Within the private data center, select one machine to serve as the CodeMeter license management server.
- The CodeMeter license management server can be a Windows machine or a Linux machine.
- If the data center supports 【USB dongle】, plug the USB dongle into this machine (XGRIDS provides a green USB dongle that supports intranet licensing).
- If the data center server does not support a USB hardware dongle, XGRIDS can generate a 【software license】 for a specific machine and import it into that machine.
Overview of the mode by which a Docker container requests a runtime license from the licensing server:
Linux Private Licensing Server Deployment
Install the CodeMeter Service
On the selected licensing server, install the CodeMeter Runtime environment, then:
- If using the USB dongle form, simply plug the USB dongle into this server;
- If using the software license mode, the software license must be bound to the hardware characteristics of the selected licensing server and cannot be changed.
※ If you choose to install the software license on a virtual machine, to keep this software license always available, do not change the physical machine hosting the virtual machine, and do not change the main hardware of that physical machine, such as the CPU, motherboard, network card, etc.
CodeMeter Runtime Installation Package Download Addresses
For servers with a newer OS version (such as Ubuntu 20.04 or above), CodeMeter Runtime (Version 8.20) is recommended:
- Linux rpm:https://cdn-bukbb1.xgrids.cloud/developer/deploy/codemeter/CodeMeter-8.20.6558-501.x86_64.rpm
- Linux deb:https://cdn-bukbb1.xgrids.cloud/developer/deploy/codemeter/codemeter-lite_8.20.6558.501_amd64.deb
If the server OS version is older, installing CodeMeter Runtime (Version 7.51) is recommended:
- Linux rpm:https://cdn-bukbb1.xgrids.cloud/developer/deploy/codemeter/CodeMeter-lite-7.51.5429-500.x86_64.rpm
- Linux deb:https://cdn-bukbb1.xgrids.cloud/developer/deploy/codemeter/codemeter-lite_7.51.5429.500_amd64.deb
CodeMeter Runtime Installation Method
# DOWNLOAD Version8.20
wget https://cdn-bukbb1.xgrids.cloud/developer/deploy/codemeter/codemeter-lite_8.20.6558.501_amd64.deb

# INSTALL
sudo dpkg -i --force-all ./codemeter-lite_8.20.6558.501_amd64.deb
Or
# DOWNLOAD
wget https://cdn-bukbb1.xgrids.cloud/developer/deploy/codemeter/codemeter-lite_7.51.5429.500_amd64.deb

# INSTALL
sudo dpkg -i --force-all ./codemeter-lite_7.51.5429.500_amd64.deb
How to Uninstall CodeMeter Runtime
If the operating system version is newer (such as Ubuntu 20.04.6 LTS or above), when running the installation command for version 7.51, the output may contain an error message like 【Segmentation fault (core dumped)】.
sudo dpkg -i ./codemeter-lite_7.51.5429.500_amd64.deb

Selecting previously unselected package codemeter-lite.
(Reading database ... 113440 files and directories currently installed.)
Preparing to unpack .../codemeter-lite_7.51.5429.500_amd64.deb ...
Unpacking codemeter-lite (7.51.5429.500) ...
Setting up codemeter-lite (7.51.5429.500) ...
Segmentation fault (core dumped)
Processing triggers for systemd (245.4-4ubuntu3.20) ...
Processing triggers for man-db (2.9.1-1) ...
At the same time, running the cmu -l command, the output contains a "CodeMeter not running" error message.
In this case, it is recommended to uninstall the current version, then download version 8.20 and reinstall it.
# UNINSTALL
sudo apt-get --purge remove codemeter-lite
Configure & Start the CodeMeter Network Licensing Service
After installation, you need to enable CodeMeter's network server feature. The specific steps are as follows:
a) Stop the CodeMeter service using the command line
sudo service codemeter stop
sudo service codemeter-webadmin stop
**※ You must stop the service first before you can modify the ini file. Otherwise, the modifications will not take effect.**
b) Modify the Server.ini configuration file;
sudoedit /etc/wibu/CodeMeter/Server.ini

# Or open it with your preferred editor using administrator privileges:
sudo vim /etc/wibu/CodeMeter/Server.ini
c) In the Server.ini configuration file, set IsNetworkServer=1 (means allowing it to act as a server to license containers)
In the Server.ini configuration file, set CleanUpTimeOut=3 (means the license count is automatically released 3 minutes after a client terminates abnormally)
In the Server.ini configuration file, set RemoteRead=2 (means allowing the licensing server's WebUI to be accessed from other computers)
Save the file after modifying.
d) Start the CodeMeter service again using the command line
sudo service codemeter start
sudo service codemeter-webadmin start
e) Use the command line cmu -l to check whether the CodeMeter service started properly. If normal, it appears as shown below
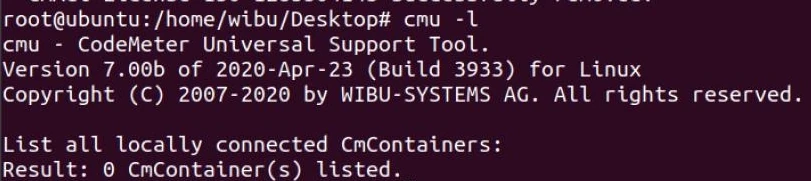
f) If startup is abnormal, the output will show CodeMeter not running.
If the configuration is still abnormal after strictly following the manual above, please contact technical support for help.
CodeMeter Licensing Server Management Page
If the licensing server's operating system itself has a graphical interface, you can open the management page by accessing http://localhost:22352/dashboard.html in the local browser.
The management page opened from the local machine has "write operation" permissions, such as taking a licensed client offline.
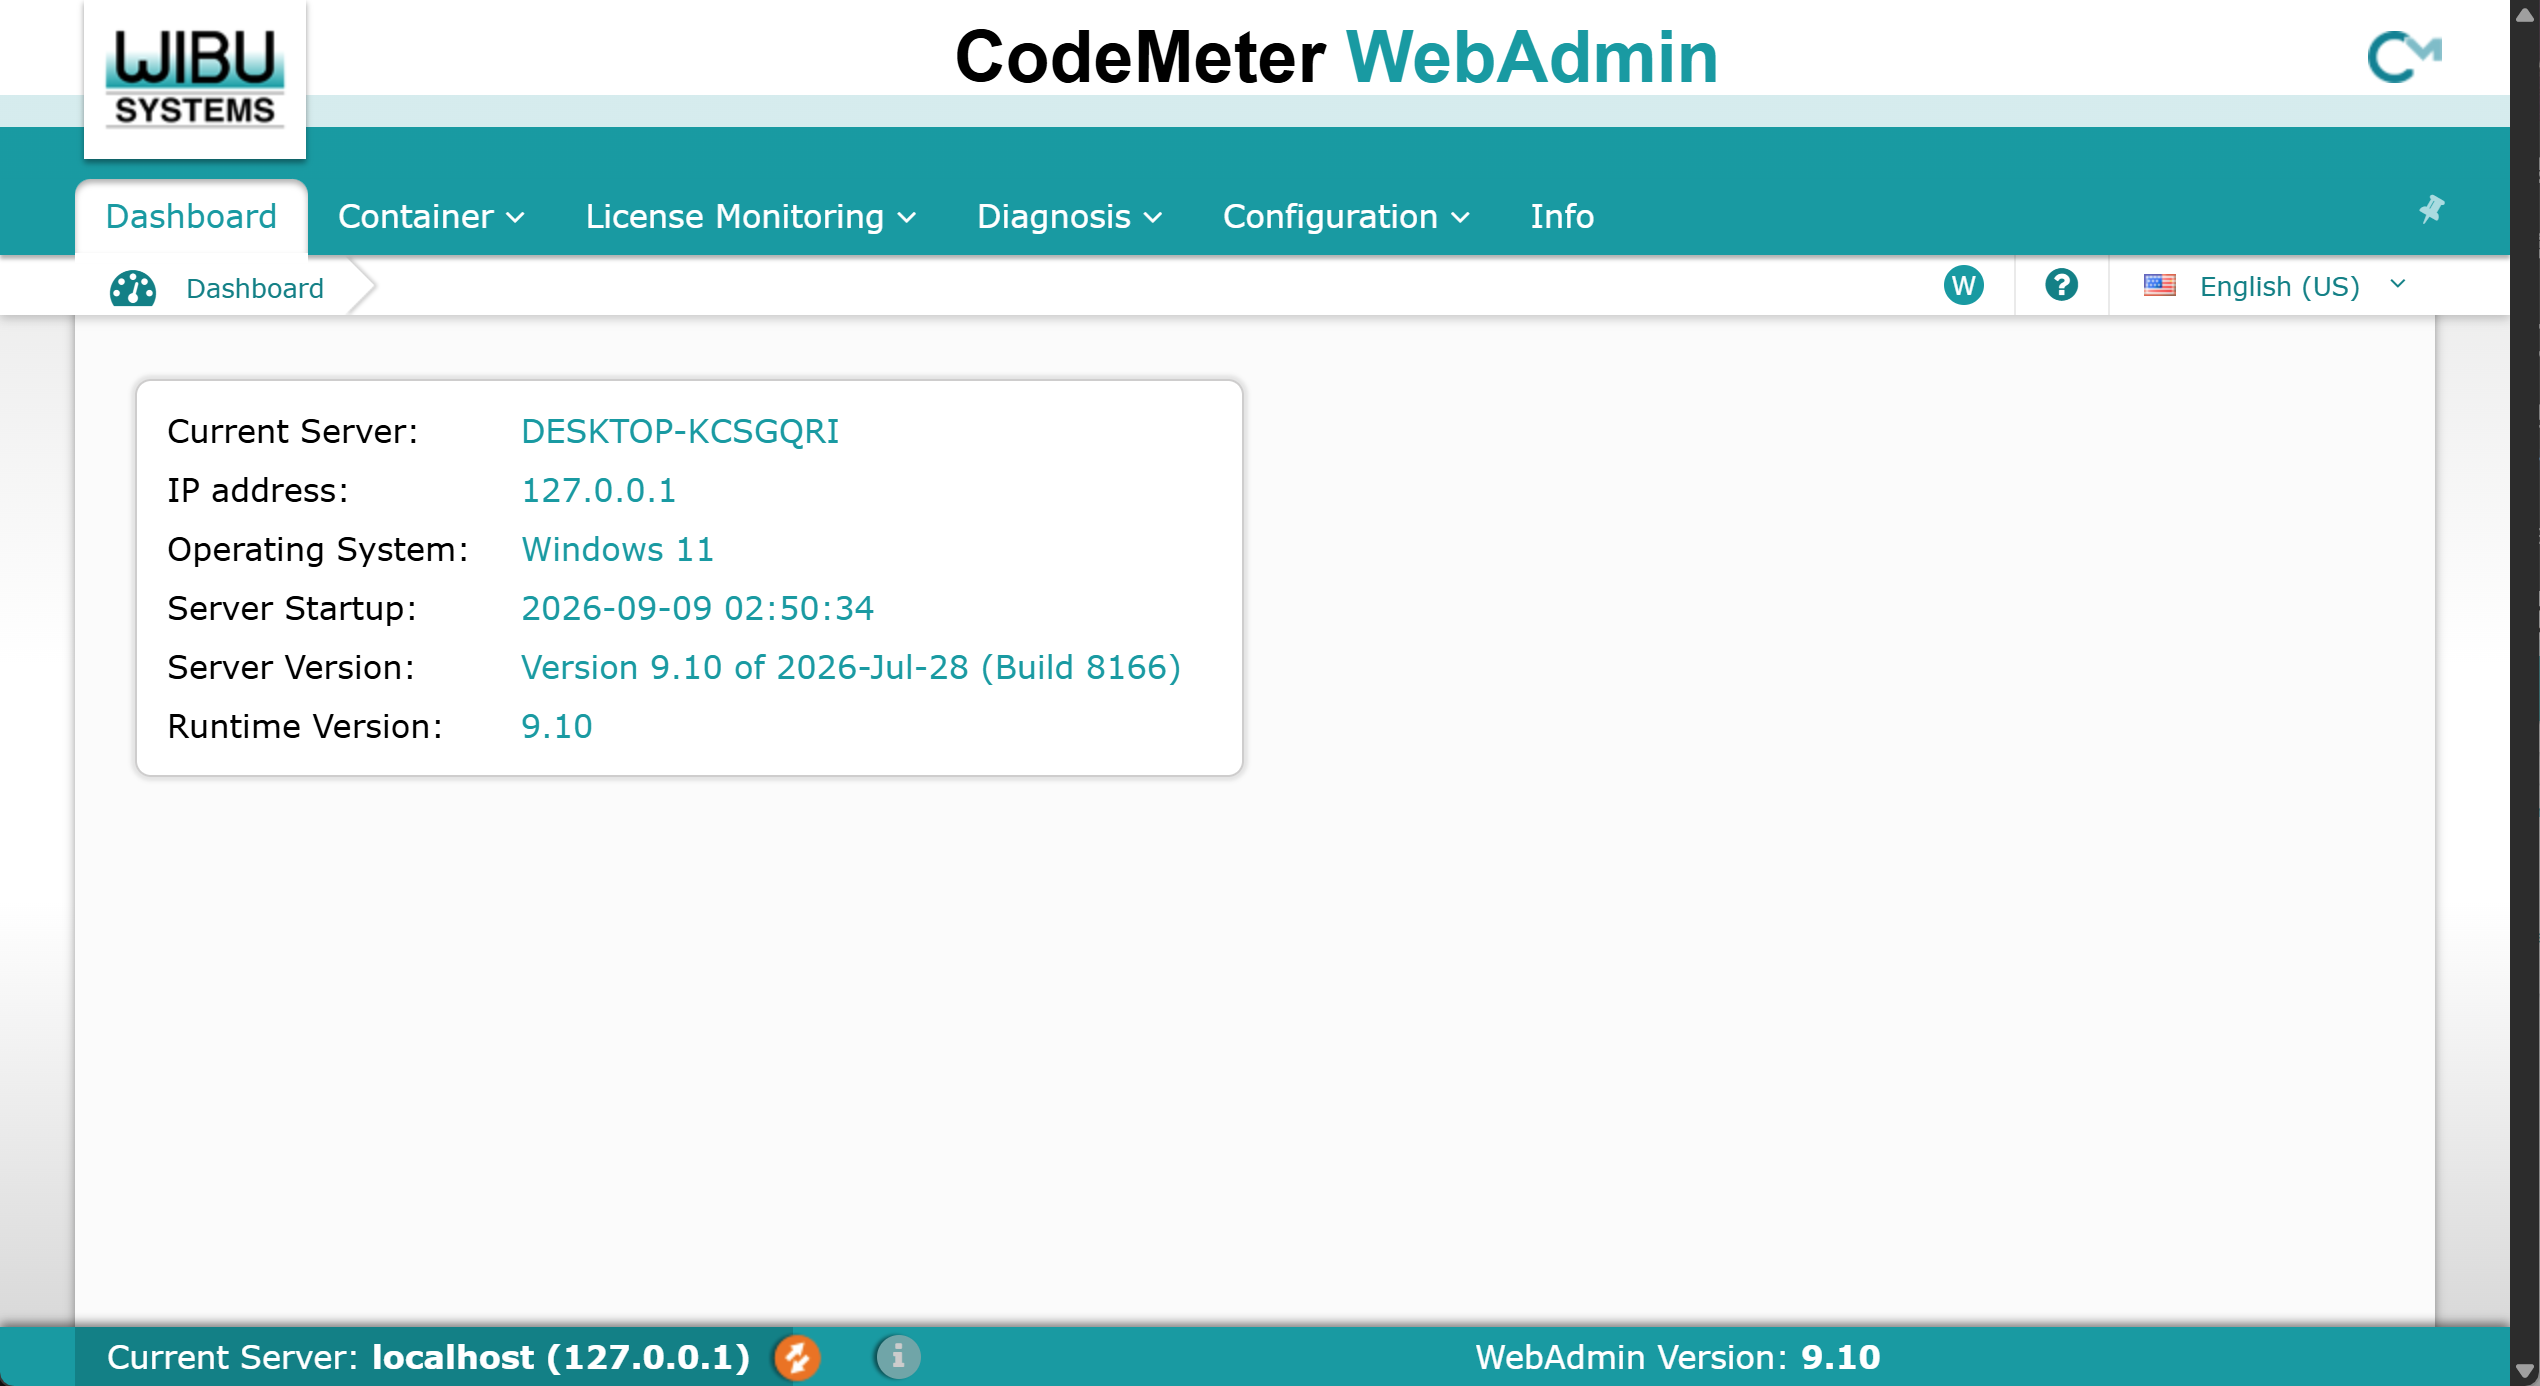
If the licensing server's operating system does not have a graphical interface, in the installation steps above, Server.ini's RemoteRead=2 has already been set, which allows its management WebUI page to be accessed from other computers. If it has not been configured yet, the configuration method is as follows:
1) First stop the CodeMeter WebAdmin service (it must be stopped first)
sudo service codemeter-webadmin stop

2) Edit the ini file
sudo vim /etc/wibu/CodeMeter/Server.ini

Set RemoteRead to 2 in the [HTTP] section
RemoteRead=2

3) Restart
sudo service codemeter-webadmin start
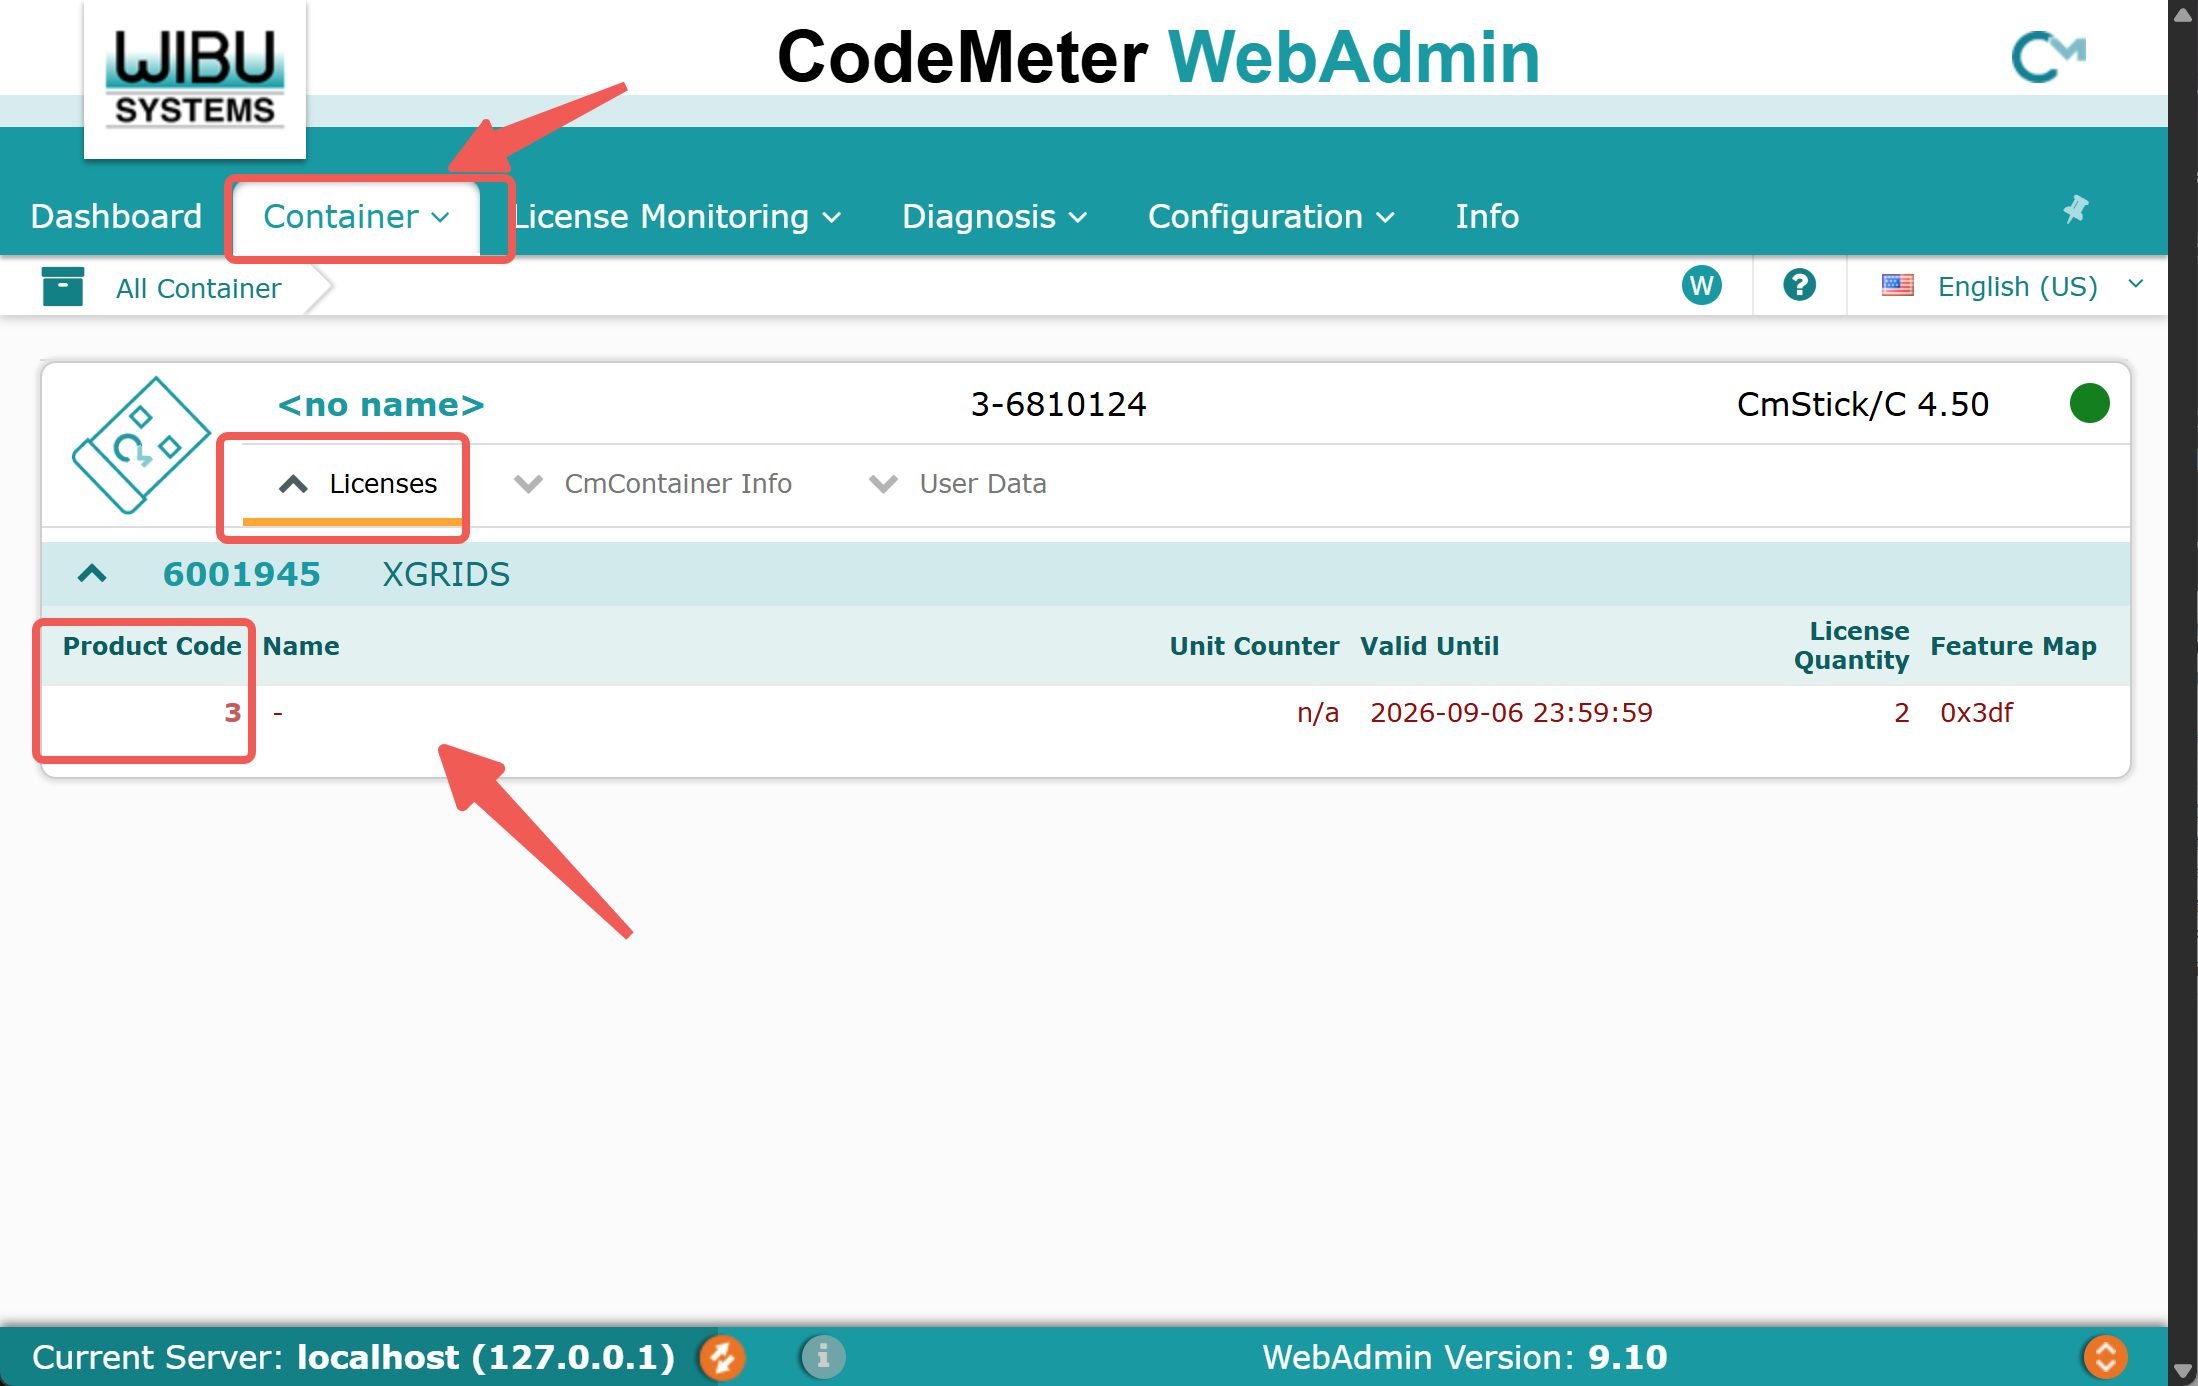
At this point, you can access the web page http://server IP address:22352/dashboard.html from another computer, where you can view the license management status:
Import License
USB Dongle License Import Procedure
Simply plug the green USB dongle into this server.
Software License Import Procedure
- Download the XGRIDS offline licensing tool software
#DOWNLOAD
wget https://xgbb1.oss-cn-shanghai.aliyuncs.com/developer/deploy/codemeter/codemeter-xgrids-tool
Run the tool on the server to output the license request file "XGrids-LCC-LICENSE-serialnumber.WibuCmRaC"
#DOWNLOAD codemeter-xgrids-tool
wget https://xgbb1.oss-cn-shanghai.aliyuncs.com/developer/deploy/codemeter/codemeter-xgrids-tool

#RUN codemeter-xgrids-tool
chmod +x ./codemeter-xgrids-tool
./codemeter-xgrids-tool

#OUTPUT:
-----> Make XGrids.WibuCmLIF
Executing command: /usr/bin/cmu -l
Command output:
 cmu - CodeMeter Universal Support Tool.
Version 8.20a of 2024-Dec-03 (Build 6558) for Linux
Copyright (C) 2007-2024 by WIBU-SYSTEMS AG. All rights reserved.

List all locally connected CmContainers:
- CmContainer with Serial Number 130-2780241535 and version 3.00 (empty)
Result: 1 CmContainer(s) listed.

Found Serial Number: 130-2780241535
Executing command: /usr/bin/cmu --create-lt-context --lt-request-file XGrids-LCC-LICENSE-130-2780241535.WibuCmRaC -s 130-2780241535 --firmcode 6001945
Command output:
 cmu - CodeMeter Universal Support Tool.
Version 8.20a of 2024-Dec-03 (Build 6558) for Linux
Copyright (C) 2007-2024 by WIBU-SYSTEMS AG. All rights reserved.

 Context file created successfully.

====== XGrids-LCC-LICENSE-130-2780241535.WibuCmRaC Created!  ======
Send the generated XGrids-LCC-LICENSE-serialnumber.WibuCmRaC file to the XGRIDS sales representative;
- The XGRIDS sales representative uses this file to initiate the licensing application process.
- After the application is approved, XGRIDS technical staff generate the license file (XGrids-LCC-LICENSE-serialnumber.WibuCmRaU).
XGRIDS sends the updated license file (XGrids-LCC-LICENSE-serialnumber.WibuCmRaU) to the customer.
After receiving the license file (XGrids-LCC-LICENSE-serialnumber.WibuCmRaU), the customer runs the following command on the server to import the update file:
cmu --import-lt-update --lt-update-file XGrids-LCC-LICENSE-<serial-number>.WibuCmRaU --firmcode 6001945 -s <serial-number>To view the imported permissions within the licensing server, access http://server IP address:22352/dashboard.html
License Update Procedure
- Query and record the current authorization serial number within the server
Run the `cmu -l` command to display the license serial number in the current system (for example, 130-1299254712). This serial number will be used in subsequent steps to generate the license request file.
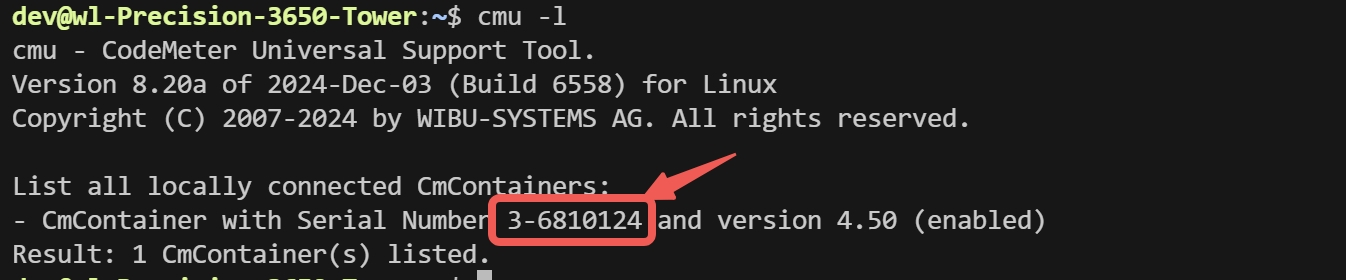
Run the 【generate license request file】 command on the server: cmu --create-lt-context --lt-request-file "xxx.WibuCmRaC" -s130-xxxxxxxxxx --firmcode
6001945- 130-xxxxxxxxxx: the license serial number obtained in the previous step
- xxx.WibuCmRac: the license request file name (the name can be customized, the suffix is fixed)
Provide the generated xxx.WibuCmRac to the relevant XGRIDS personnel, who will generate the license upgrade file xxx.WibuCmRaU (the suffix is fixed)
Run the 【import license upgrade file】 command on the server: cmu --import-lt-update --lt-update-file xxx.WibuCmRaU --firmcode
6001945-s 130-xxxxxxxxxx- 130-xxxxxxxxxx: the license serial number obtained in the previous step
- xxx.WibuCmRaU: the license upgrade file name generated by XGRIDS (the name can be customized, the suffix is fixed)
To view the updated server permissions, access http://server IP address:22352/dashboard.html
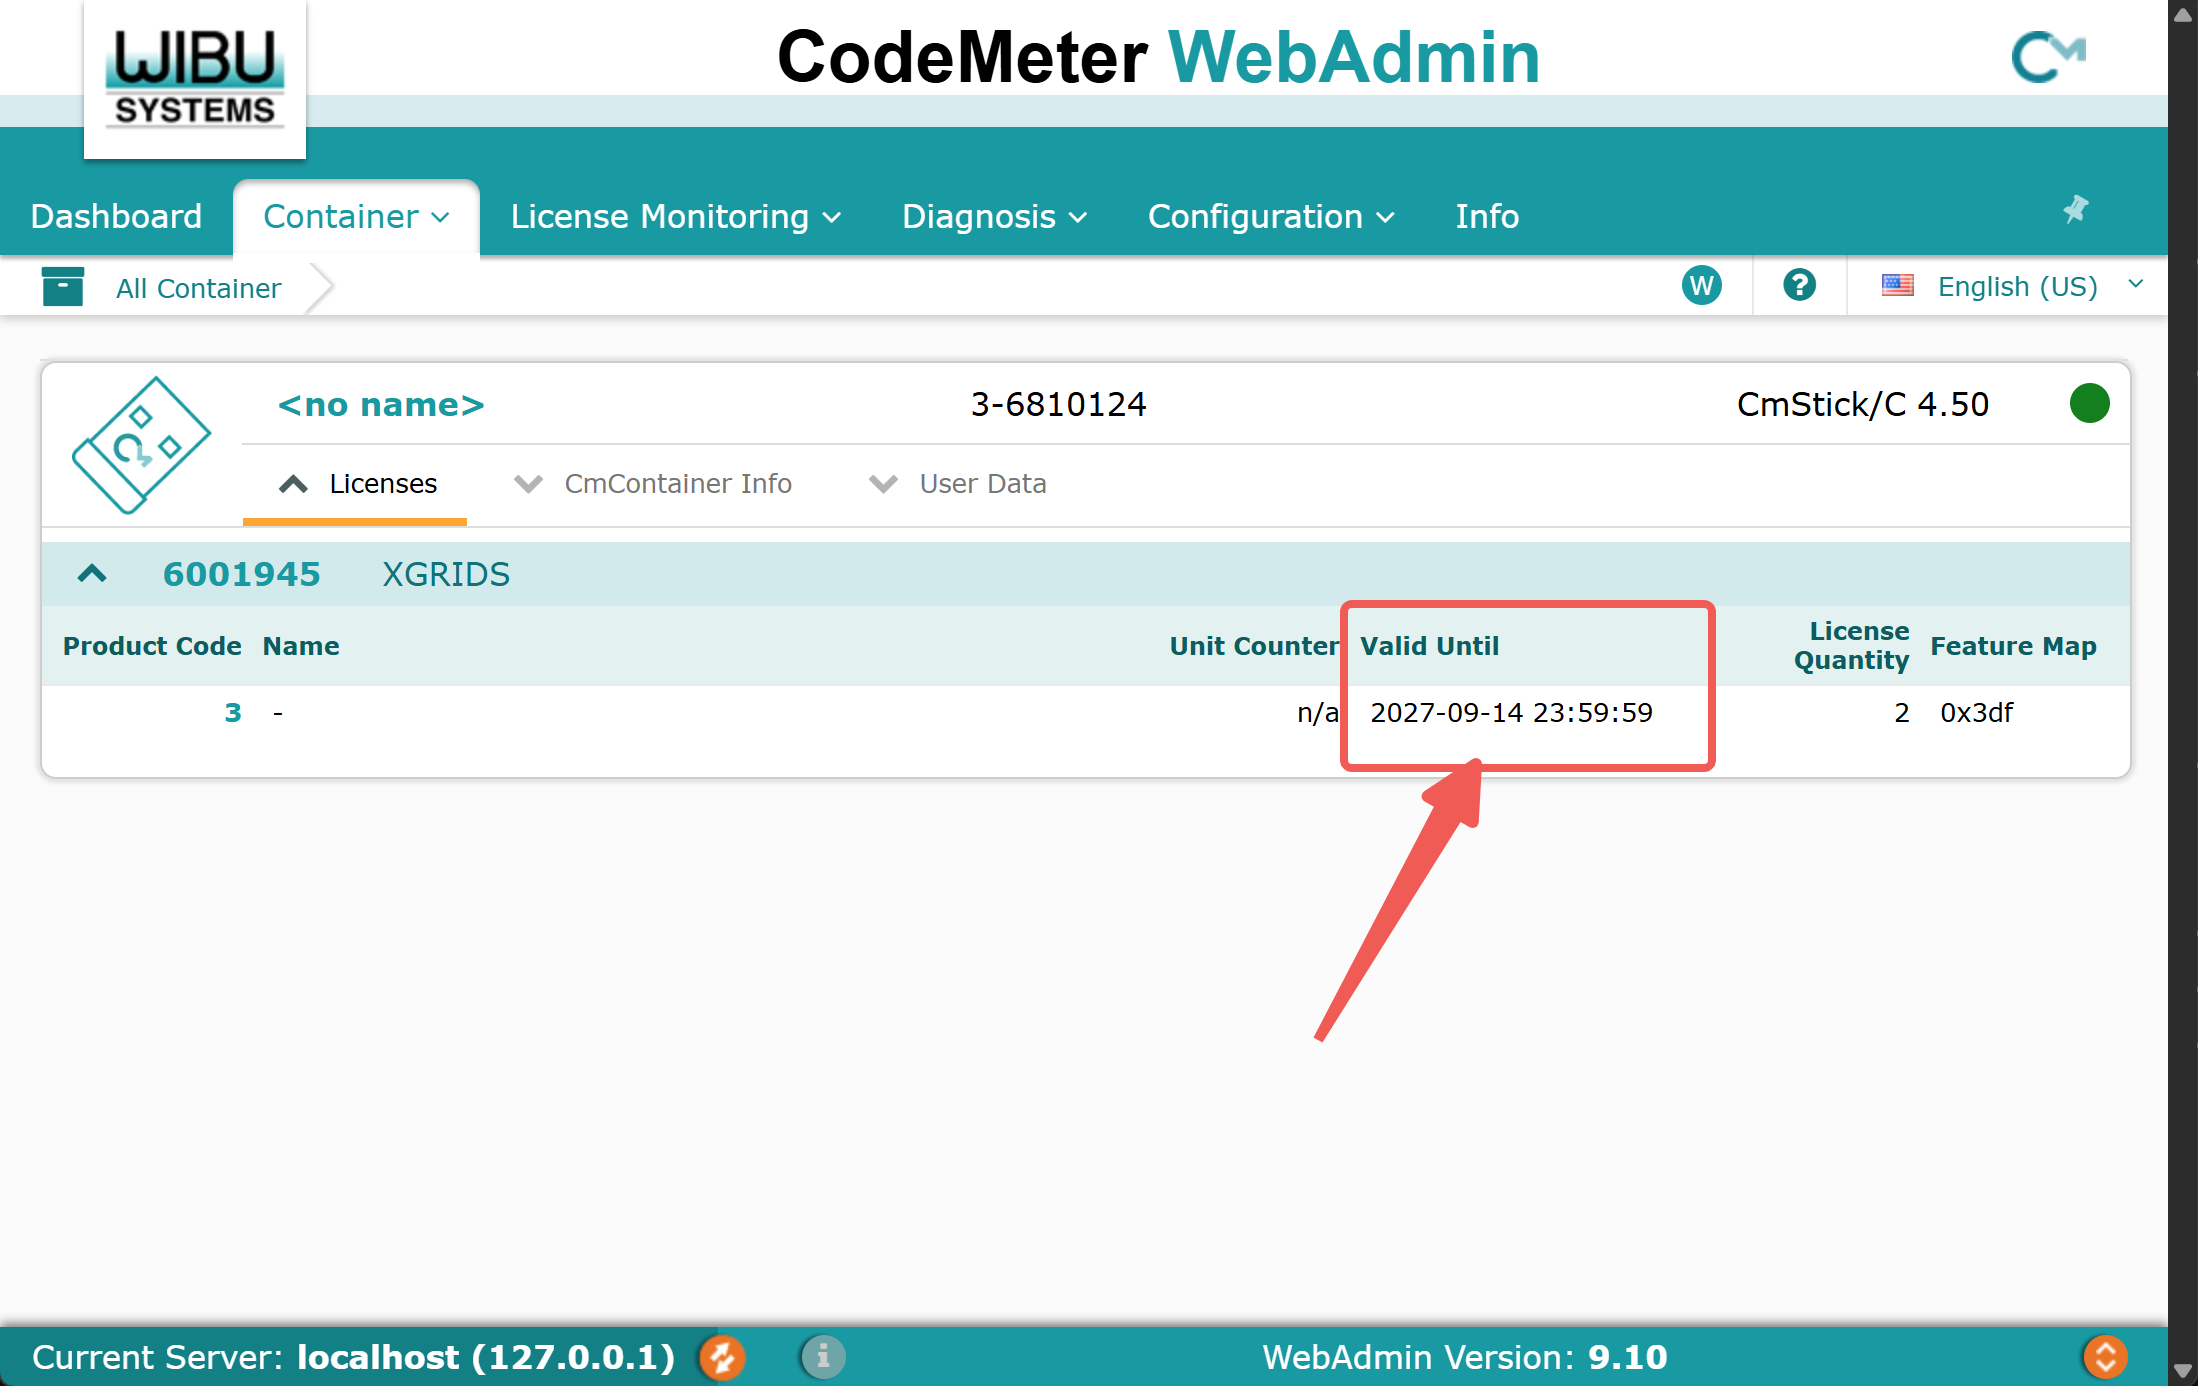
- Note: After authorization becomes invalid due to a system reinstall, you need to import all the 【*.WibuCmRaU】 files in sequence to restore the original authorization. Please keep every 【*.WibuCmRaU】 file delivered to you.
Settings When the LCC Container Starts
When the LCC container starts, pass the licensing server's IP address into the container as the "CODEMETER_SERVER" environment variable.
For details, refer to the 【LCC Reconstruction Software Docker Edition】 guide.
※ When starting the LCC container, note that you must not use the –privileged parameter in the startup command line
※ The container's network connection is generally the Bridge mode by default. Please keep this mode, otherwise the encryption program may fail to communicate
Others
How to Check the Accessibility of the Licensing Server
When a container runs on another host machine, you first need to confirm that this host machine can access port 22350 of the licensing server.
The test command is as follows:
telnet 192.168.68.205 22350

Trying 192.168.68.205...
Connected to 192.168.68.205.
Escape character is '^]'.
At the same time, note that host machines other than the licensing server must not install CodeMeter Runtime, otherwise when the container runs it will first look for authorization within the current host machine, causing it to fail to obtain authorization properly.
How to Determine Whether CodeMeter Runtime Startup Is Abnormal
If the output of the cmu -l command contains CodeMeter not running, it means it did not start properly. Please contact technical support to investigate the cause (the installation may have failed.)
cmu -l

cmu - CodeMeter Universal Support Tool.
Version 7.51 of 2022-Aug-25 (Build 5429) for Linux

List all locally connected CmContainers:
Result: 0 CmContainer(s) listed. (CodeMeter not running)
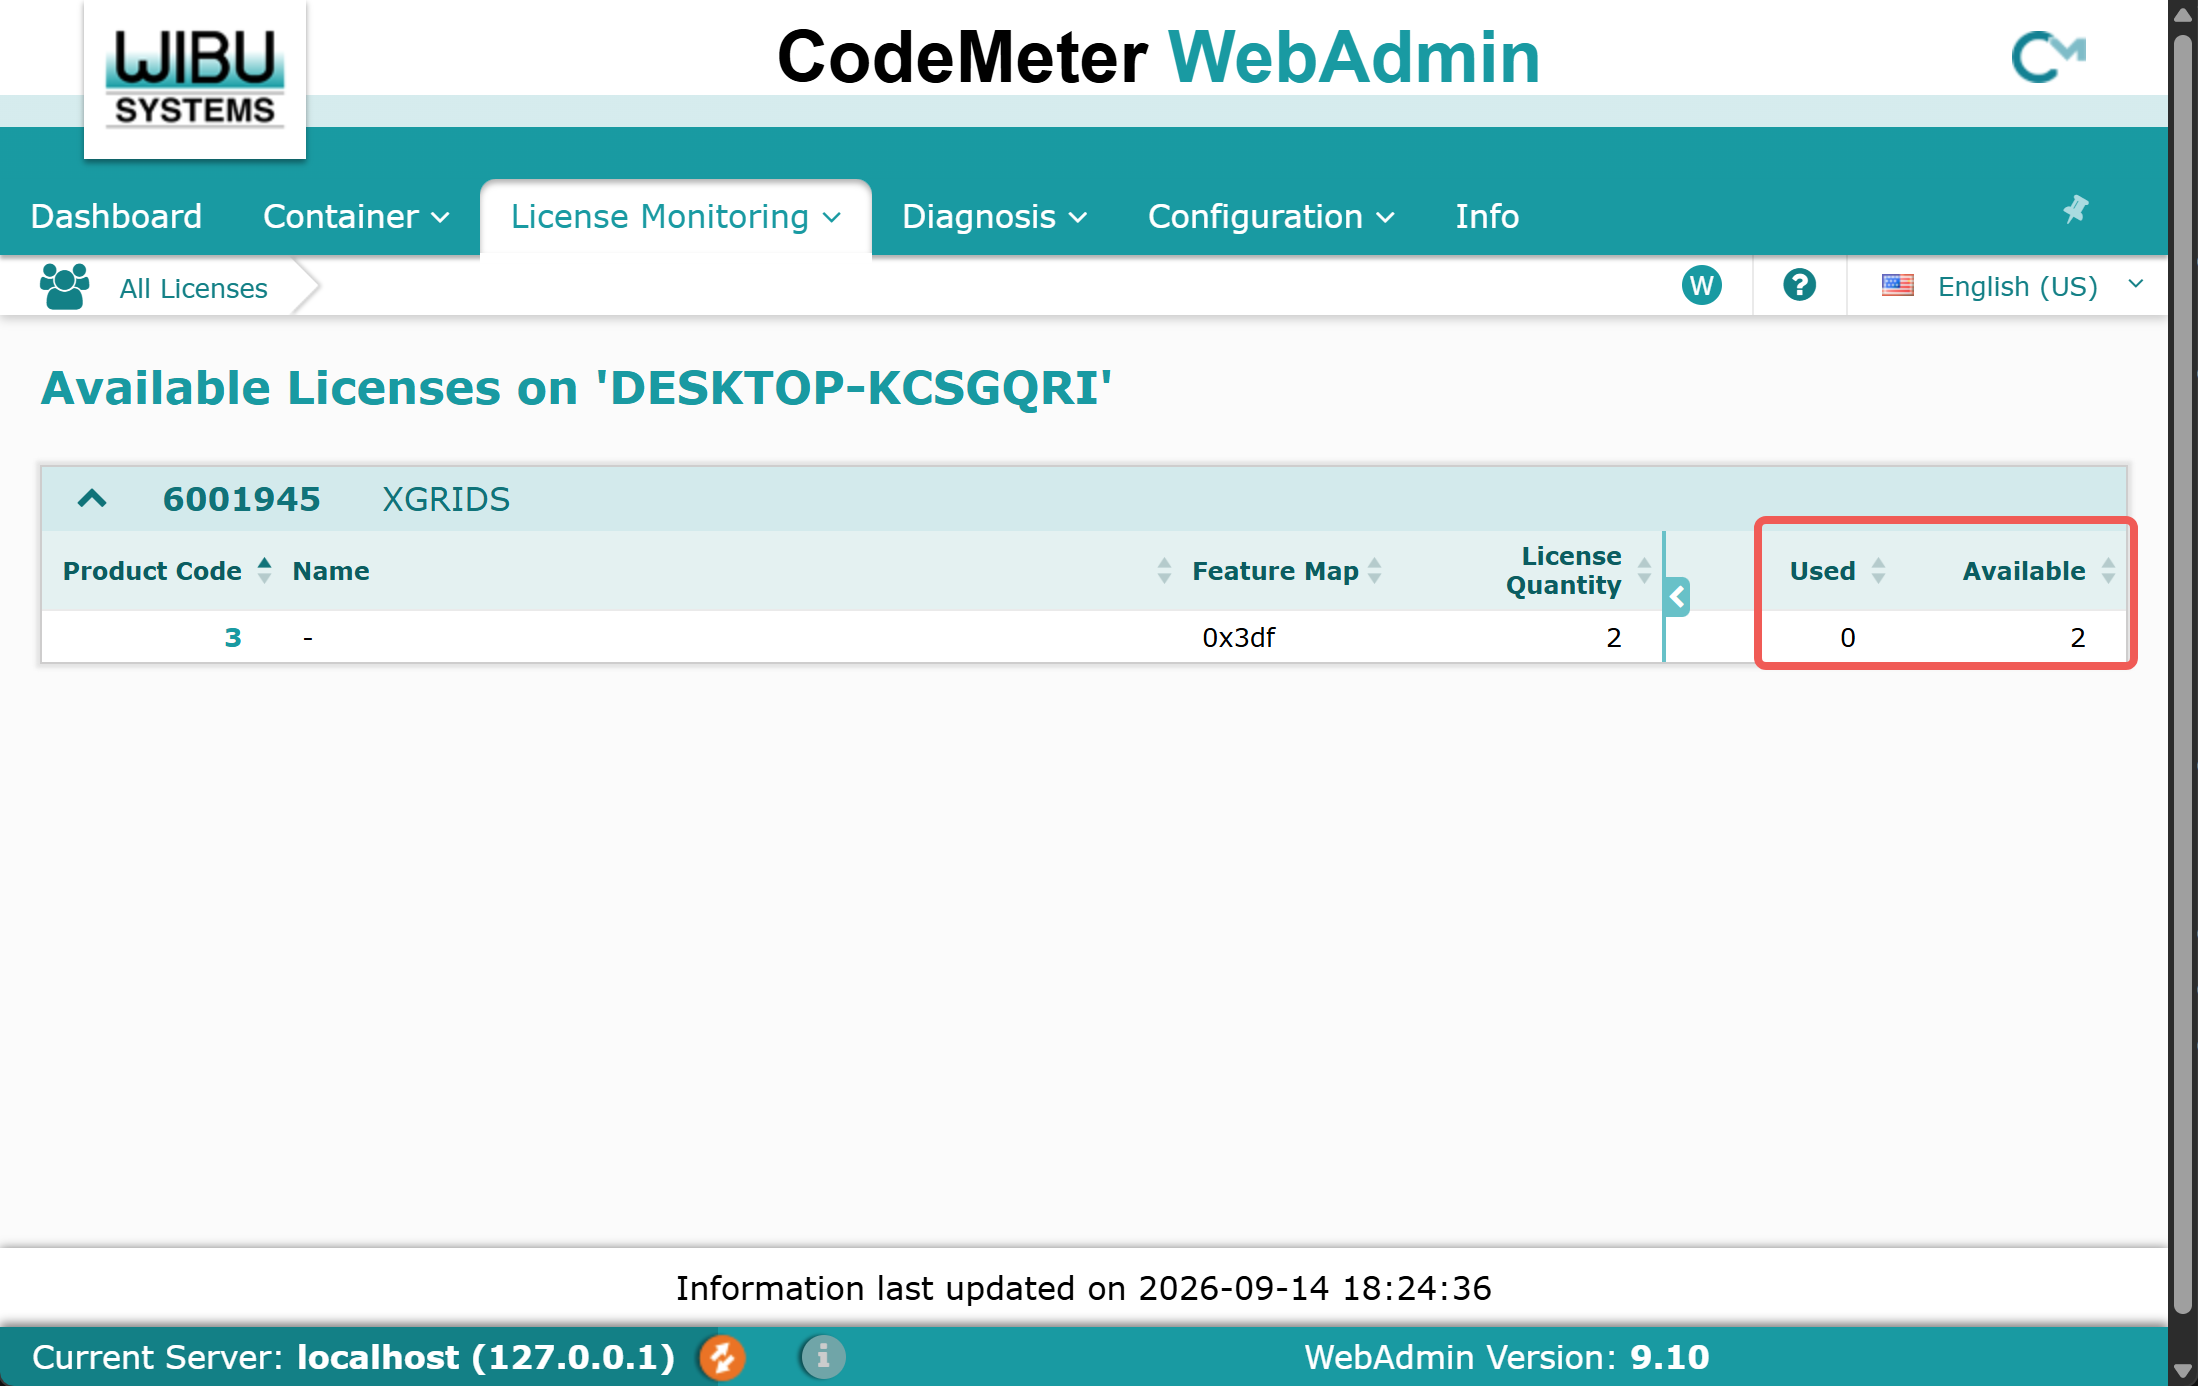
How to View the Current License Usage
After the program inside the container starts, it will request the number of licenses required for execution based on the specified CodeMeter licensing server address.
When the process terminates normally, the license will generally be released within a few minutes; the license can then be normally used by the next startup.
How to Manually Release a License
If the container is killed directly, the license requested by the process inside the container needs to wait until timeout before it can be released (the default timeout of the CodeMeter license server is generally 120 minutes; in the installation tutorial of this document, it has been changed to 3 minutes).
From the License Monitor page, based on the last access time, you can confirm terminated programs and click the operation button to release them manually.
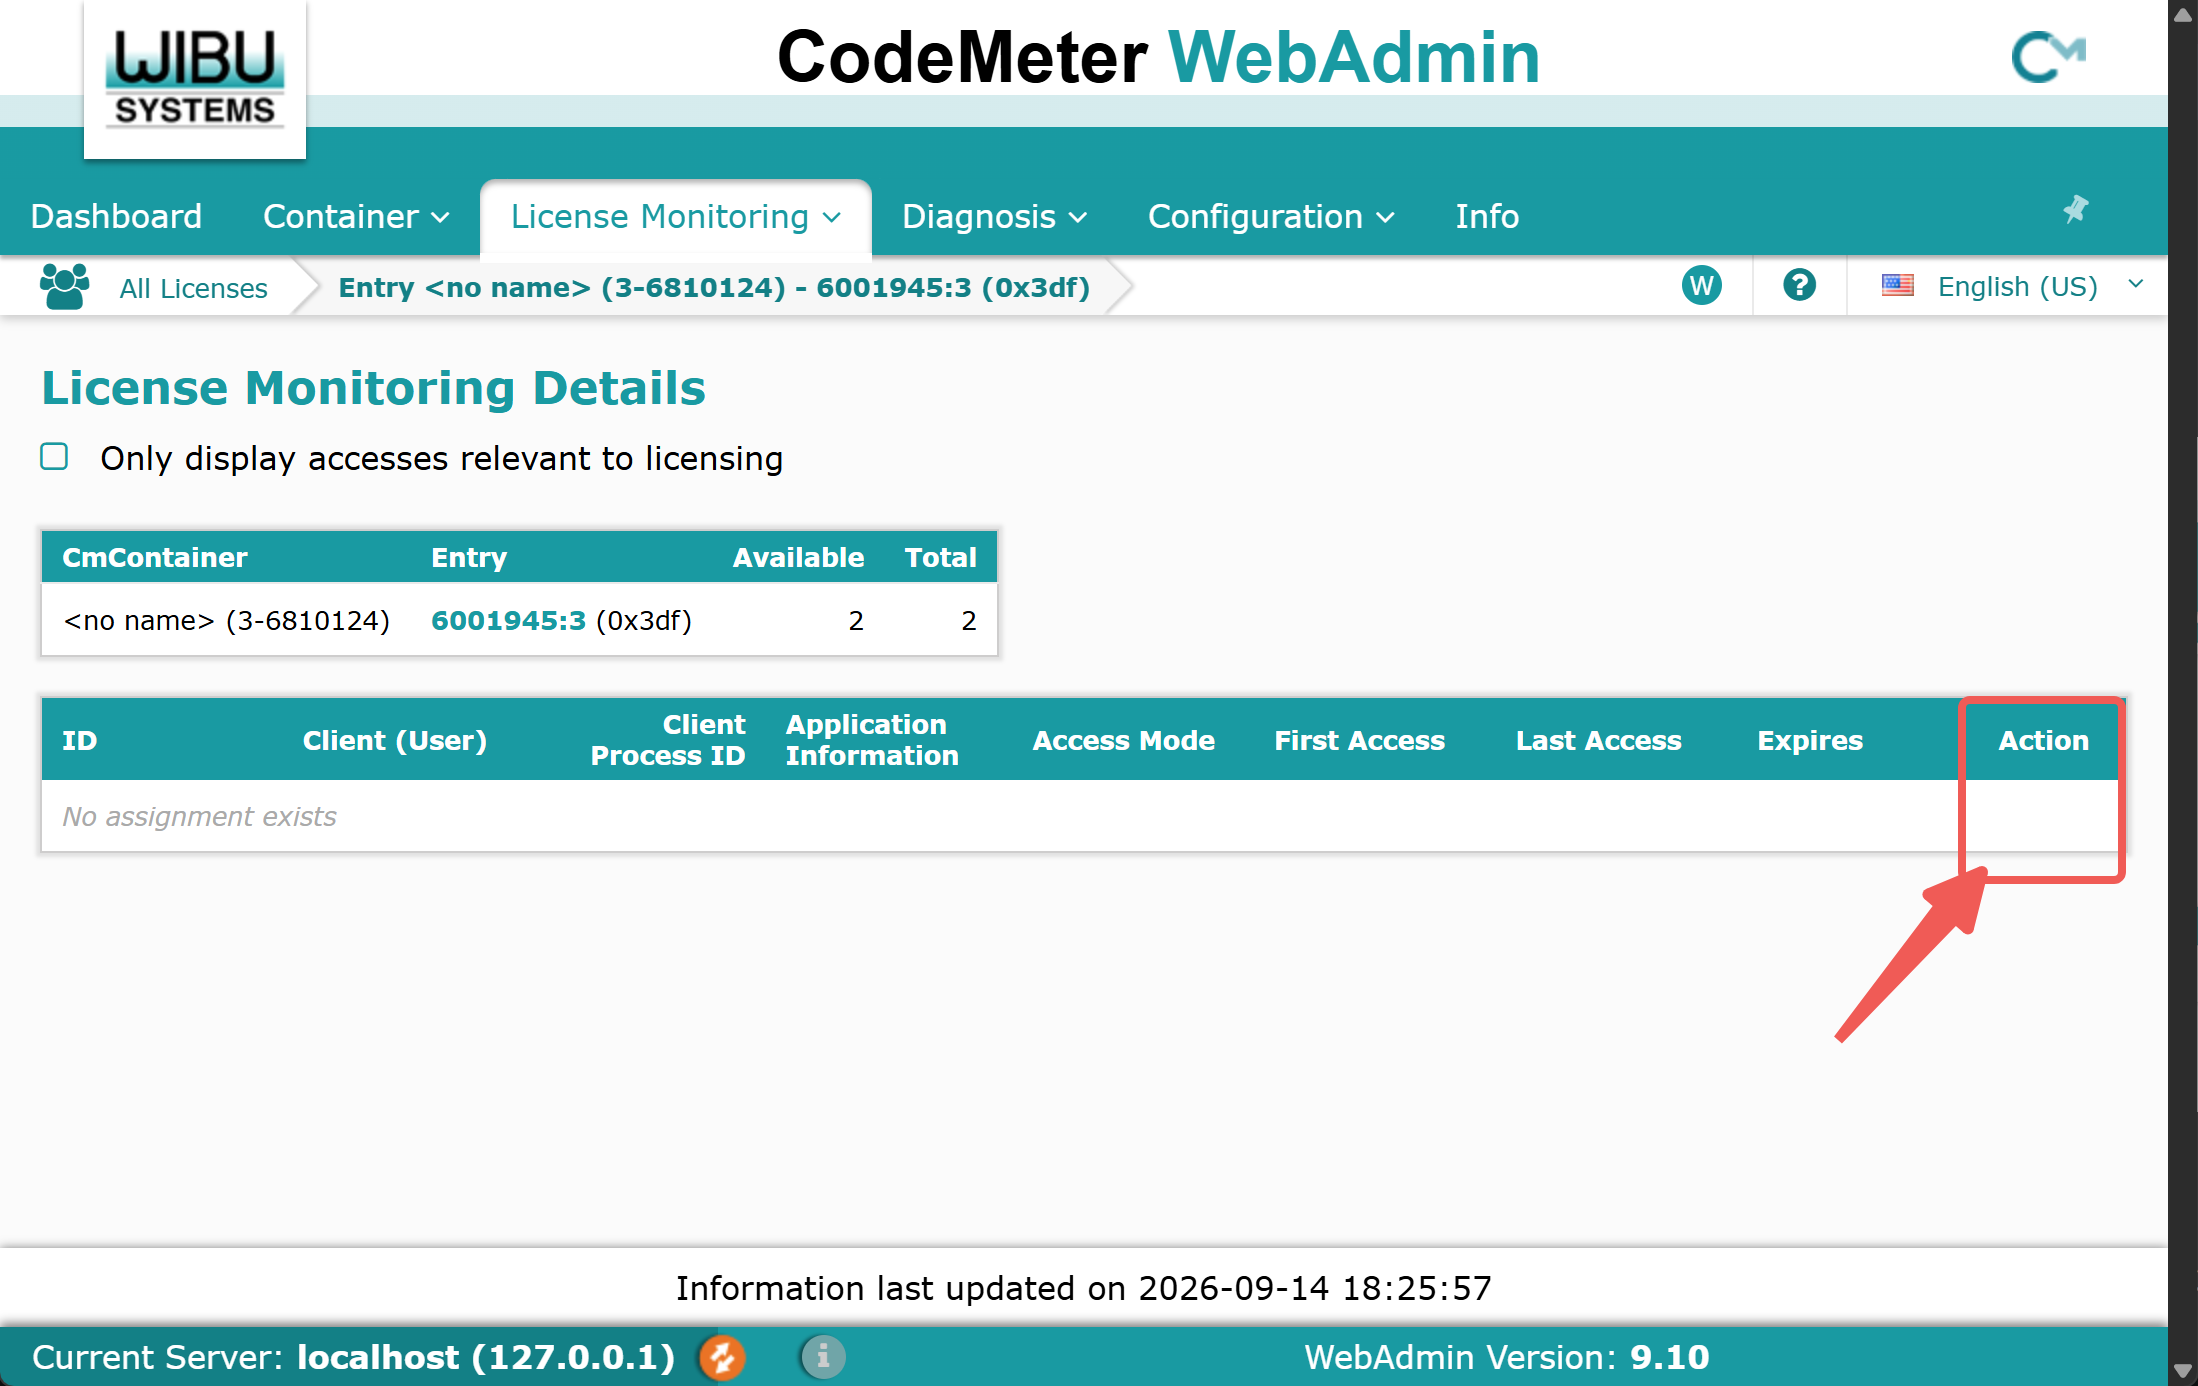
Note: Only when opening the WebUI page on the licensing server's local machine do you have operation permissions. Otherwise, you can only wait for automatic release.
Authorization Exception Handling Method
When authorization is damaged for some reason (system exception):
First, delete the existing authorization: cmu -sserialnumber --delete-cmact-license
Then import them one by one starting from the WibuCmRaU file of the first authorization
Reference: Official Documentation on the Specific Procedure for Importing a Software License
https://help.wibu.com.cn/help/FAQ/codemeter/cmact/1757
Delete the Software Lock Authorization Bound on the Server
Refer to the official documentation for instructions: https://help.wibu.com.cn/help/FAQ/codemeter/cmact/ad7e
If operating on a Windows system, open CMD and enter the command line `cmu32 –l` to view the software lock serial number.

Then use the following command to delete the software lock:
cmu32 -s130-1633636009 --delete-cmact-license
If operating on a Linux system, enter the `cmu –l` command to view the software lock serial number, then use the following command to delete the software lock.
cmu -s130-1633636009 --delete-cmact-license