
Scene Report
The Scene Report tool organizes the current project's 3D Layout and tour content into a template-based report that can be viewed and published.
- Supports export to local storage in JPEG and PDF formats
- Optionally includes viewpoint and measurement data in the export
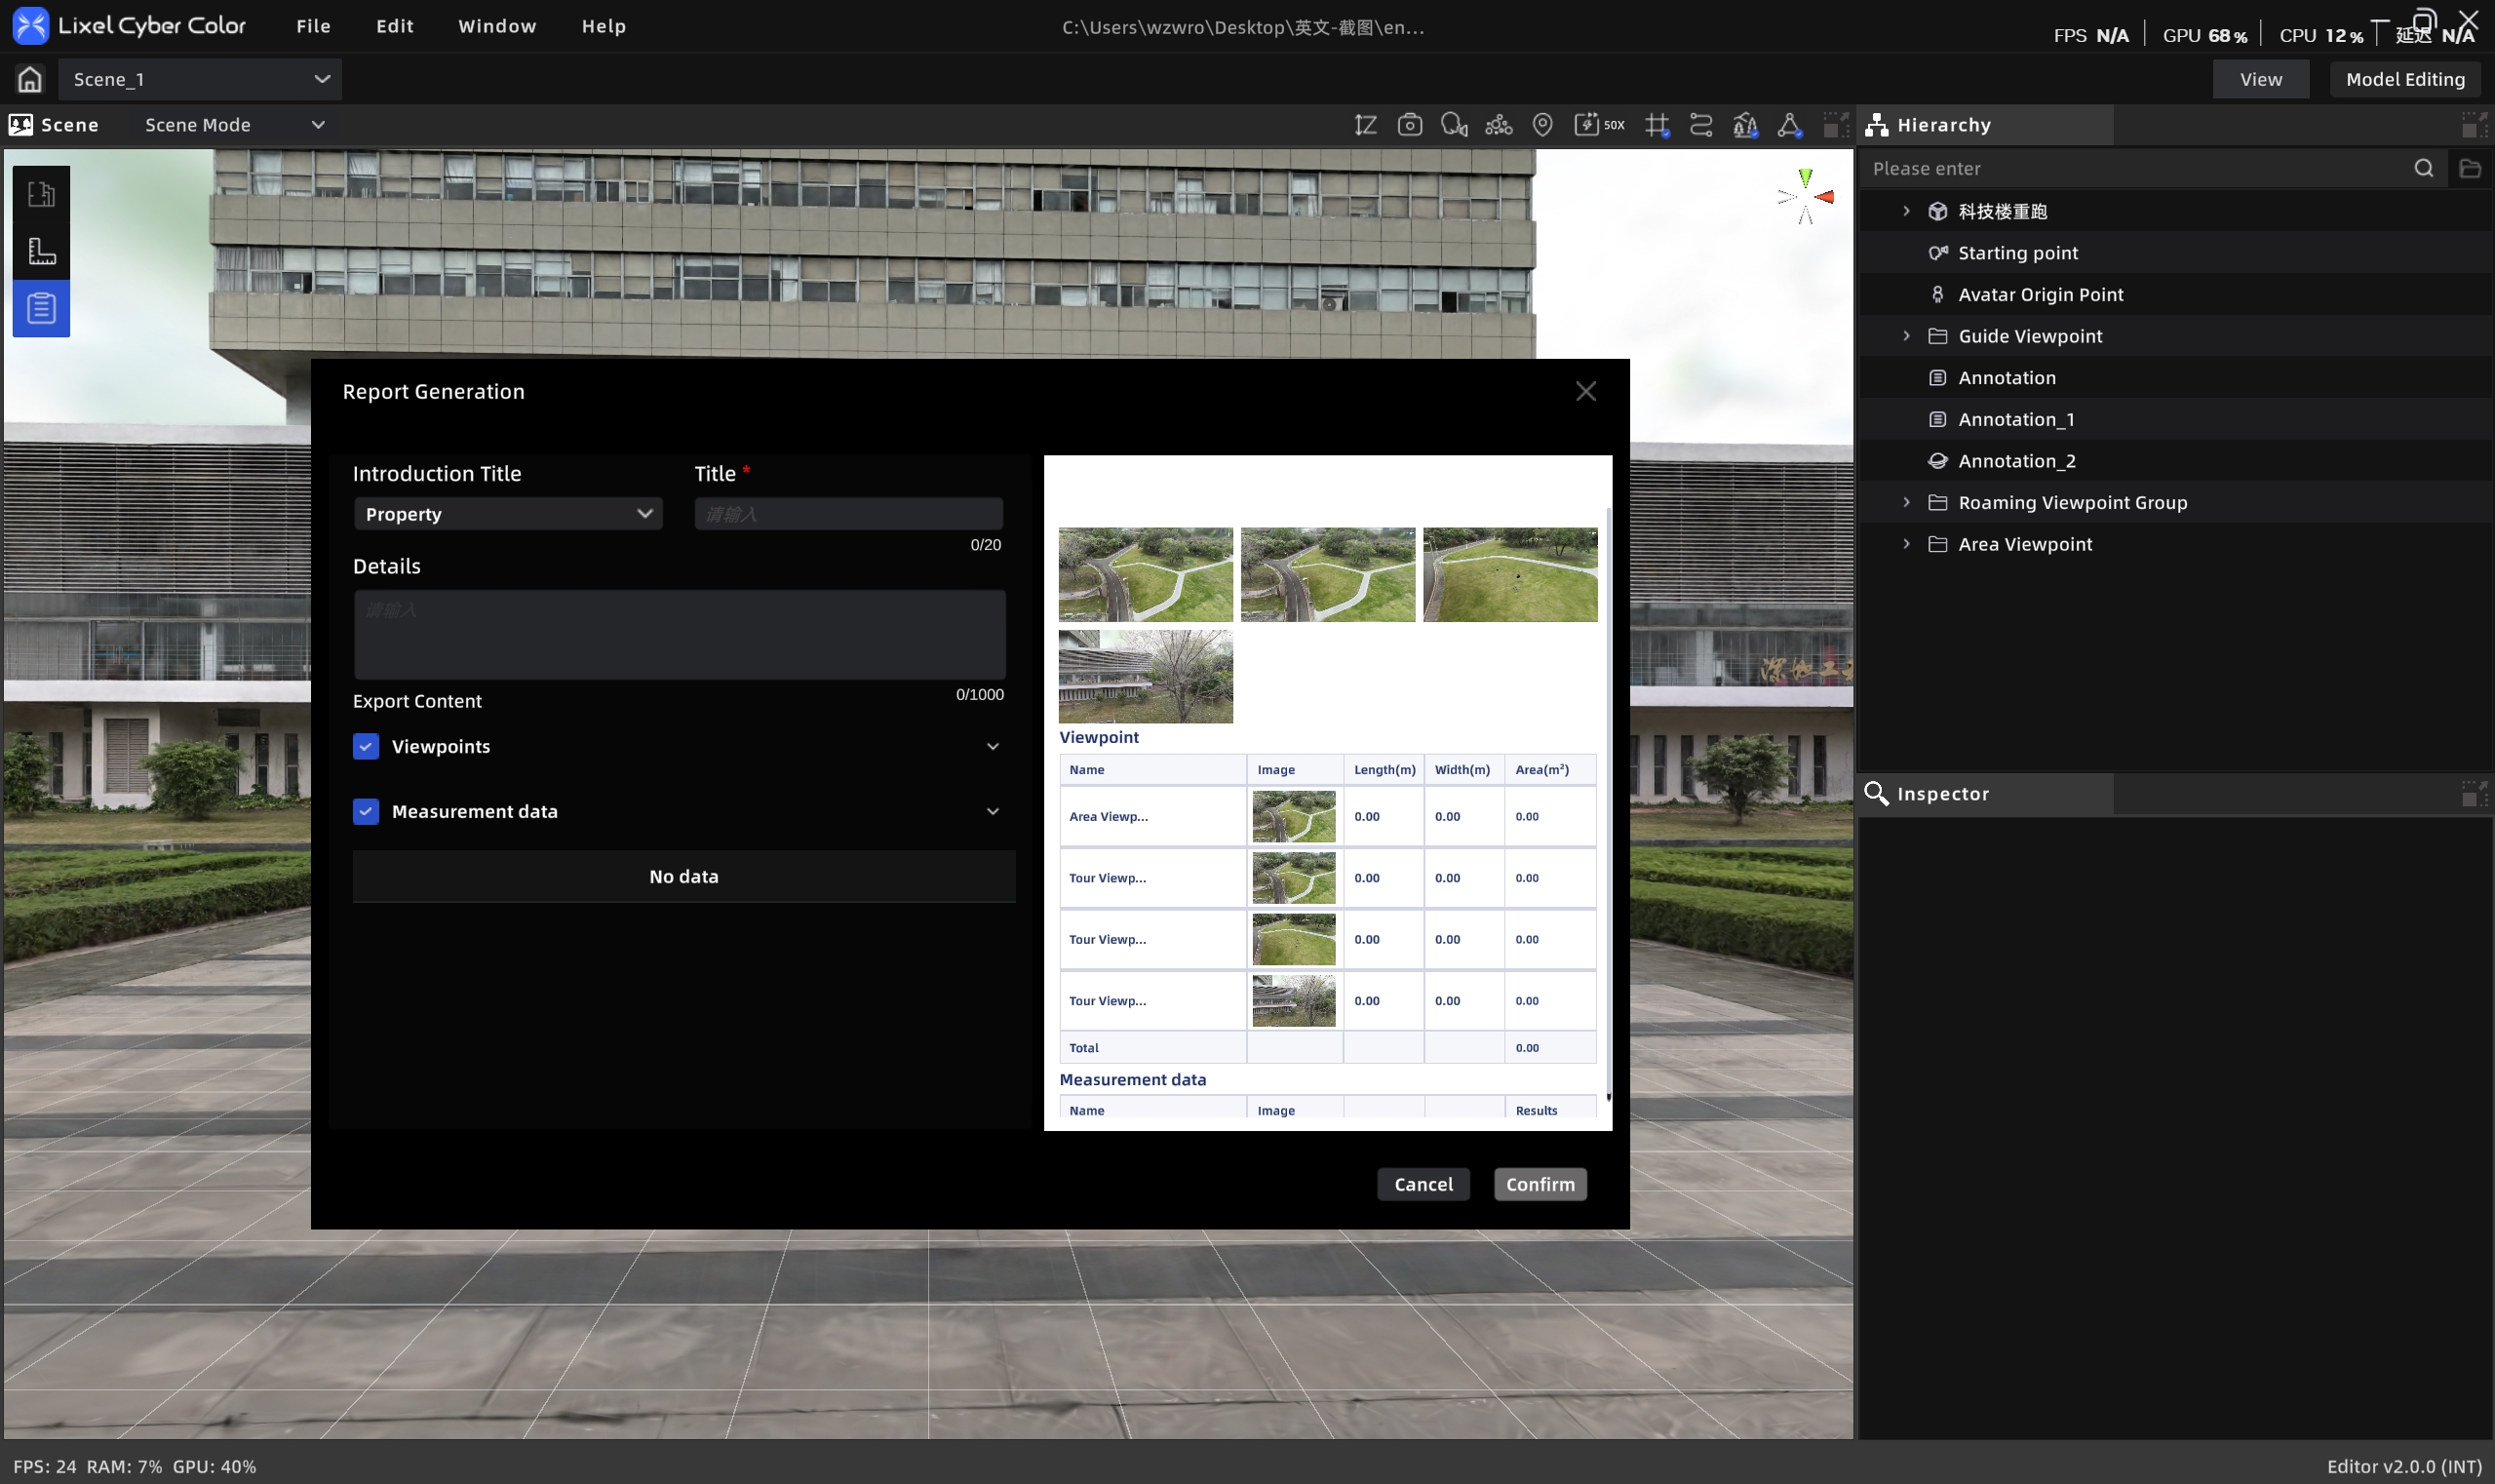
Scene Report
Workflow
V2.1 optimized the Scene Report generation process to "select data scope first, then generate," with added progress feedback and instant unit update capabilities.
Creating a New Scene Report
- Click the "Scene Report" entry point
- The system displays a data scope selection interface. Check the content to include in the report:
- Title (required, ≤50 characters)
- Details (≤1000 characters)
- 3D Layout (if available)
- Viewpoint data
- Measurement data
- After confirming selections, click "Start Generating"
- The system displays generation progress (e.g., "3/10 viewpoints completed, estimated 20 seconds remaining")
- After generation is complete, the report editing panel opens
Note: During generation, the button is greyed out and cannot be triggered again. If you exit during generation, a confirmation prompt appears: "Generation in progress. Exiting will cancel the operation."
Scene Report Management
- View and Edit: Click the Scene Report entry in the Assets list; the Property panel allows previewing and editing
- Export: Export from the Property panel in JPEG or PDF format
- Delete: Select the report entry in the Assets list and press
Deleteor right-click → Delete - Update After Publishing: After publishing the project, if the report is modified, use "Update" to sync the latest report to Preview Mode